MVX250i E, MVX200i E, MVX200 E
DISASSEMBLING
29
<Note on Reassembling>
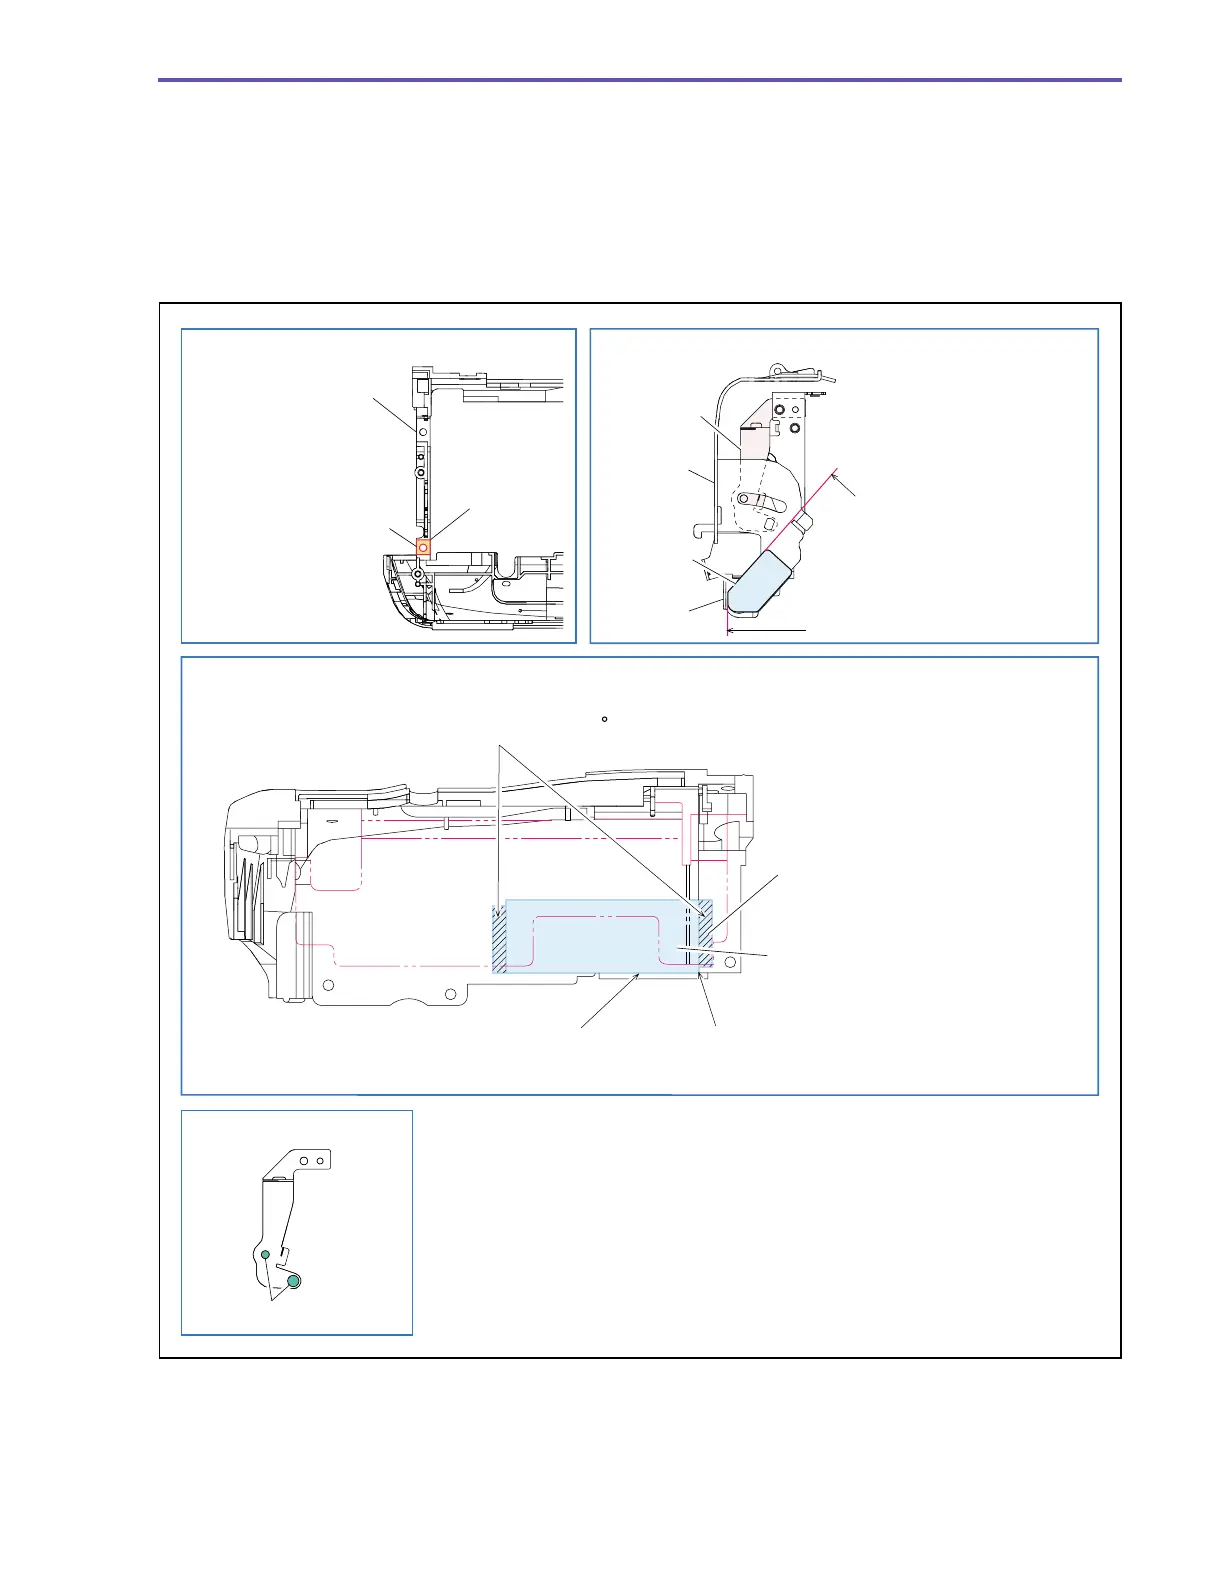
(1) Attach the GND Tape1 to the position indicated in the figure below.
(2) Attach the GND Tape2 to the position indicated in the figure below.
(3) Attach the Click Spring and the Cassette Arm Sheet as illustrated below.
(4) With the Cassette Arm Ass’y open, attach it to the dowel A of the Left Cover and then secure the screw.
<Instruction for Supply>
Click Spring, two dented spherical points : Hanal FL-778 (DY9-3026-010)
Fig. 26
Instruction for Supply
Note on Reassembling (1)
Note on Reassembling (3)
Note on Reassembling (2)
Left Cover
GND Tape1
GND Tape 2
Attach the GND Tape1
so that it is secured to
the concave part of the
Left Cover.
(The GND Tape1 shall
not be unseated.)
Attach according to the outline
of the Cassette Arm Ass'y.
No interference with the Stopper
shall occur at the time of turning.
Allowable deviation of
attachment : ±0.5 mm.
Allowable deviation in attachment,
unless otherwise specified : ±0.5 mm.
Align the cutout part with the stepped
part of the left cover.
(Protrusion is not allowed.)
Align with the end face of the left cover.
(Protrusion is not allowed.)
Click Spring
Cassette
Arm Ass'y
Cassette
Arm Sheet
Stopper
Click Spring
Hanal FL-778
Fold the hatched part to the back side.
(Fold through an angle 180 according to the shape of the cutout.)