MVX250i E, MVX200i E, MVX200 E
DISASSEMBLING
36
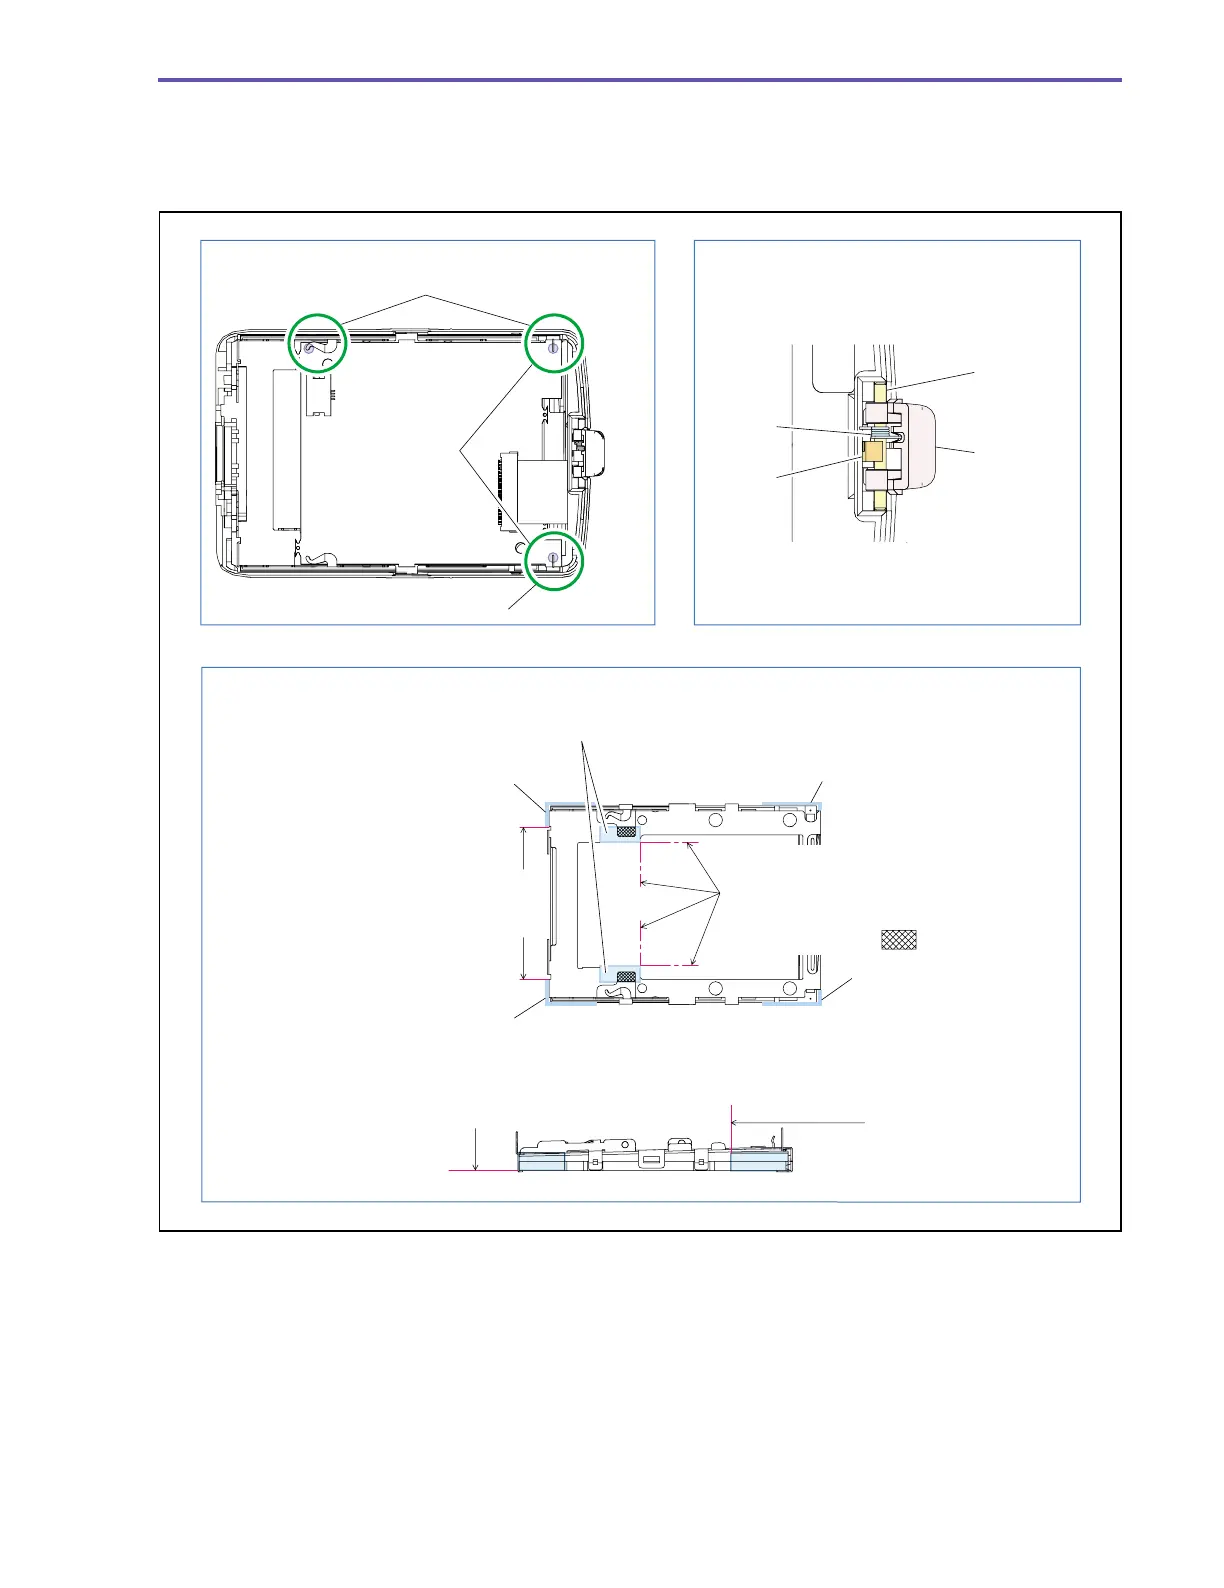
<Note on Reassembling>
(1) At the end of reassembling, solder three points (α).
(2) While holding the Shaft and Spring, attach the LCD Open Knob over the claw A.
(3) Attach the LCD Sheet and UL Tape to the position indicated in the figure below.
Fig. 33
Note on Reassembling (1) Note on Reassembling (2)
Note on Reassembling (3)
Solder α
Solder α
Claw A
Attach with reference to the plate end of
the LCD panel, and fold a surplus part
(upper, lower).
Attach with reference to the plate
end of the LCD Holder, and fold
a surplus part.
Attach in alignment with the plate
end of the LCD panel (four sheets).
Guideline for
attaching UL Tape.
UL Tape (The tape may have an arbitrary width.)
Spring
Shaft
LCD Open
Knob
LCD Sheet
LCD Sheet
LCD Sheet
LCD Sheet
Fold the lead
wire inside,
and perform
soldering.
Conceal the holes
Be sure to cover part.