SECTION 3 - HYDRAULIC SYSTEM SERVICE
page 3-7
Shaft in Vise
202046M1
Replace Rod Cap
202047M1
NOTES:
Use a tool with a rounded or conical tip for removal
and assembly of seals, O-rings, and back-up washers.
Do not use sharp tools such as knives or screwdrivers.
To avoid leaks after repairs, always use new seals, O-
rings, and back-up washers.
Always clean, dry, and lightly oil parts before
assembly and lubricate all internal parts with clean
hydraulic oil.
When installing the seals ensure that the grooves and
the seals are clean and have sufficient lubrication.
When inserting the end caps into the tube, ensure that
the tube chamfers or radii have sufficient lubrication
all around the tube surface.
Washers and O-rings must sit snugly in the groove, not
be loose or tight. Check part numbers as it is possible
to install the wrong size.
REASSEMBLY OF CYLINDER
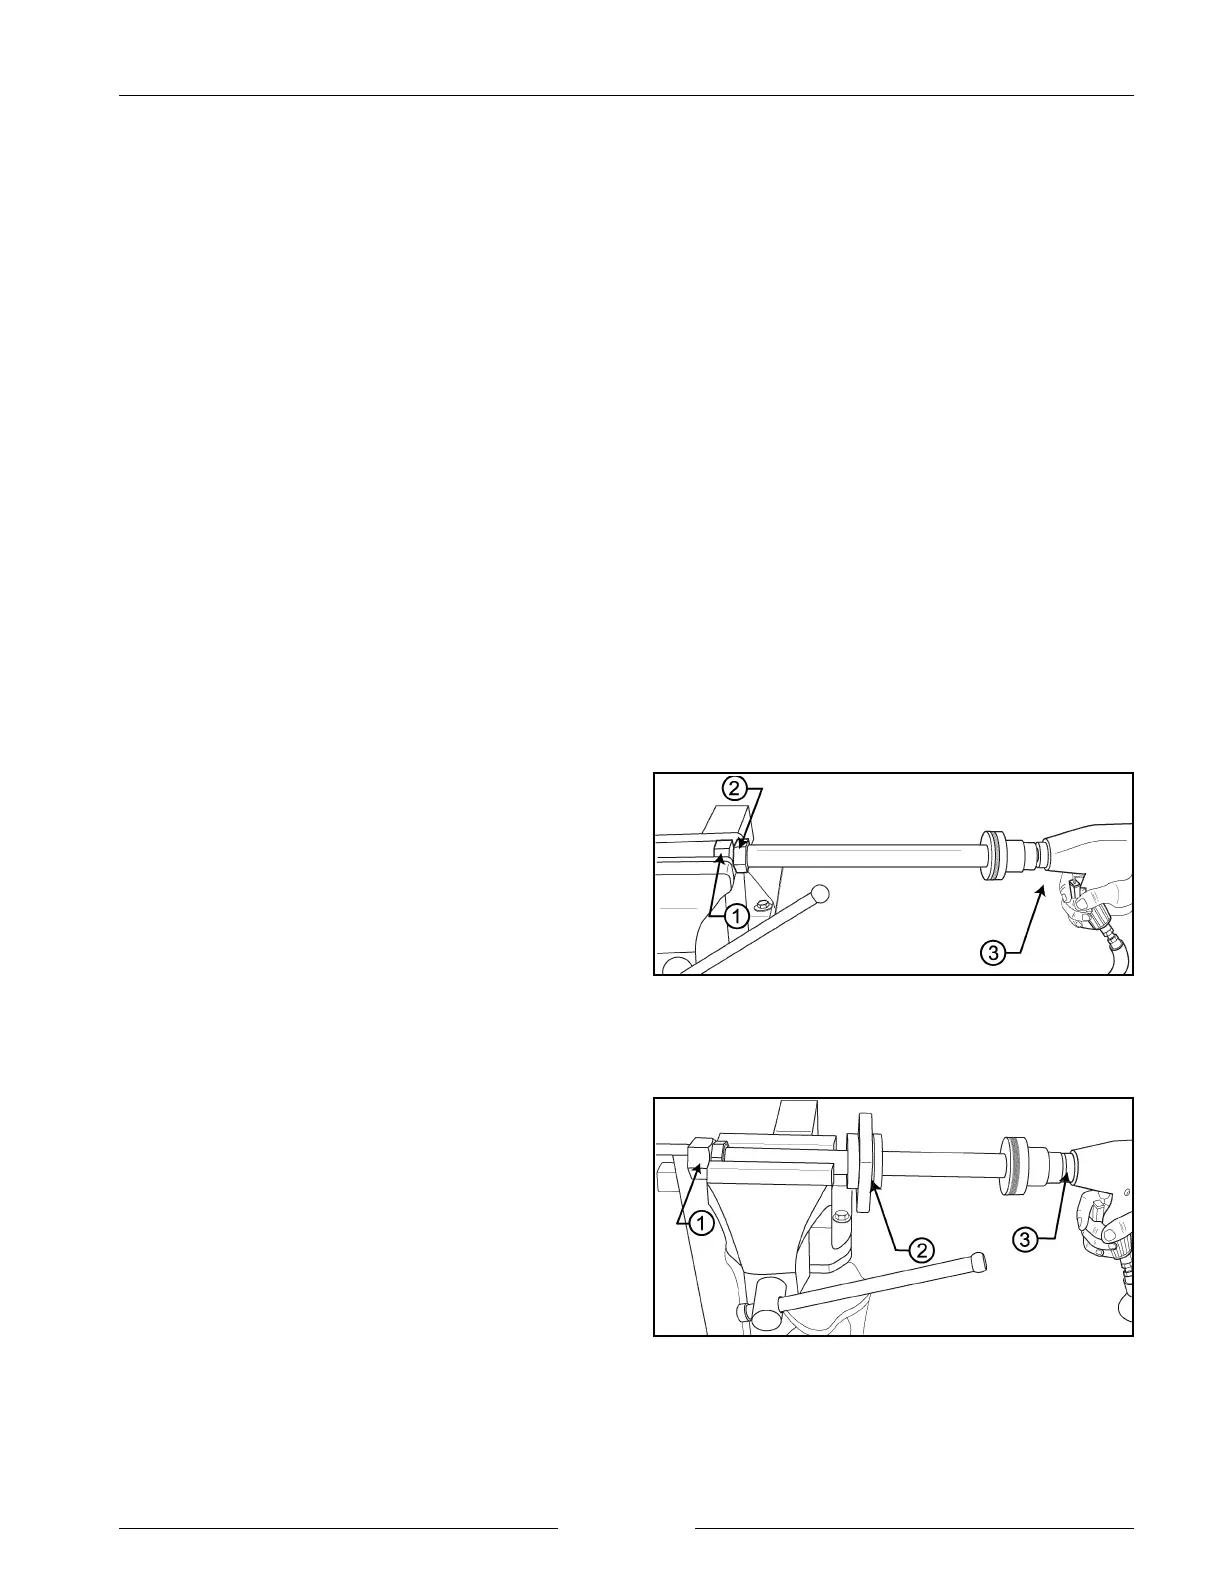
Reassemble the end cap onto the shaft:
15. The wiper seal on the rod cap makes it difficult to
slide the rod cap back onto the shaft the way it was
removed. To reassemble the rod cap, first remove the
nut from the piston shaft.
- Thread two locking nuts (1 and 2) on the threaded
clevis end of the piston shaft.
- Place the nut (1) into the vise and use an air tool and
socket (3) to loosen the nut on the piston end of the
shaft.
- Place the nut (1) into the vise and use an air tool and
socket (3) to loosen the nut on the piston end of the
shaft.
16. Replace the cap (2) onto the shaft. Move the shaft so
the opposite locking nut (1) is in the vise. Apply
Loctite to the piston nut and tighten using an air tool
and socket (3).