Part IV: System Functions
Chapter 33: Auto Test
Press the
Auto
( ) key below the display to enter the Auto Test menu. Auto Test allows users to design
and run custom measurement plans.
3
You can select the measurements to perform, as well as the channels
and test settings for each one, in advance. Auto tests rely on pre-defined User Channel Plans and Limit Plans.
There are two types of auto-test: projects and work orders. Projects are tasks created with the DS2831, while
work orders are tasks created by the asset and test-data management platform, Deviser EDGE. Work orders
can contain multiple projects, and the content of a work order is not editable except through EDGE
33-1 Creating a Project
In the Auto Test menu, the F1 key allows you to cycle between auto test types. Cycle to
[Project]
and press
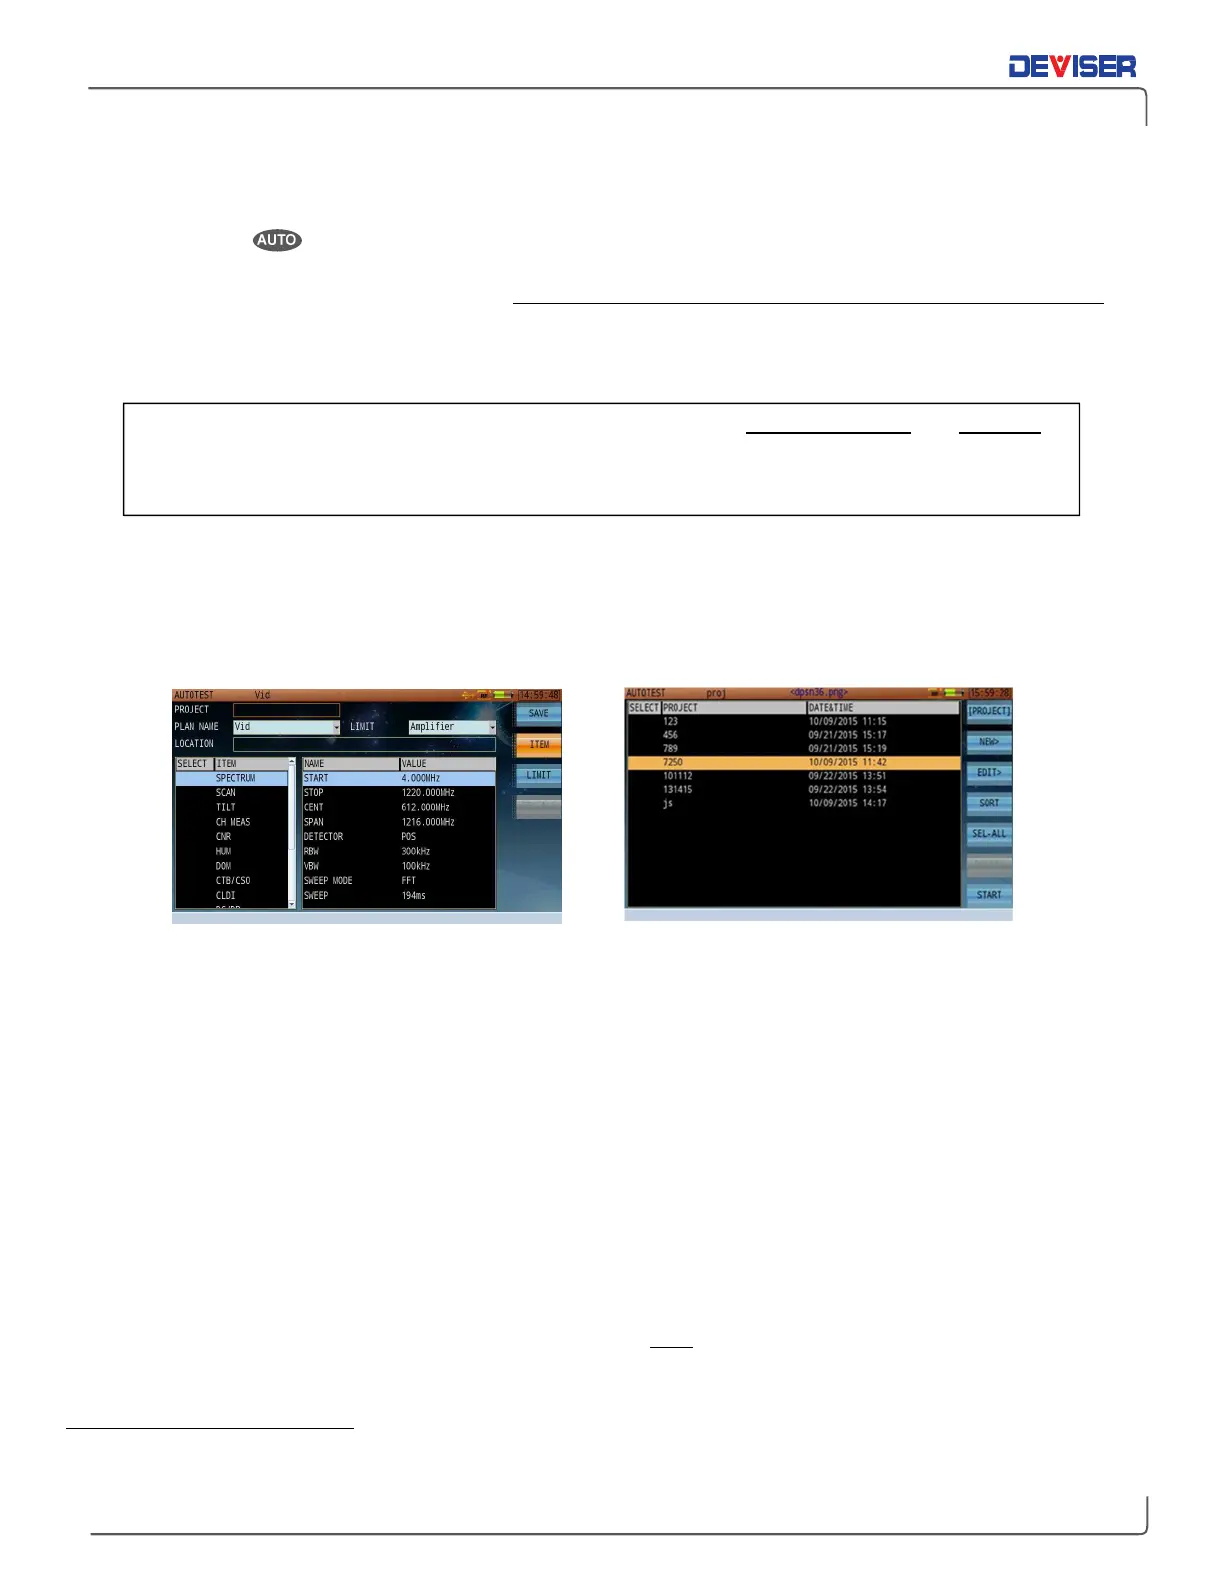
New
(F2) to open the auto test design screen (below, left).
In the
Project
and
Location
fields, you can name the auto test project and the physical test address using
the alphanumeric keypad. Highlight and click the
Plan Name
and
Limit
fields to select the desired channel
plan and test point location for this project. (If you plan to import the output file into a pre-configured TWC
Workbook, you may choose any arbitrary test point location.)
Under the Location field are two panes. Move to a panel with the rotary knob, then use the arrow keys to
scroll up and down within it. In the left panel, you can select measurement functions to perform (by clicking
the rotary knob). In the right panel, you can modify the settings that each measurement will take. Press the
Item
(F2) and
Limit
(F3) keys to toggle between different available settings.
•
Example: Place a check next to “Spectrum” on the left, then change “CENT” to 500 MHz on the
right. The auto test will now include
a spectrum analysis test centered on the 500 MHz frequency.
•
Example: Place a check next to “Ch Meas” on the left, then place checks next to 101-115 on the
right. The auto test will now include MER and Pre-Post BER tests for the selected channels.
When you have finished designing your auto test project, press
Save
(F1) to save the project. It will appear
on the auto test main screen (above, right). Note that you must save a project if you wish to export it later.
3
Content, reference materials, and technical consultation for this chapter provided by Bernie Cadieux,
Deviser Instruments. <bcadieux@deviserinstruments.com>
Before setting up an auto test, you must set up your active
testing. The channel plan determines the channels you can select for individual testing, and the limit
plan adds pass/fail results to the test data depending on the limit lines you have previously specified.
See Chapter 4 and subsection 29-3.3, respectively, for details on creating channel and limit plans.