1-6 Battery Care
The DS2831 can be supplied with power in two different ways: with a battery or with the power adapter
provided.
1-6.1 Battery
The DS2831 uses a 7.4V/10Ah lithium battery for autonomous operation. Battery life during continuous use
(on a full charge) is estimated at more than 8 hours. When the voltage falls below 7.15V, the instrument will
display an alert indicating low charge. At 6.8V or less, it will display a second alert and the battery icon will
flicker. At 6.5V or less, following a third alert, the instrument will emit a long audible beep and shut down
automatically. Further use requires that the unit be connected to an external AC or DC power source,
which will also charge the battery. If the unit stays off, it will take about 4 hours to fully recharge. Charging
time will be longer if the unit is in use.
NOTE: Use only Deviser Instruments-approved batteries, adapters, and chargers provided with this
instrument.
WARNING: Low temperatures may cause a temporary reduction of the battery capacity. This will not
damage the battery. High temperatures, however, may cause permanent damage to the battery. See
stated specifications for environmental tolerances. Recommended charging temperature is 10~35°C.
NOTE: It is advisable to replace the battery when operational time falls below 50% of original capacity.
1-6.2 Charging the Unit
There are two ways to charge the DS2831 battery: with the traditional AC/DC adapter plug, or with the
DS2831 dual-slot charging deck.
With the DC Port
Using the plug, you can recharge the battery while continuing to operate the device.
1.
Connect the adapter cord to the power supply; then insert the DC connector into the VDC power inlet
at the top left of the instrument (while facing the screen). You can continue to operate the meter while
plugged in.
2.
When the charging indicator displays a gradually-filling battery icon in the status bar on the screen, the
instrument is charging. The LED next to the power button indicates status: green means fully charged,
red means charging in progress, and red and green flickering indicates no battery or abnormal battery.
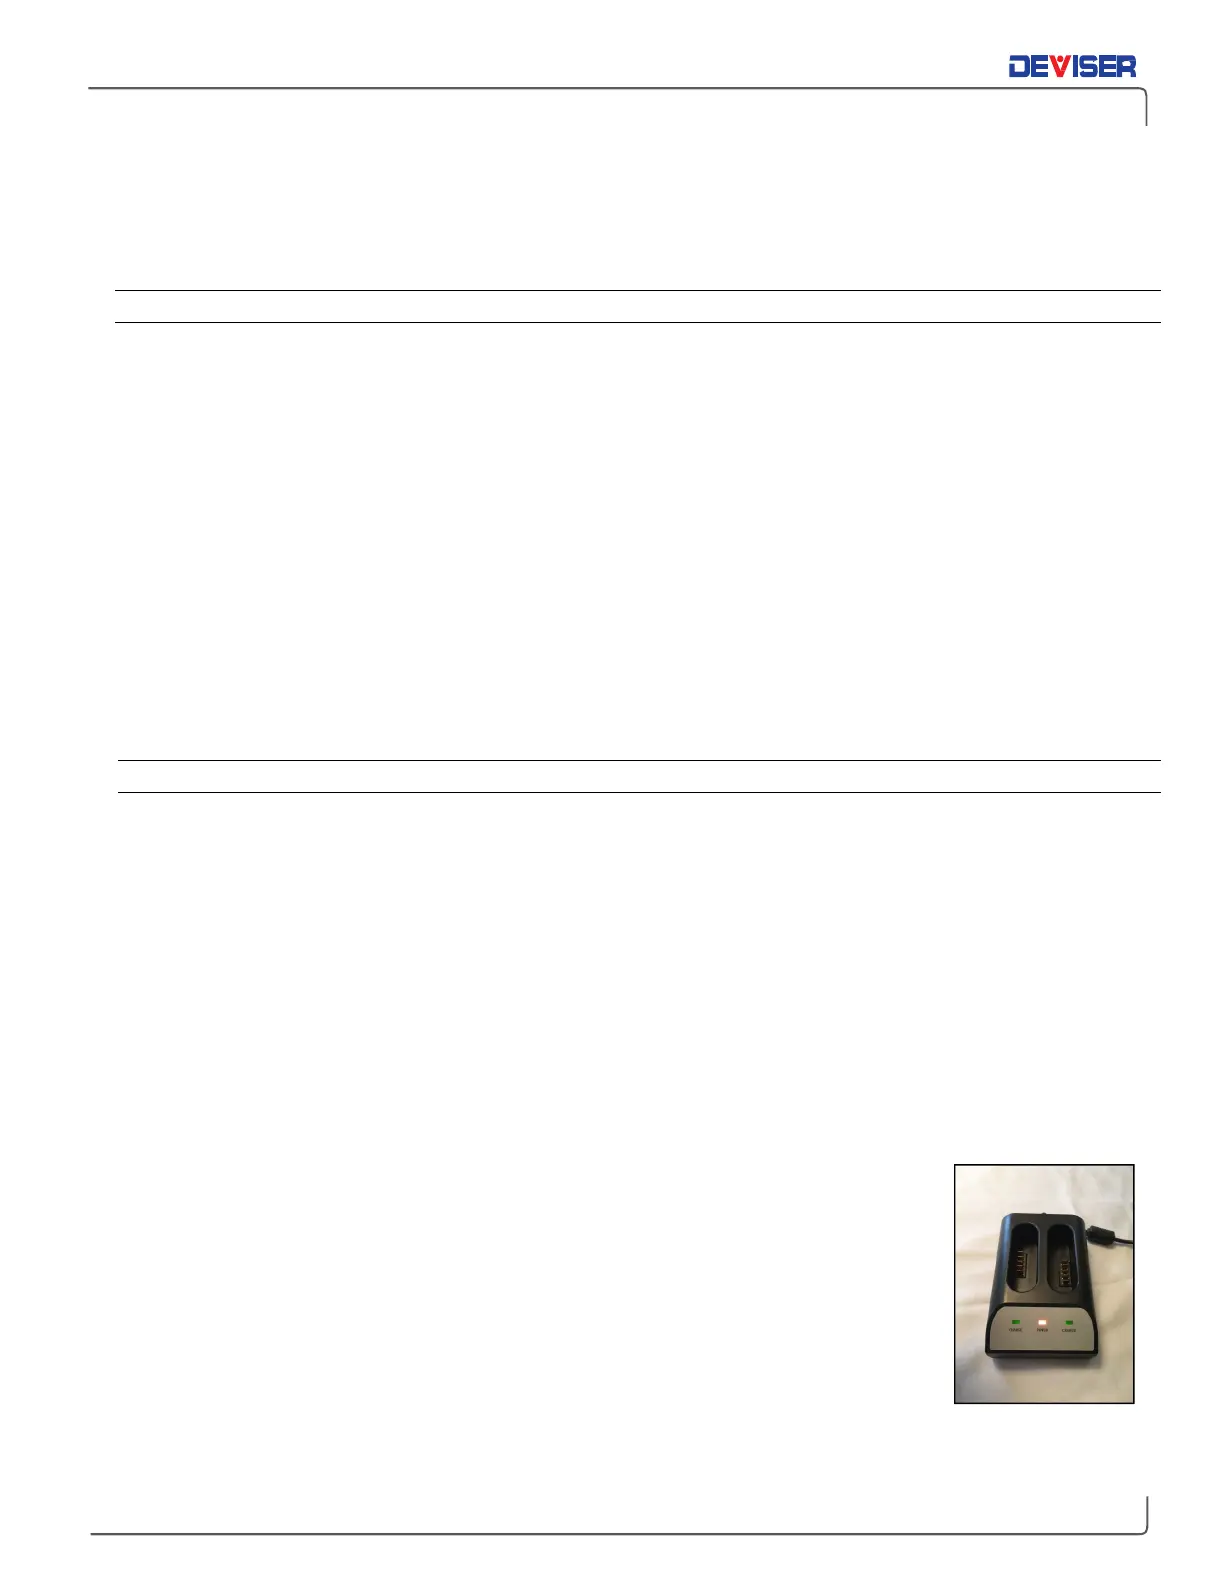
With the Charging Deck
The new high-speed charging deck accommodates two battery packs at once.
1.
Connect the adapter cord to the power supply. Then insert the DC connector into
the DC input pocket of the charging deck. (The “Power” LED will turn red.)
2.
Ensure the DS2831 is OFF. Remove the DS2831’s battery pack using the rear access
panel and a flat-head screwdriver. Insert the battery, contact points down, into the
Charge1 or Charge2 slot. Its LED will turn red if successful; when fully charged, it will
turn green.
3.
Remove the battery when complete, then disconnect the AC power adapter.