EPSON Stylus Pro 4400/4450/4800/4880/4880C Revision C
Disassembly & Assembly Disassembly Procedures 268
5. Remove the "Tension Spring, 3.81" from the hooks of both the "Head Unit"
and the "Lever, Inclination". (Refer to Figure 4-79.)
6. Remove the three screws and the washer that secure the "Lever,
Inclination" to the "Carriage Unit to remove the "Lever, Inclination".
(Refer to Figure 4-79.)
C.B.P. (P2) 3x12: 2 pcs.
C.B.P. 3x8 (+washer 3.0x0.5x8):1 pc.
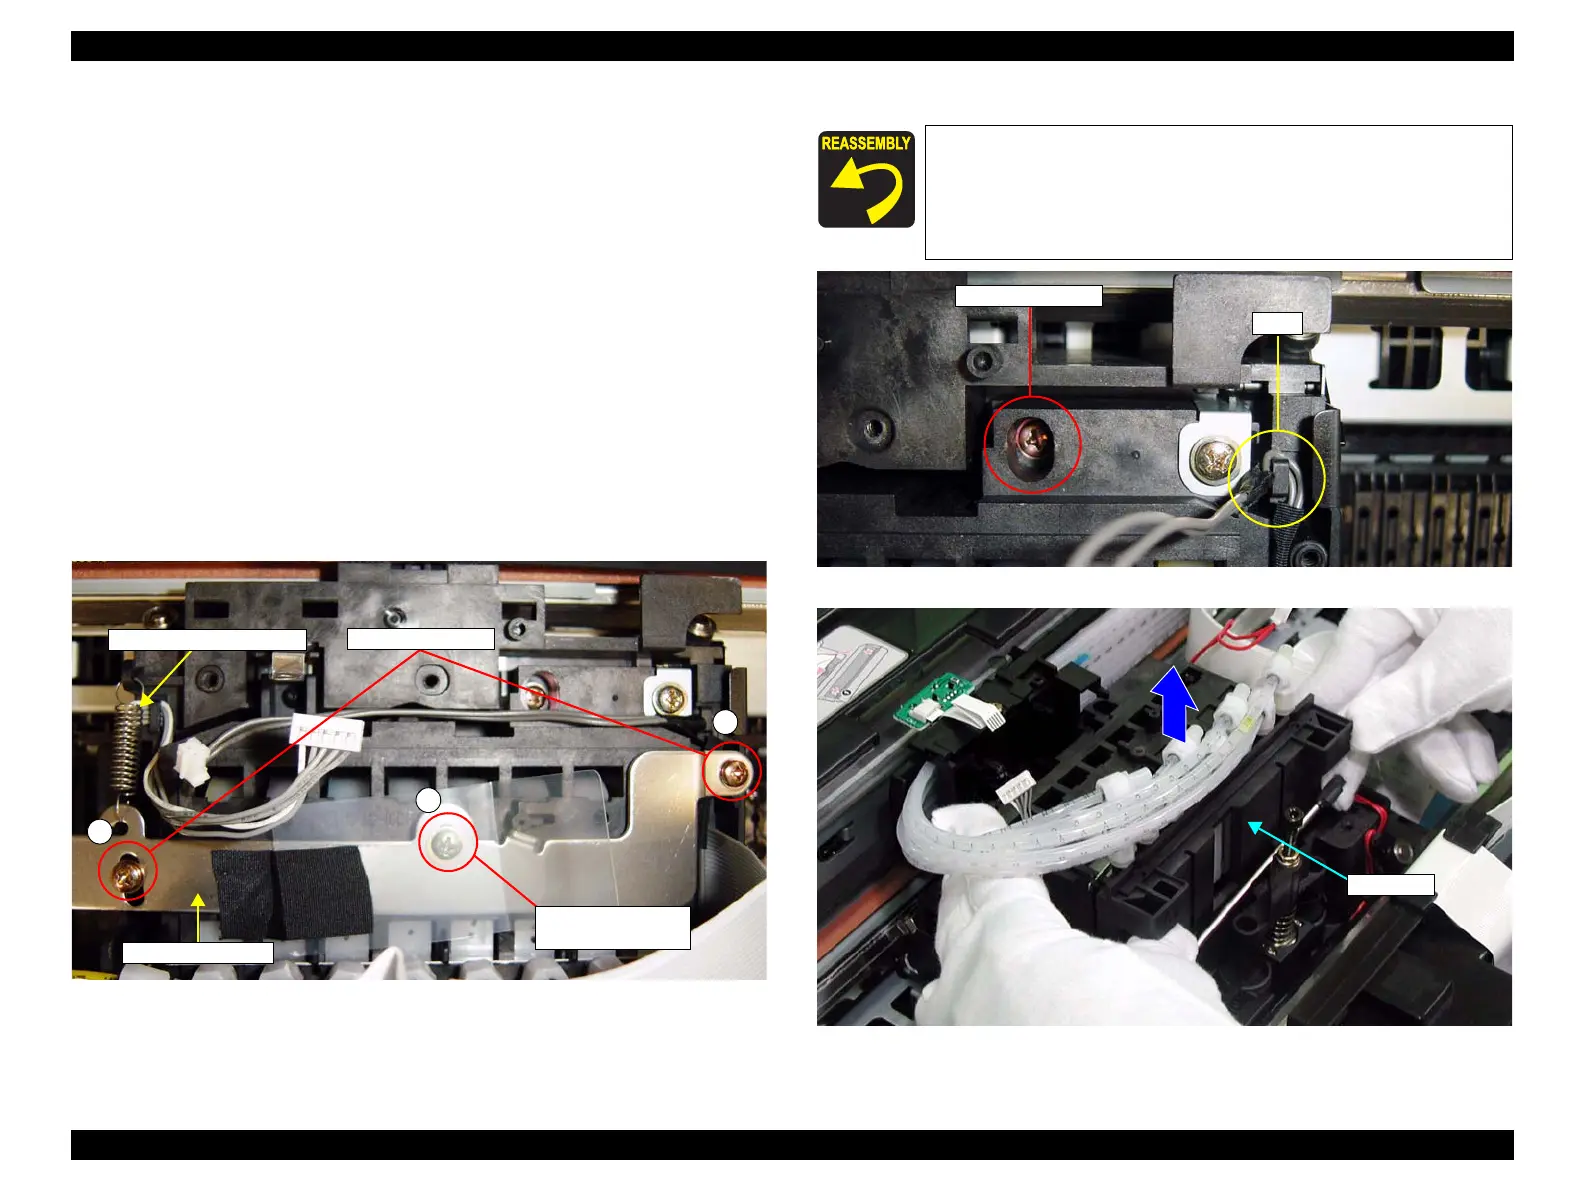
7. Remove the screw securing the "Head Unit" to the "Carriage Unit".
(Refer to Figure 4-80.)
C.B.P. (P2) 3x12: 1 pc.
8. Release the harness from the tab shown in Figure 4-80, and move the
"Carriage Unit" toward you.
9. Lift the "Head Unit" together with the "Ink Tube Unit" to remove from
the"CarriageUnit". (Refer to Figure 4-81.)
Figure 4-79. "Lever, Inclination" Removal
Figure 4-80. Removal of Screw Securing Head Unit
Figure 4-81. Head Unit Removal
C.B.P. (P2) 3x12
Extension Spring, 3.81
C.B.P. 3x8
+washer 3.0x0.5x8
A
B
C
Lever, Inclination
When installing the "Lever, Inclination", follow the steps
below.
1. Tighten the Screw A.
2. Attach the "Extension Spring, 3.81".
3. Tighten the Screw C first and then the Screw B.
C.B.P. (P2) 3x12
Tab
Head Unit

 Loading...


