EPSON Stylus Pro 4400/4450/4800/4880/4880C Revision C
Disassembly & Assembly Disassembly Procedures 339
4.2.8.14 Tube, Supply, Ink (LK/LC/LW/LLK) on the Right Side
of the Main Unit
7
1. Remove the "I/H Right Unit", and remove the "Cover, Holder, IC, Right" on
the backside of the "I/H Right Unit".
(Refer to "4.2.8.5 I/H Right Unit / I/H Lever Sensor (Right)" (p305).)
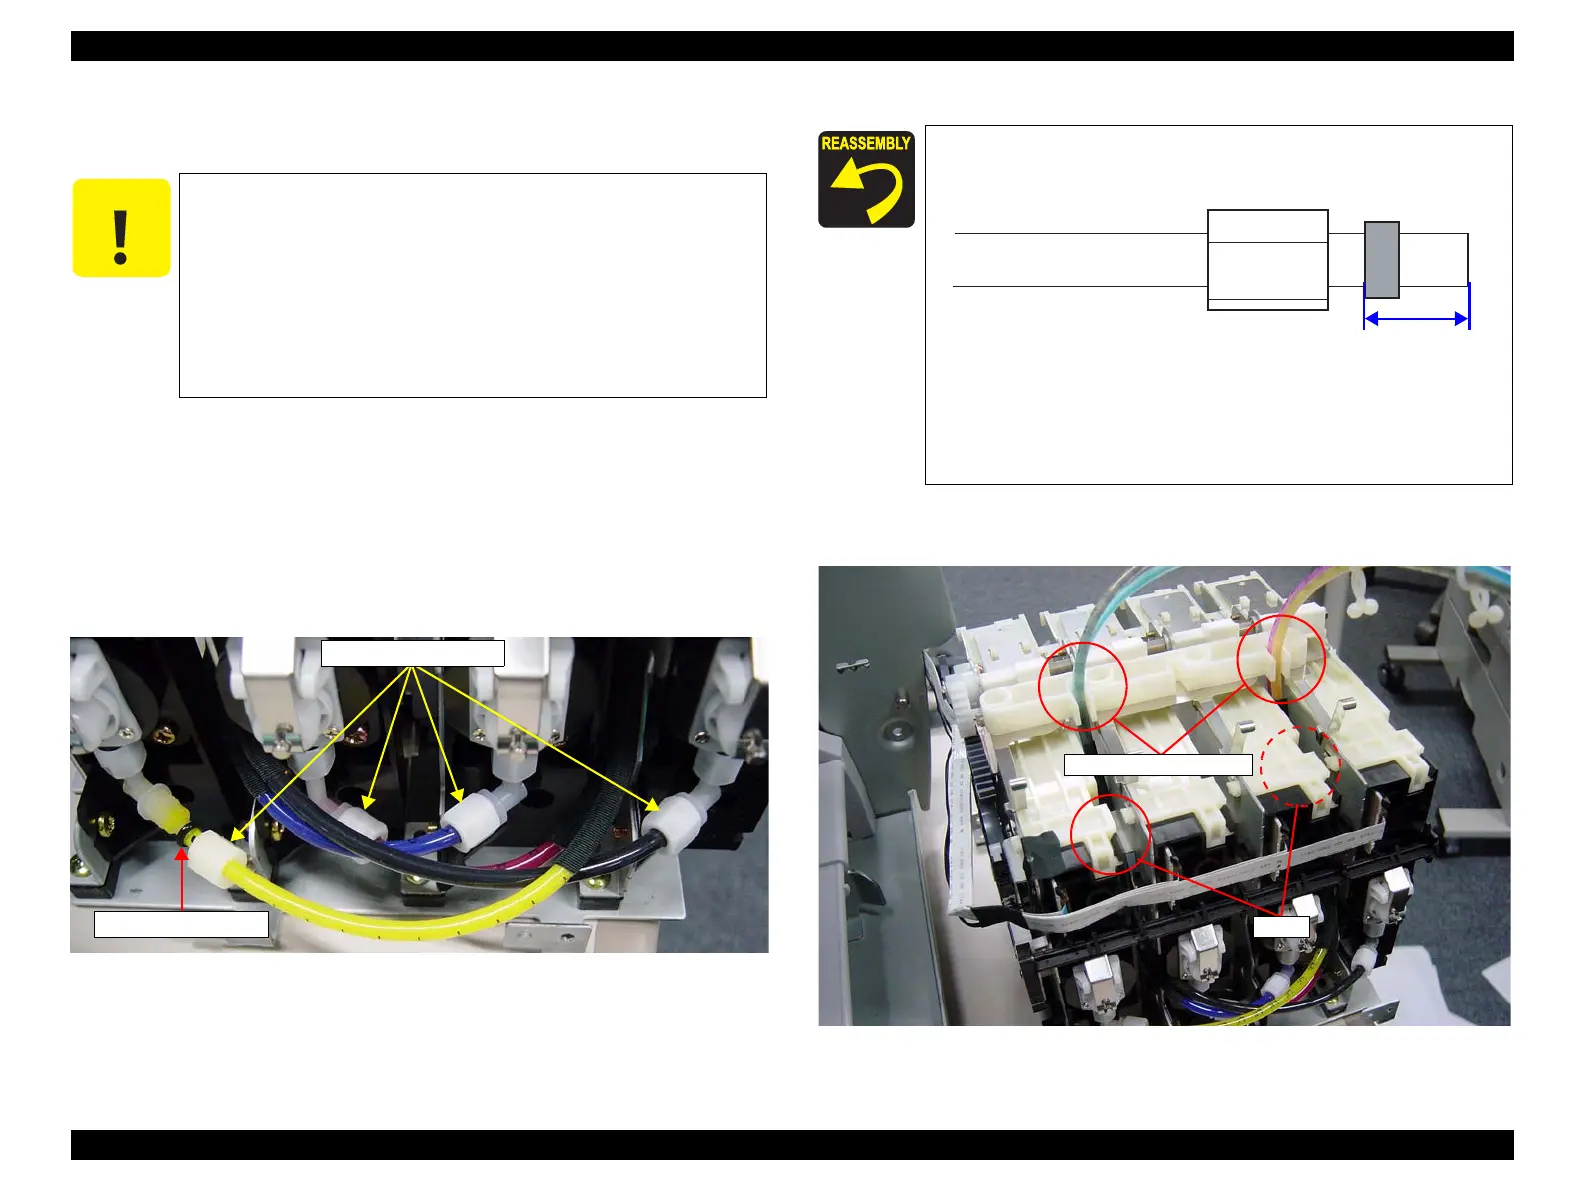
2. Loosen the "Coupling Screw, M7"s that secure the "Tube, Supply, Ink"s to
remove the "Tube, Supply, Ink"s. (Refer to Figure 4-190.)
3. Remove the "O-ring, Coupling M7"s and the "Coupling Screw, M7"s from
the "Tube, Supply, Ink"s. (Refer to Figure 4-190.)
Figure 4-190. Coupling Screw, M7 Removal
4. Release the "Tube, Supply, Ink" from both the tabs and tube holder
sections of the "I/H Right Unit". (Refer to Figure 4-191.)
Figure 4-191. "Tube, Supply, Ink" Release
C A U T I O N
When performing the following work, remove ink out of the
ink path befoe removing the "Tube, Supply, Ink". Refer to
Chapter 5 “Adjustment” (p.366) to know how to remove ink.
Some amount of ink remains inside the "Tube, Supply, Ink"
even afetr the ink removal. Prepare a cloth in advance and
put a sheet of paper on the work area in case the ink spatters
inside and around the printer. In addition to this, keep the
removed "Tube, Supply, Ink" with its head coverd with a
plastic bag during the work.
Coupling Screws, M7
O-ring, Coupling M7
The "O-ring, Coupling M7" should be attatched 2mm
away from the head of the "Tube, Supply, Ink".
To prevent ink leakage and damage on the Coupling
screw, be sure to tighten the "Coupling Screw, M7" with
the prescribed torque and the tool specified below.
• Tool: Torque Wrench 1.25/1.75 (1277142)
• Tightning torque: 1.25 ( ± 0.25) kgf • cm
Approximately 2mm
Tube Holder Sections
Tabs

 Loading...


