200 Upgrade and Maintenance Manual TX1310 M3
System board and components
15.4.3 Installing the system board
Ê Check the settings on the new system board (see section "Onboard
settings" on page 231).
Ê Insert the system board by holding it at a slight angle. Slide the connectors
into the connector panel.
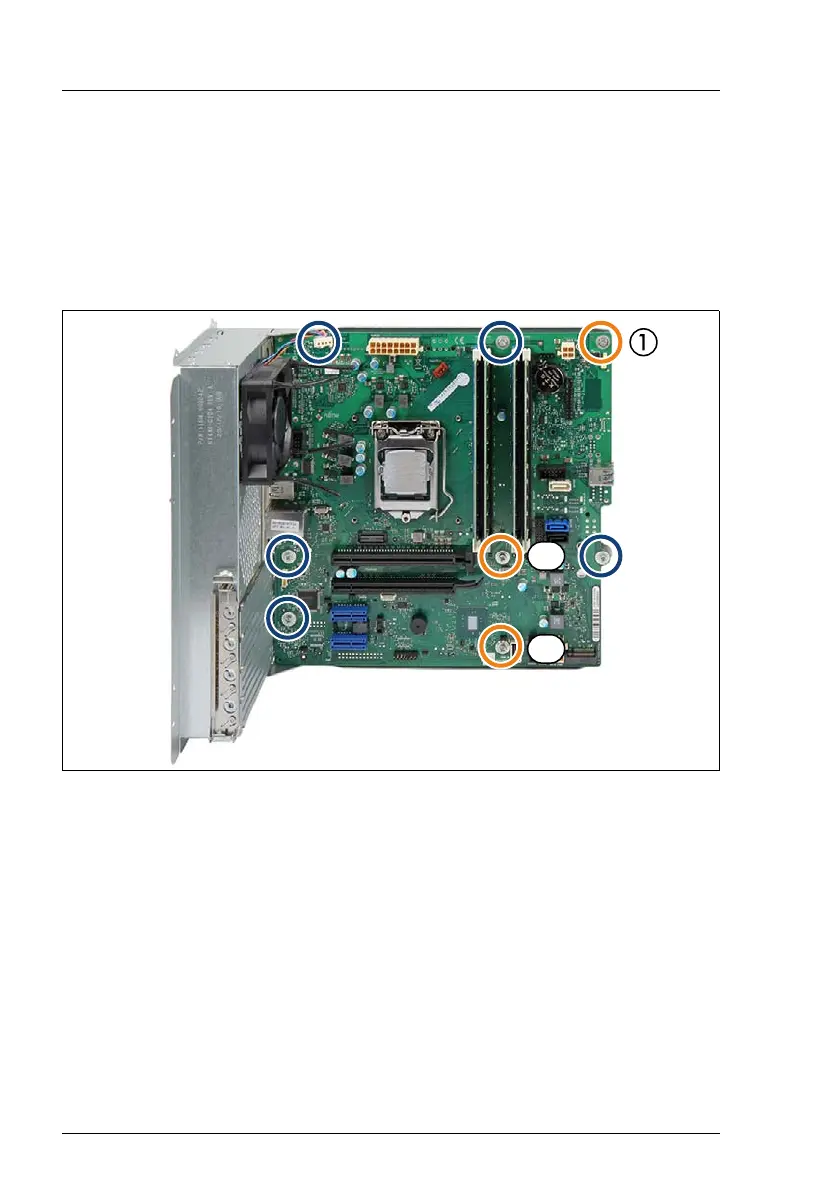
Figure 122: System board screws
Ê Lower the system board onto the centering bolts (see orange circles).
I Depending on the chassis variant the second centering bolt is on
position 2A or 2B.
Ensure that the system board is properly seated on both centering bolts.
Ê Fasten the system board with eight screws.

 Loading...