3.1 Setting the Test-Conditions
33
3
Set a upper-limit test value and a lower-limit test value. For example, when the
upper-limit (lower-limit) test value is set at 10 mA, a “
PASS” will be shown
when
a current less than (more than) 10 mA is supplied to the tested object. If no
lower-limit test value is required, set it to “OFF” using the ON/OFF key. However,
the upper-limit test value cannot be set to OFF.
3.1.2 Setting the Upper (Lower) Limit Value
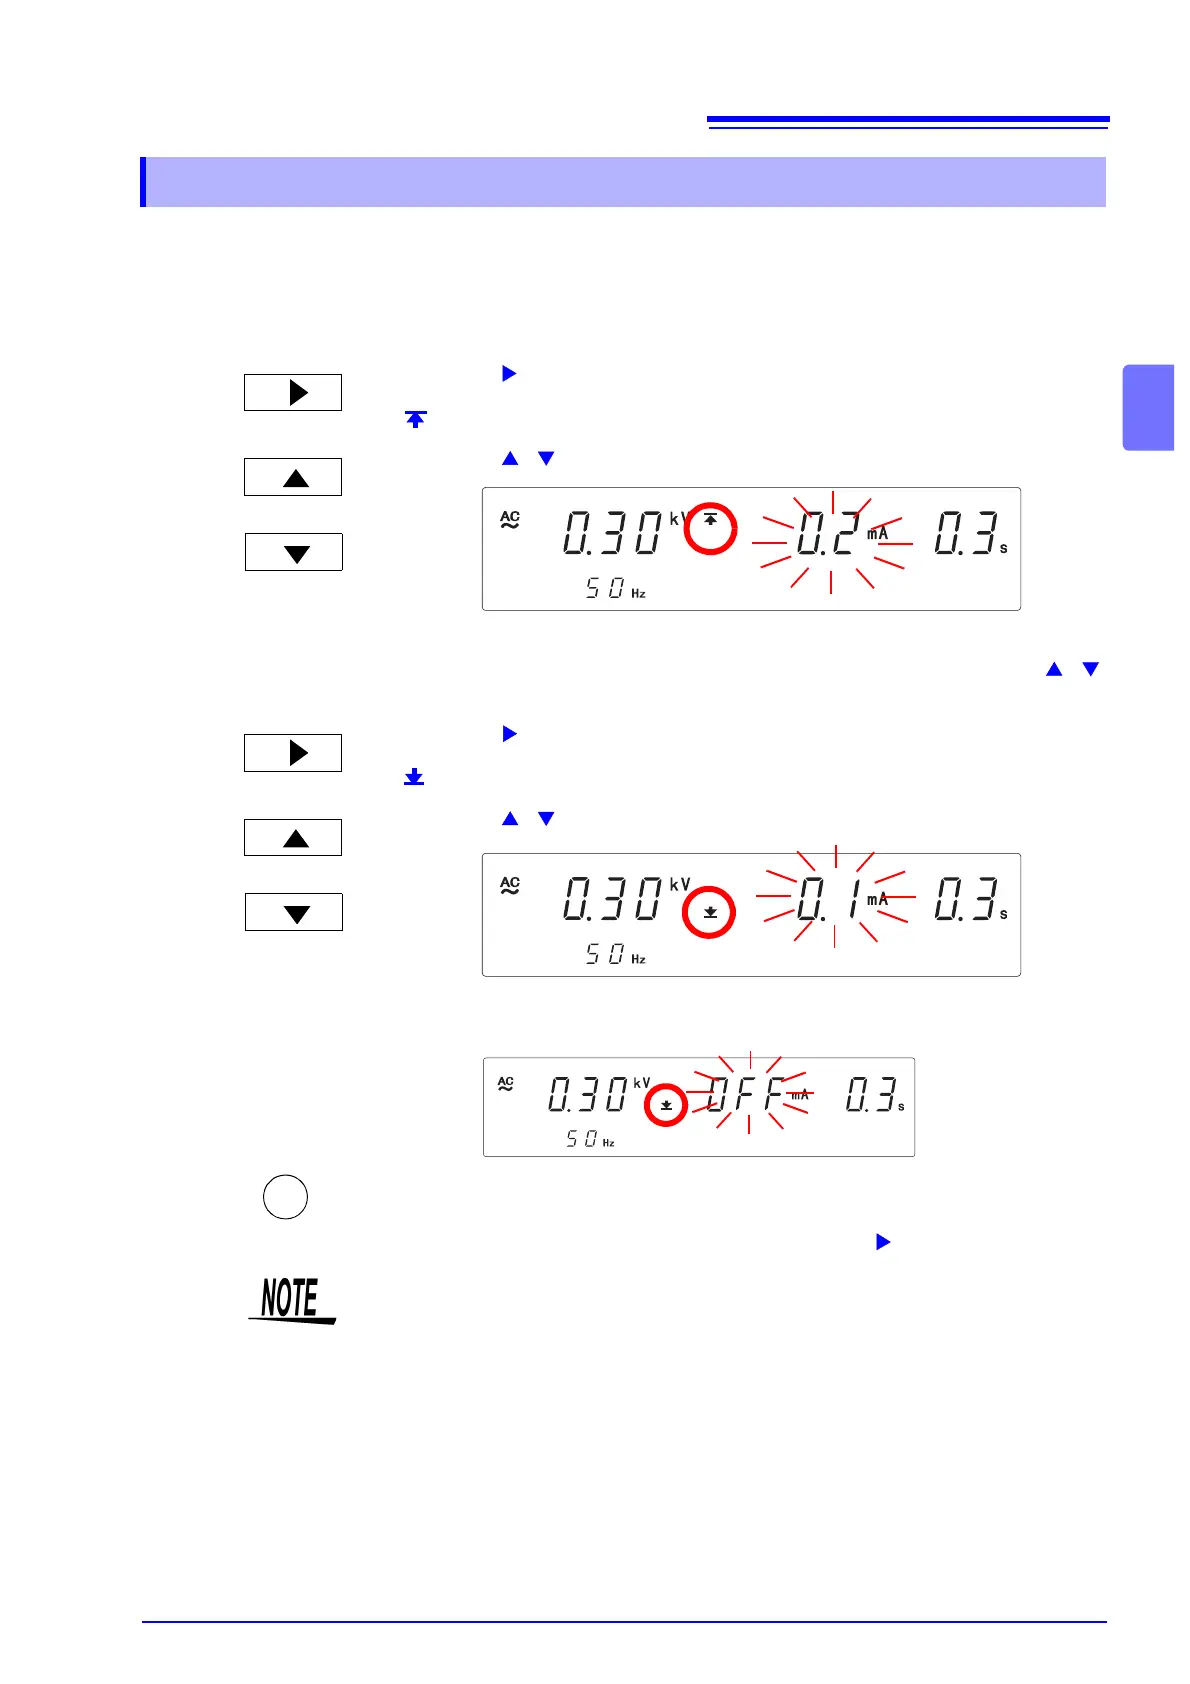
1.
Press the key to move the flashing cursor to the upper-limit test value.
is lit.
2.
Press the / keys to set the upper-limit test value.
Setting range: 0.1 to 20.0 mA (The value changes by 0.1 mA.)
To change the value by 1 mA, while holding down the SHIFT key, press /
keys.
3.
Press the key to move the flashing cursor to the lower-limit test value.
is lit.
4.
Press the / keys to set the lower-limit test value.
Setting range: 0.1 to 19.9 mA (The value changes by 0.1 mA.)
If no lower-limit test value is required, set it to “OFF” using the ON/OFF key.
5.
Press the STOP key to complete the setting value.
The instrument reverts to the READY state.
To continue to the setting for the next item, press the key.
or
<Ex.> Set to 0.2 mA.
or
<Ex.> Set to 0.1 mA.
<Ex.> Set to OFF.
STOP
• The electric current range will be decided by the lower-limit test value (10 mA-
range for “lower-limit test value ≤ 10.0 mA”, and 20 mA-range for “lower-limit
test value > 10.0 mA”)
• The setting resolution of the upper (lower)-limit test value is 0.1 mA.
• The current measurement resolution during a test depends on the set upper-
limit test value: 0.01 mA at 0.10 mA to 10.00 mA and 0.1 mA at 10.1 mA to
20.0 mA.
• If the set lower-limit test value is greater than the upper-limit test value,
unable to get out of setting screen. In such a case, correct the upper- or
lower-limit test value.
• A lower-limit test value is not necessary in the withstanding test but pre-setting
it will allow the instrument to be used for simple Contact Checks.