2.4 Connecting the Test Lead
21
2
When using the Contact Check Function, connect the test lead as follows.
On the usage of Contact Check,
see "2.6 Pre-test Check" "3.1.7" "4.1.5 Set-
ting the Confirmation Voltage used for upper and lower-limits for Contact Check".
2.4.1 When using the Contact Check Function
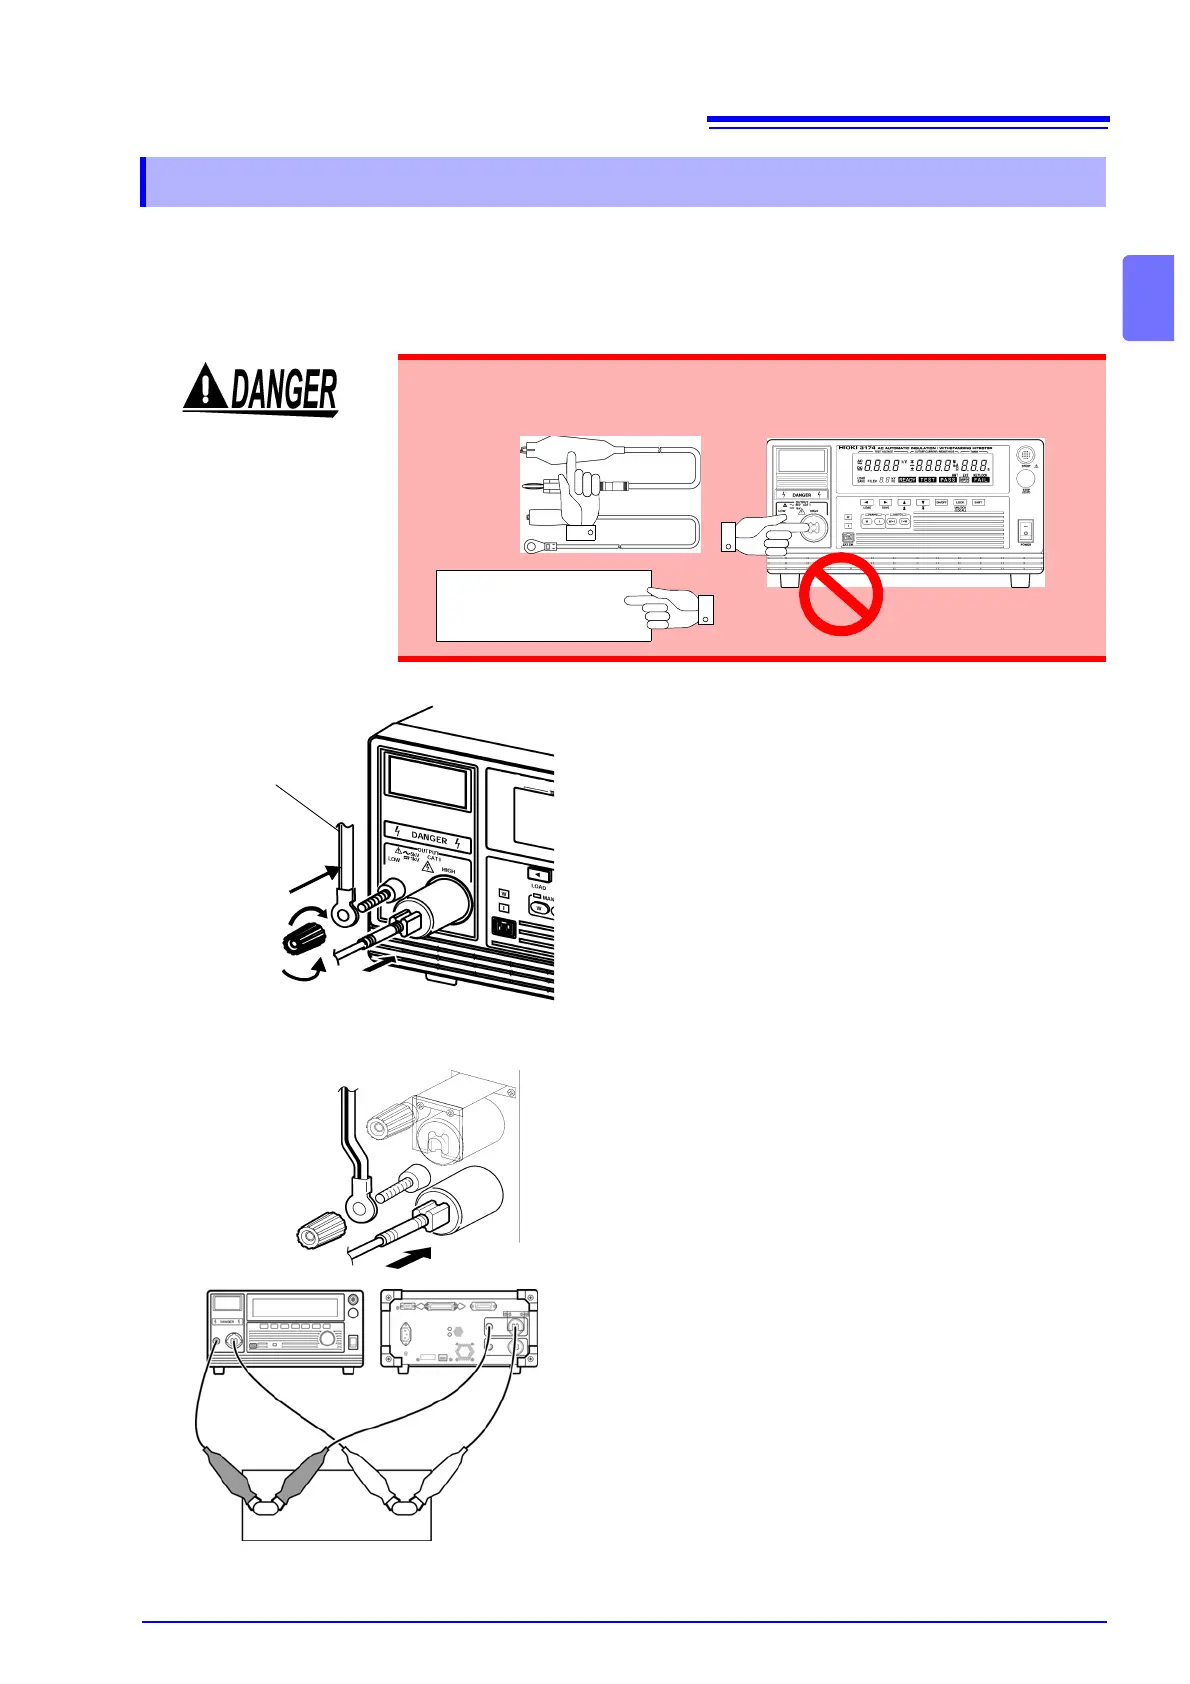
To prevent electric shock, when the DANGER lamp is lit or during the test,
never touch the voltage output terminals, test lead, or the tested object.
Tested object
When the front terminal is used
Remove the LOW voltage output terminal b
turning it counterclockwise.
2. As shown in the left figure, insert the plug o
the H.V. Test Lead (low voltage side).
3. Secure the LOW voltage output terminal b
turning it clockwise.
4. Connect the plug on the H.V. Test Lead (hig
voltage side) to the HIGH voltage output te
minal.
5. Connect in the same way when using th
voltage output terminals on the back of th
instrument as well.
6. Connect the test lead of the LOW voltag
output terminal to the tested object.
Ensure the connection is secure so that it w
not come off during the test.
7. Connect the test lead of the HIGH voltag
output terminal to the tested object as well.
3
1
The H.V. Test Lead
(low voltage side)
4
2
5
6
7
Tested object
When the back terminal is used