9 Replacing components
170
HSD S.p.A. © - h0108k01a.fm120718
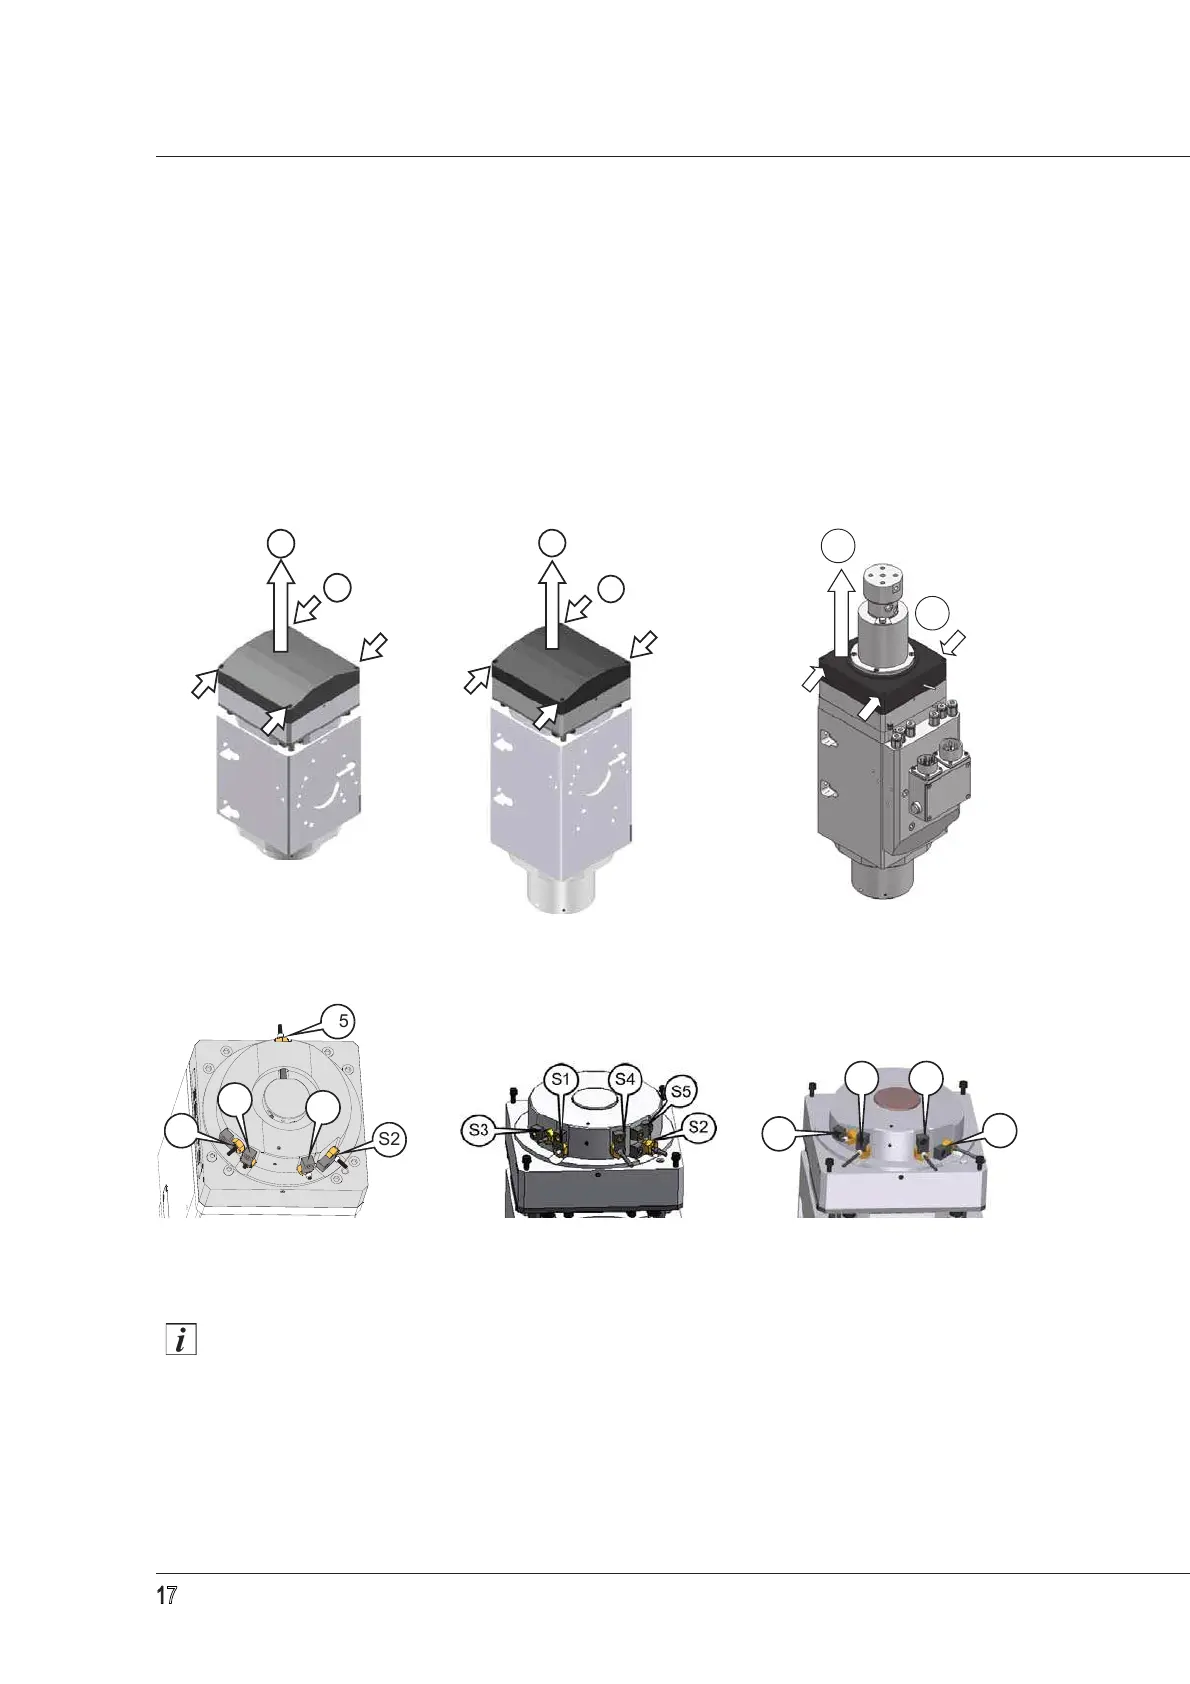
Refer to figures
12 to 14 to access the sensor area.
Unscrew the 4 screws (1).
Remove the casing (2) in the direction of the arrow shown in the figure.
There is also a thin layer of silicone fixing the casing to the electrospindle, but a slight force is
enough to remove it.
When replacing the casing (2), be careful not to damage the sensor cables inside. Use Loctite
510 (or an equivalent product) on the edge of the casing.
Figure 15: ES779 and ES789
Sensor S4 is only present in HSK versions. Sensors S3 and S5 are only present in certain
versions.
Figure 12: ES779 Figure 13: ES789 Figure 14: versions with distributor
Versions with a fixed piston Versions with a floating piston Versions with a floating piston
not set up for use of S5
!
!"
!"