9 Replacing components
HSD S.p.A. © - h0108k01a.fm120718
183
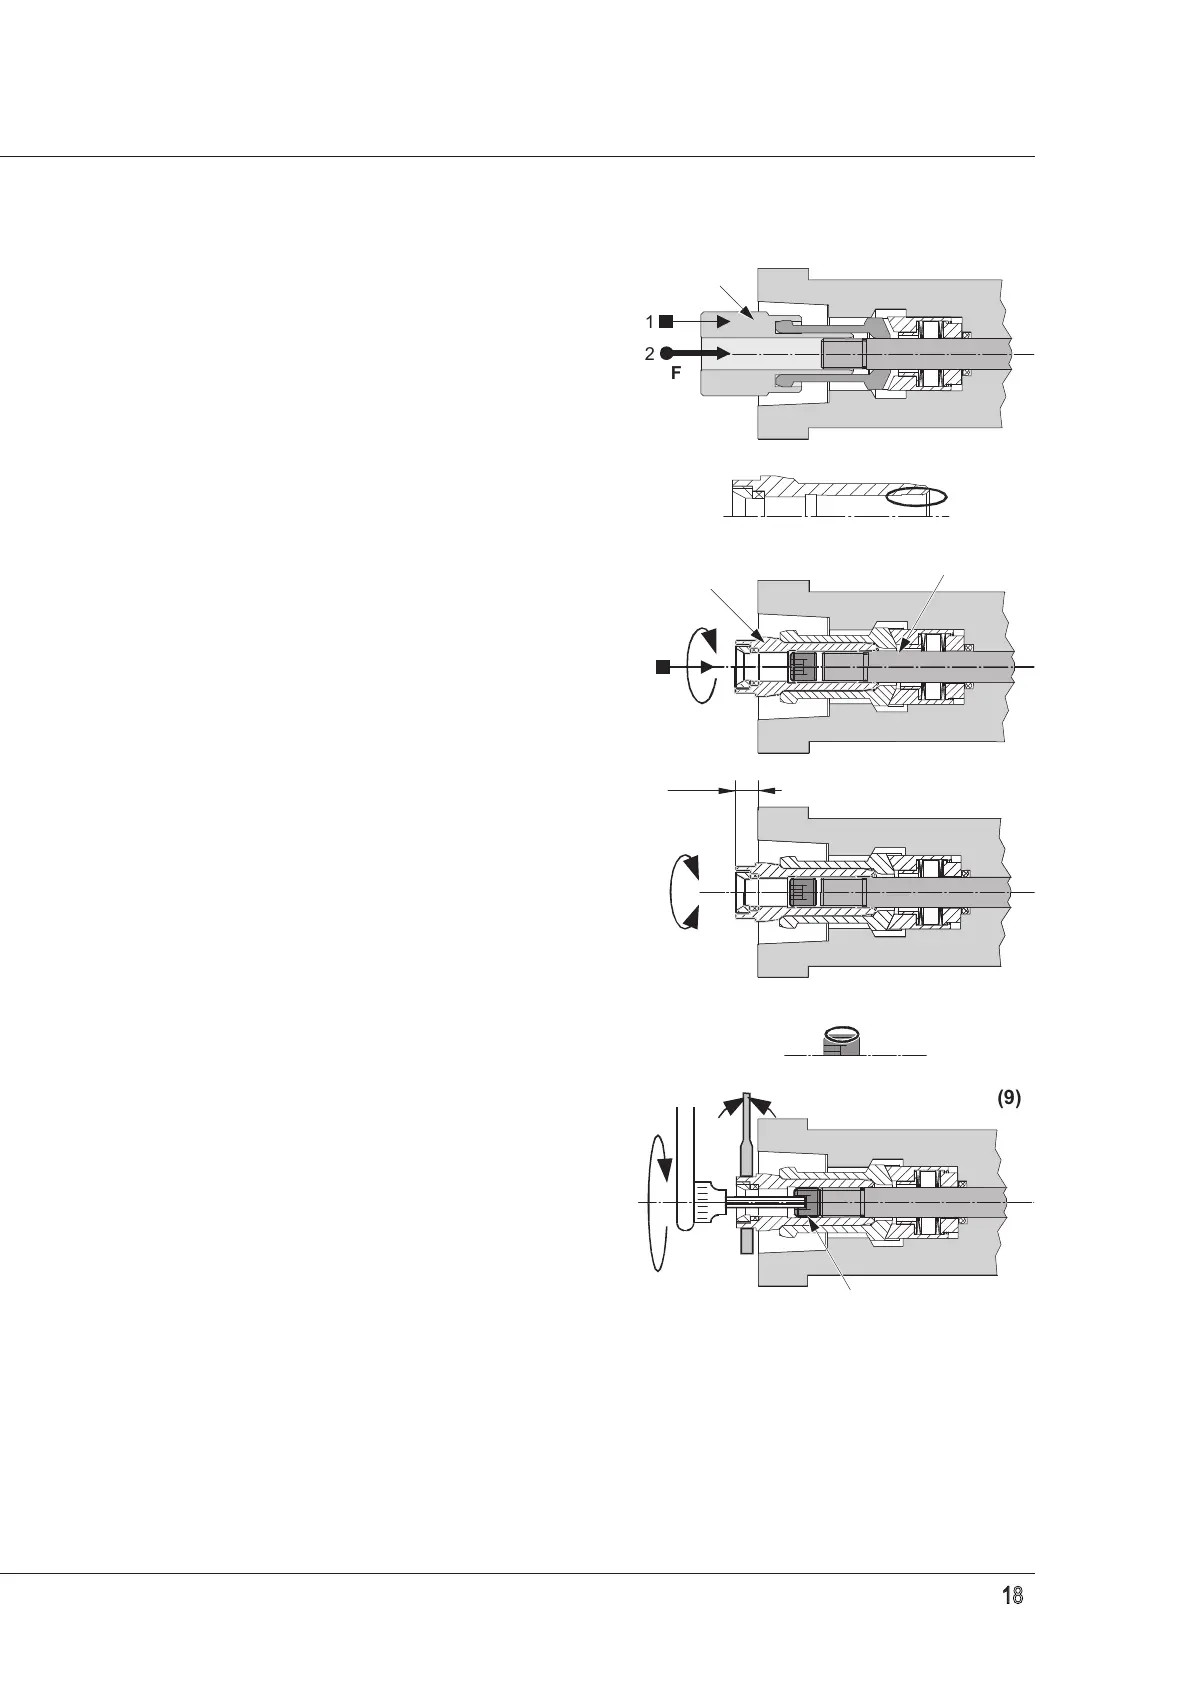
4b. As an alternative, using the
assembly tool (b):
Insert the collet segments in the
assembly tool. Insert the unit in the
spindle and apply the necessary force to
bring it to its position.
5. Lubricate the collet unit with assembly
grease.
6. The collet unit together with the pre-
mounted gaskets must be screwed onto
the screw dowel until reaching the set
screw position.
7. Bring the collet core to the adjustment
position
“B”(see paragraph
7.4.1 “Checking and adjusting the HSK
collet ejection position”
).
8. Spread medium-strength thread locking
compound LOCTITE 243 (or other
equivalent product) on the thread of the
lockscrew.
9. Tighten the lockscrew against the screw
dowel.
Observe the tightening values indicated
in table
3, paragraph 9.4.4 “Tightening
the lockscrew for the HSK collet”
.
Leave the thread locking compound to
rest so it can set (according to the
instructions of the manufacturer).
10. Check the axial force exerted by the locking device on the tool holder (the use of the Power
check is recommended). If the force measured is less than 70% of the minimum value
indicated in paragraph
7.4 “Tool-holder locking and ejection device”, proceed as follows:
• Grease the collet again, as indicated in paragraph
8.1.7 “Lubricate the HSK collet”, and
check the axial force on the tool-holder again.
• if the force is still less than 70%, change the collet and check again;
• if the force is still less than 70%, change the clamping device completely.