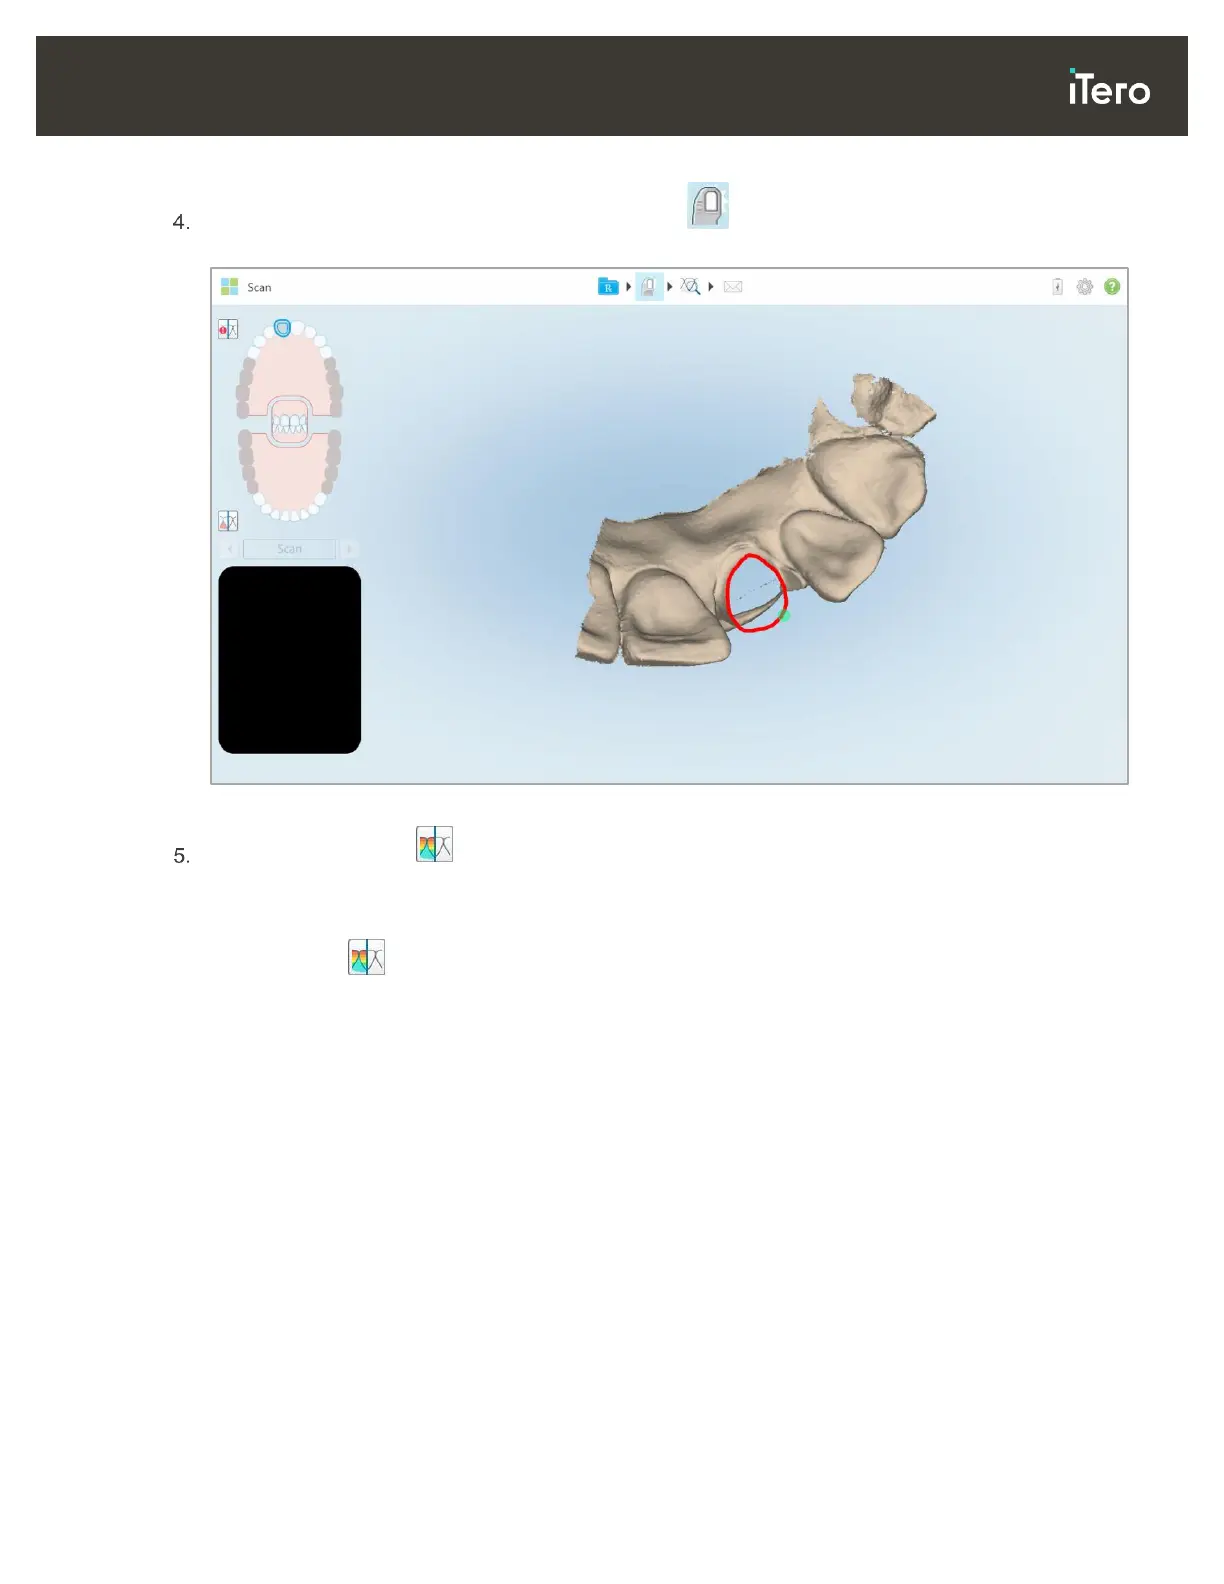
After adjusting the clearance on the patient’s tooth, tap to return to Scan mode and rescan the deleted
area, which is marked in red.
Figure 80: Deleted area marked in red
Tap the Clearance tool to confirm that the prepped tooth was sufficiently reduced.
4.3.3 Working with the Clearance tool
The Clearance tool enables you to view the contact and distance between the opposing teeth, to ensure
that the prepped tooth has sufficient reduction for the material chosen in the Rx.
The Clearance tool can be accessed from the View mode and from the Viewer, as described in section 4.7.1.
Note: The Clearance tool is displayed only after you have scanned the upper and lower jaws, and the bite.