33
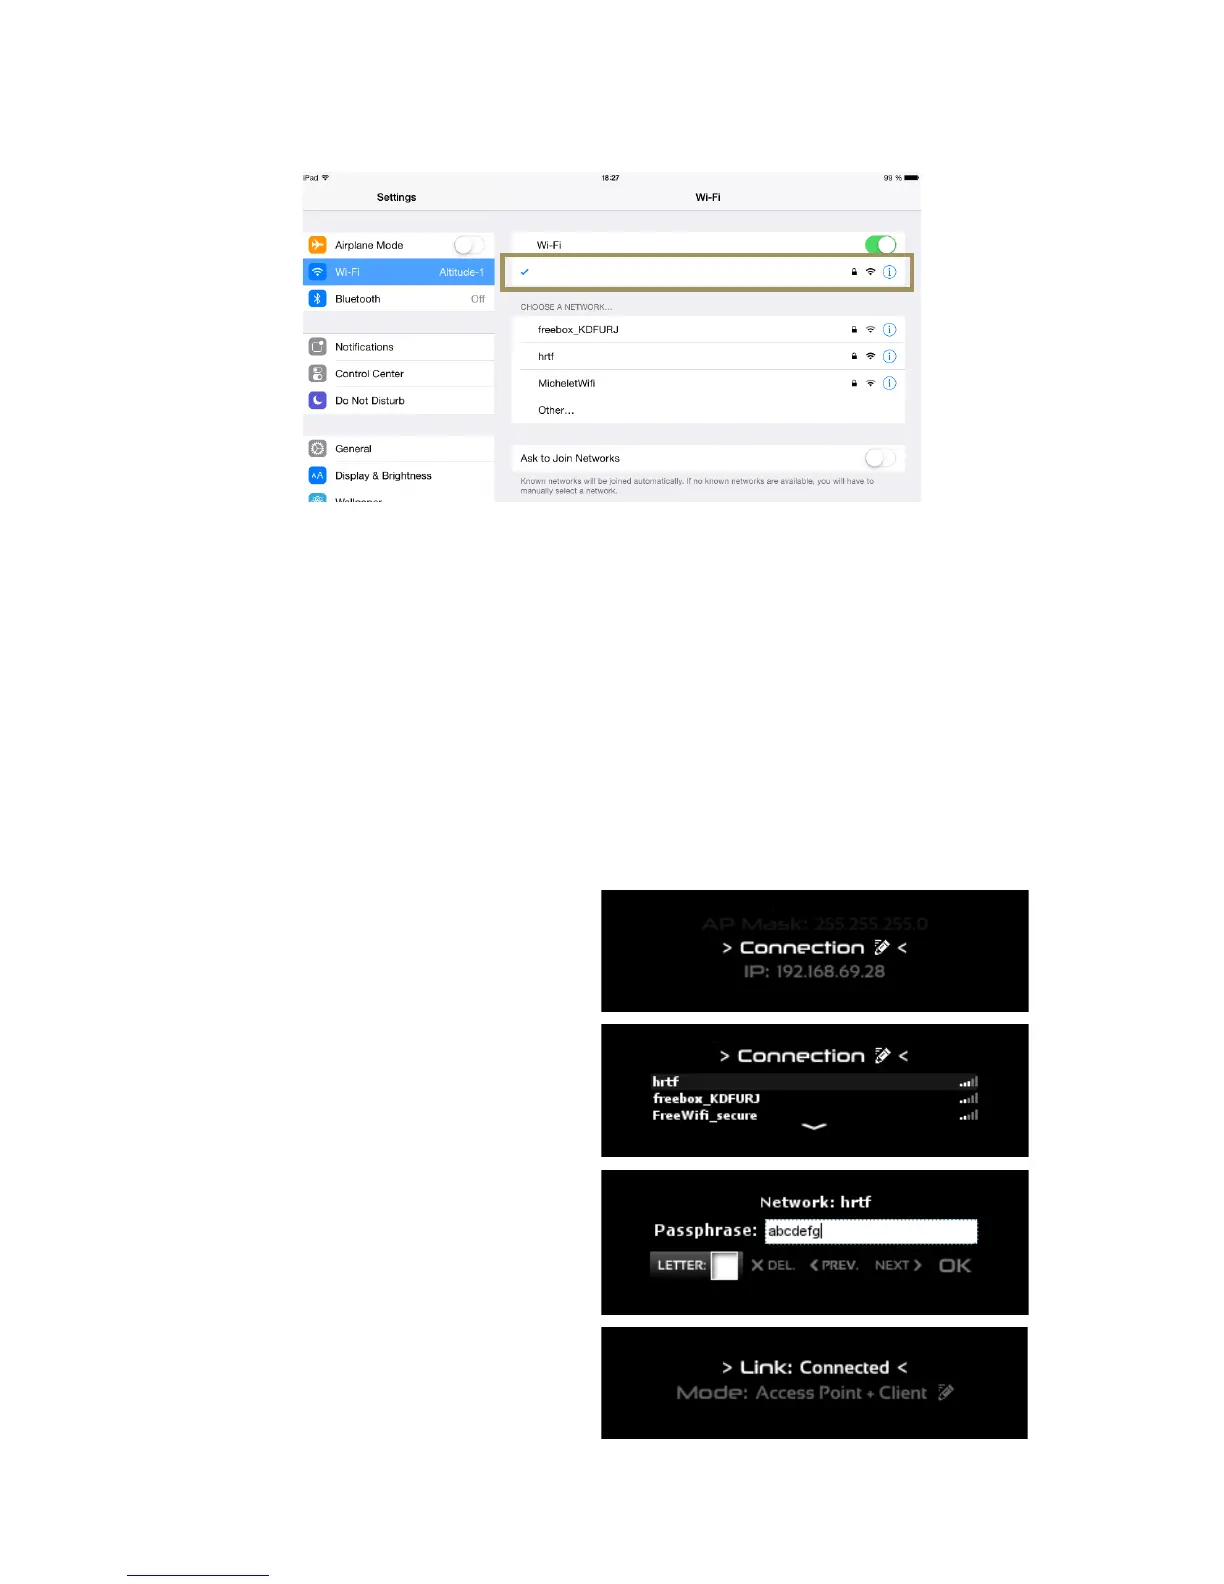
• You should now see the SDP-XX network as the currently connected Wi-Fi network on top of the page and on
the top left side of the page:
Figure#14:#the#iPad#is#now #c o n n e ct ed #t o #th e #SDP- XX#W i-Fi#network#
Once you are connected, you can move to the next step of the procedure: configure and connect your VNC client to the
SDP-75’s VNC server.
2.2.3.2 OPTION B: THE SDP-75 JOINS YOUR EXISTING WI-FI
NETWORK
The most flexible network option for the final installation of your SDP-75 is to connect it as a Wi-Fi client to your existing
Wi-Fi network. This will allow you to connect to the SDP-75
and to the Internet simultaneously, without switching back
and forth between two different Wi-Fi networks.
To connect the SDP-75 to an existing Wi-Fi network
you need to use the front panel menus to change the
Wi-Fi settings:
1. Click on the menu button on the front
panel.
2. Select the Setup > Network > Wi-Fi page.
3. Turn the Source/Item selection knob to
scroll through the settings until you see
the Connection item:
4. Push the Select button. This will display
the list of available Wi-Fi networks:
5. Scroll to the name of the Wi-Fi network
you want to join, and press the Select
button. If you select an encrypted
Access Point, you will be asked for the
passphrase.
6. Enter the passphrase and press the OK
button:
7. You should now see that the Wi-Fi
status has changed to “Link:
Connected”:
This means that your SDP-75 is now connected to
the chosen Wi-Fi network.