Mini-Crawler Crane M A E D A Section 4 – FLY-JIB INSTALLATION AND STOWAGE
1/2019 MC405C-3 4-165
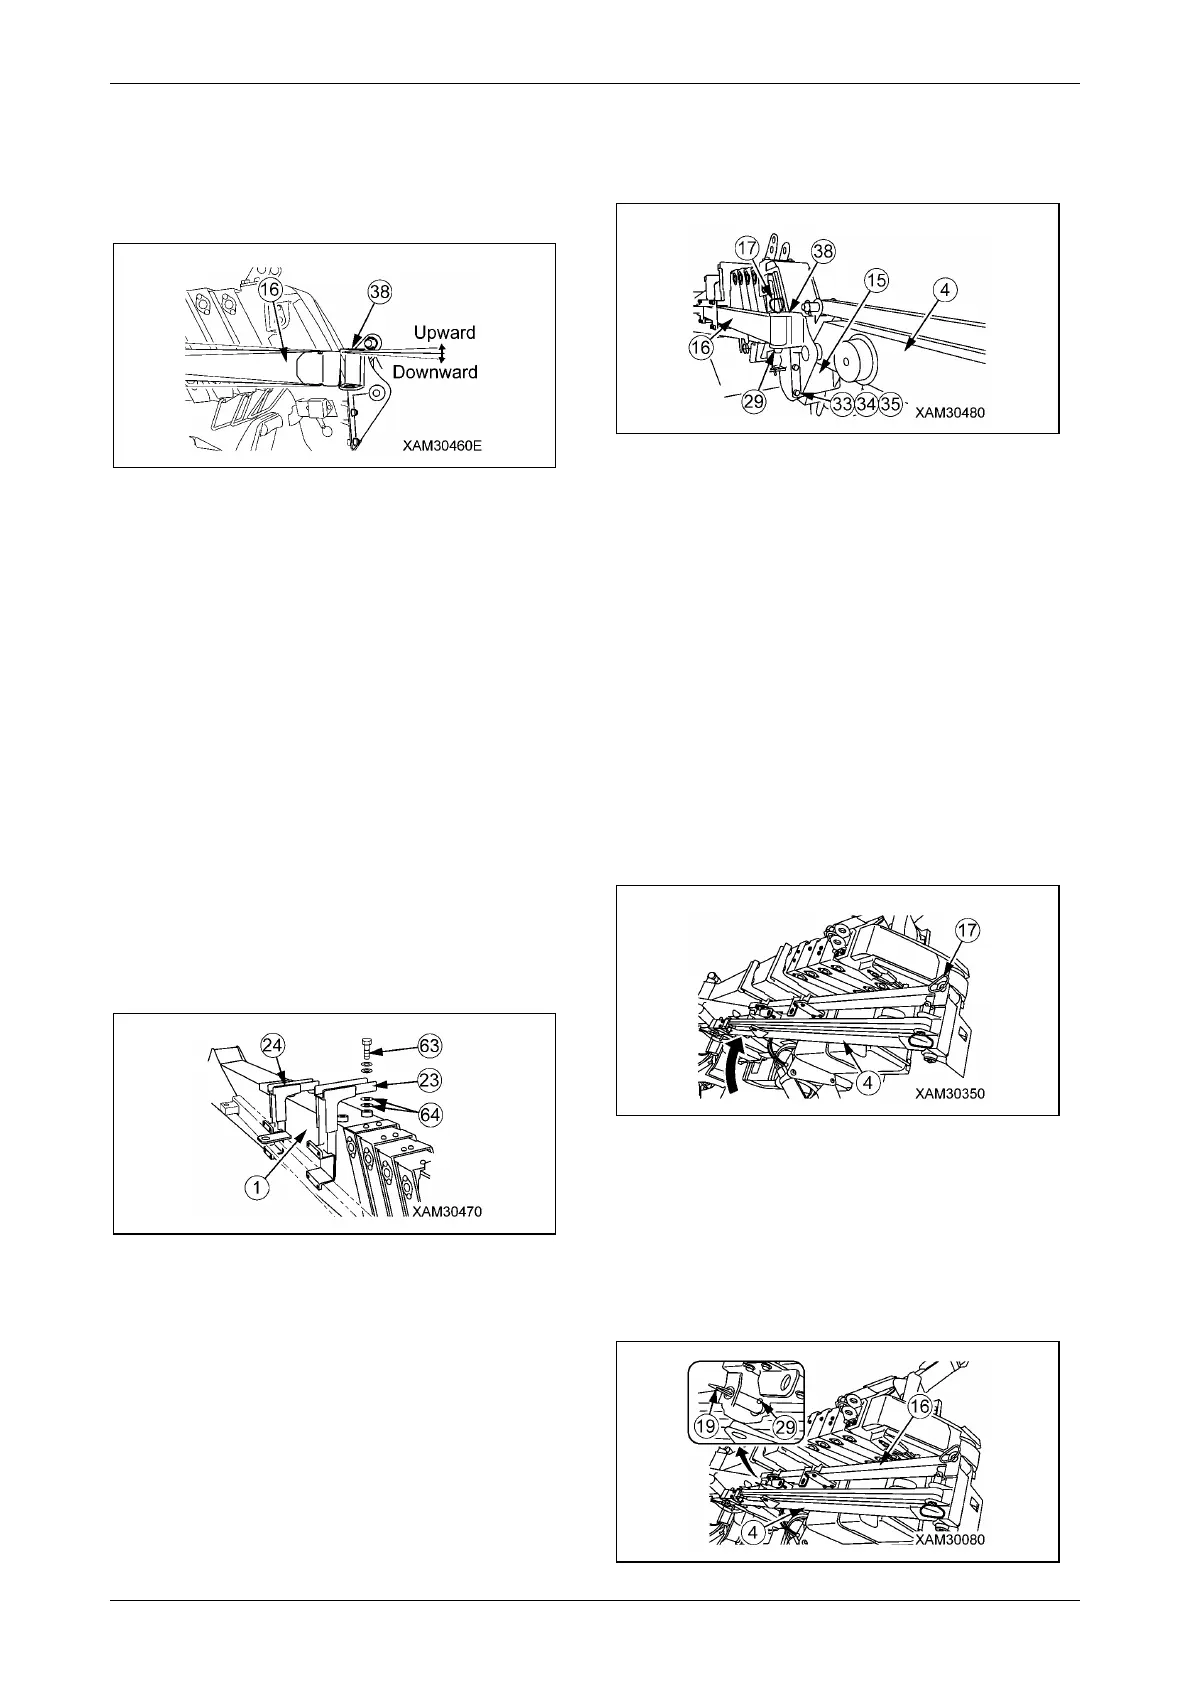
2. In case storage bar (16) face to downwards
toward bracket (38), it indicate bar guide A
(23) is on a lower position than bar guide B
(24).
Fig. 4-496
METHOD to REGULATE THE HEIGHT of
STORAGE BAR
• Basically adjust the number of washer on
bar guide side A (23) to regulate the height
of storage bar (16).
1. After confirmation, in the case applicable
to the above section 1, remove attachment
bolt (63) on the bar guide A (23) side,
reduce the number of washers (64)
between main boom (1) and bar guide A
(23).
2. After confirmation, in the case applicable
to the above section 2, remove attachment
bolt (63) on the bar guide A (23) side,
increase the number of washers (64)
between main boom (1) and bar guide A
(23).
Fig. 4-497
9. Tighten two attachment bolts (63) and plural
washers (64) on bar guide A (23).
10. Insert storage bar (16) into bracket (38) to
put the hole position together.
11. Insert position pin (17) into bracket (38), then
fix position pin (17) (length: 150mm) firmly
by lynch-pin (29).
Fig. 4-498
WARNING! Always insert position pin (17)
from upper side. If you insert it from
underside, position pin (17) can drop out
resulting in a serious hazard.
12. Remove four attachment bolts (33)
(M12x30L), four washers (34) and four nuts
(35) from Fly-jib bracket (15).
13. Operate crane to lower the hook, then
remove No.1 Fly-jib (4) hanging wire rope.
14. Lift up No.1 Fly-jib (4) tip to take it out from
stow stay, then slew it around the position
pin (17) (length: 150mm) to the main boom
side.
Fig. 4-499
15. Put the hole on storage bar (16) and bracket
on the head of No.1 Fly-jib (4) together.
16. Insert position pin (19) into the hole on the
bracket on the head of No.1 Fly-jib (4), then
fix position pin (19) securely with the lynch-
pin (29).
Fig. 4-500