7-12 (E)
7. Operation Method
LH71A / LH72
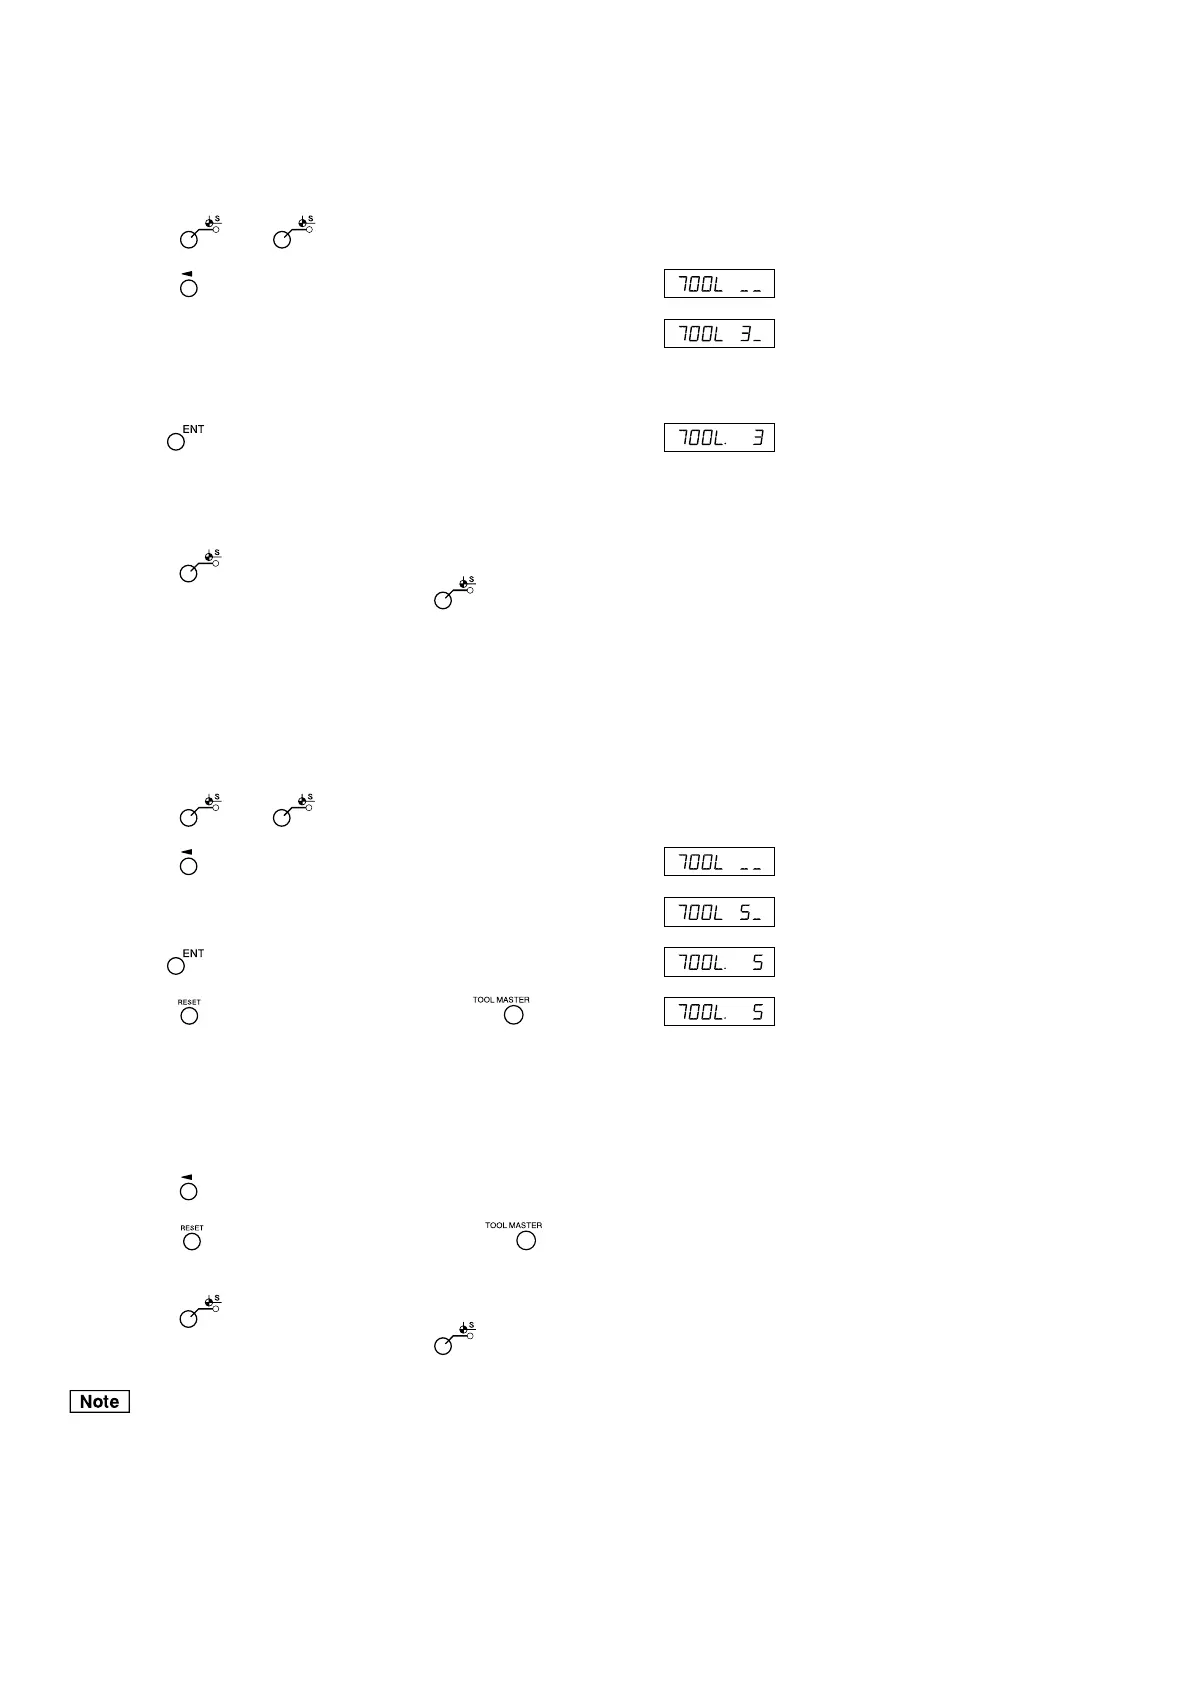
<Selecting a tool No.> Display
1 Press the key. ( lamp lights up)
2 Press the key of the third axis.
3 Enter the tool No. to be selected.
No. 1: tool master
No. 2~: tool offset
4 Use the key to finalize the setting.
The current value becomes the value of the tool offset.
In the case of the tool offset, a value resulting from the addition
of each tool offset to the tool master is displayed.
5 Press the key.
The system exits the datum point mode. ( lamp goes out)
<Switching the tool master>
When replacing the tool in position No. 1 due to wear, you can
change the master to another No.
Display
1 Press the key. ( lamp lights up)
2 Press the key of the third axis.
3 Enter the No. to be made into the master.
4 Use the key to finalize the setting.
5 Press the key of the third axis (LH71A) or key (LH72).
The decimal point lights, and No. 5 becomes the master.
6 Replace the tool in position No. 1.
7 Set the tool offset in position No. 1.
8 Press the key for the third axis, and select No. 1.
9 Press the key of the third axis (LH71A) or key
(LH72), and return the master to No. 1.
10
Press the key.
The system exits the datum point mode. ( lamp goes out)
ABS indicator remains on during datum point mode.
The tool master (No. 1) is used as the basis of linear compensation.
(Position of tool master value 0 = compensation amount 0)
(Example: No. 3)
(Example: No. 5)