CLEAN THE DUST FILTER
Applicable only to 2000 cm
3
units and 100 cm
3
high pressure units.
Dust from the sample may be carried into the instrument plumbing. A dust filter protects the valves,
minimizing valve leaks.
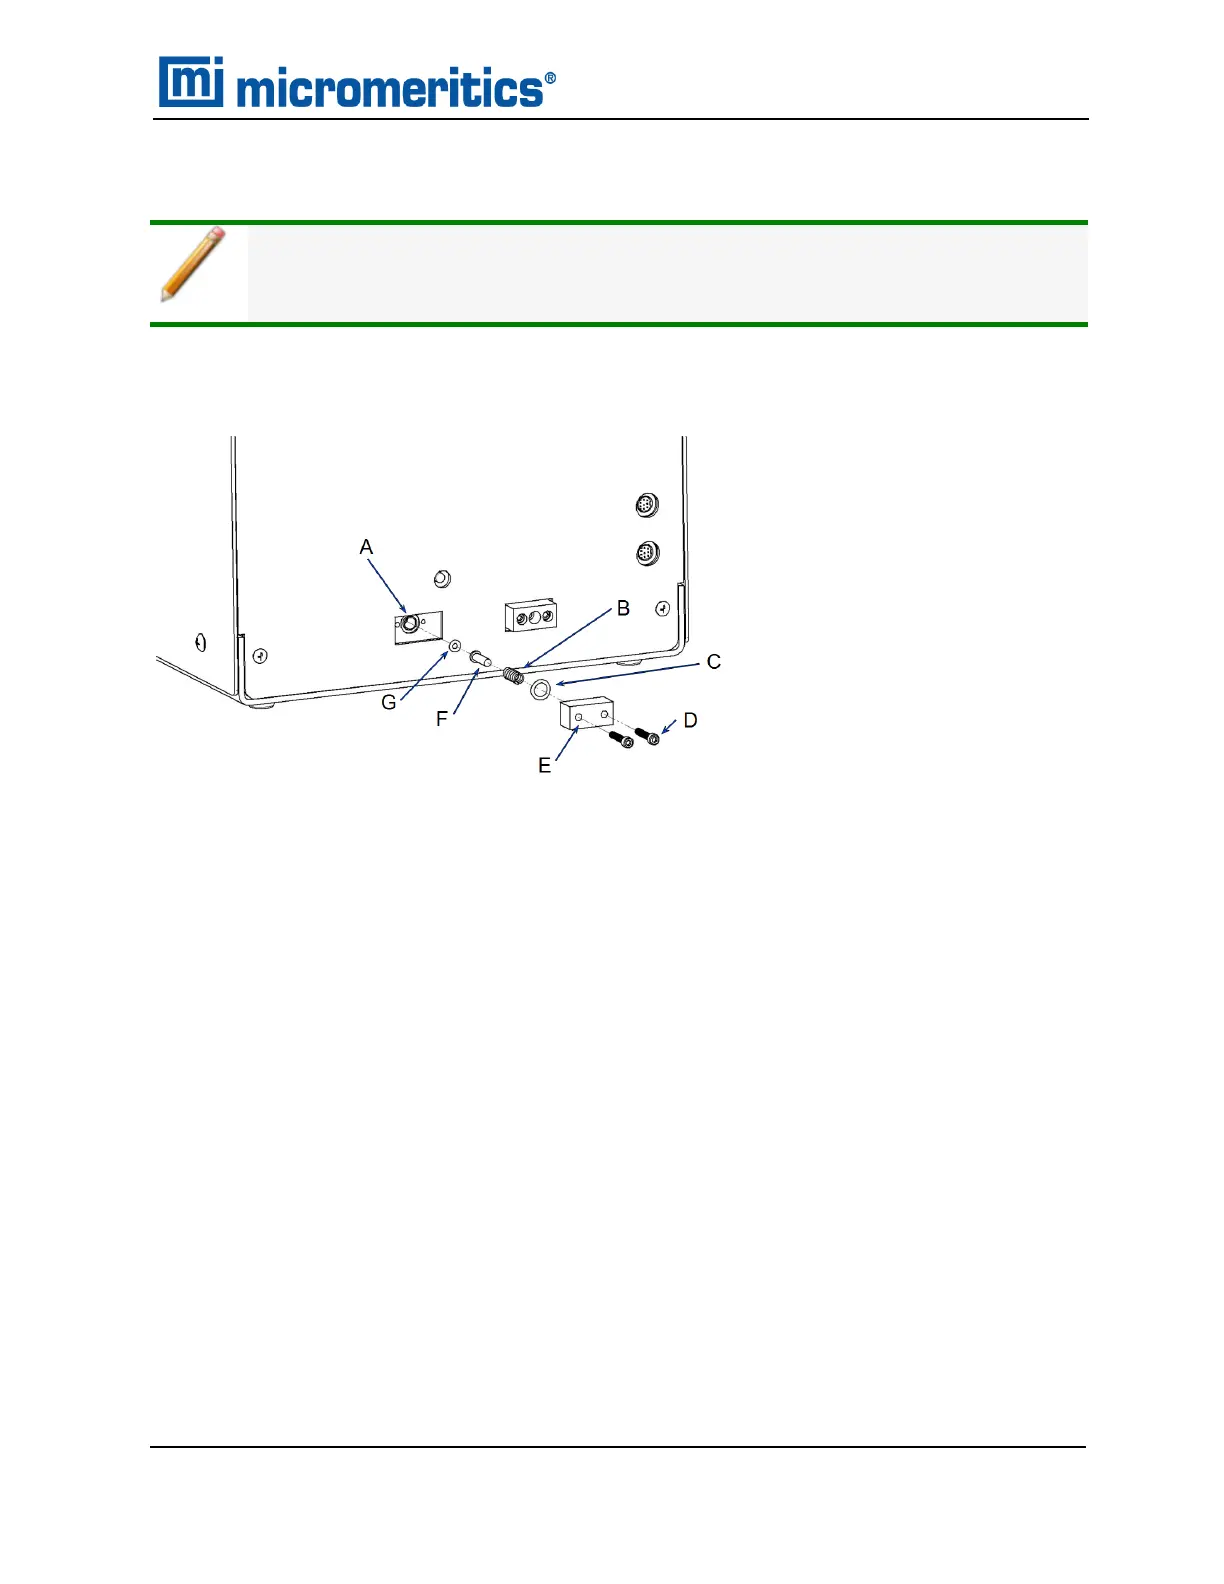
A. Filter port
B. Spring
C. O-ring (size 011)
D. Retaining screws
E. Cover plate
F. Filter
G. O-ring (size 006)
1. Press Alt+1 to enter Manual mode.
2. Close the Fill valve. Open the Expansion and Vent valves to ensure that the system is not
under pressure.
3. At the lower rear of the instrument, remove the two screws which hold the dust filter cover and
remove the cover plate.
4. Remove the spring and the filter. Remove the small O-ring inside the filter port.
5. Clean all parts with alcohol. The filter may require sonication to dislodge dust. It should be
replaced if it becomes severely clogged.
6. Inspect the O-rings before re-assembly. A very thin coating of vacuum grease may be used.
7. Re-assemble.
8. Check for leaks:
a. Fill the system with gas.
b. Open Expansion valve.
c. Check for leaks by applying a leak detecting liquid around the dust filter cover.
Clean the Dust Filter
AccuPyc II 1345 Operator Manual
134-42851-01 (Rev A) — Jan 2021
12 - 9
 Loading...


