64 HD96-24-CC-TP User Manual
In the Custom Surface Layout Presets page you can also touch the name area to edit its title.
There is the option to Cancel Changes or Store Changes & Save.
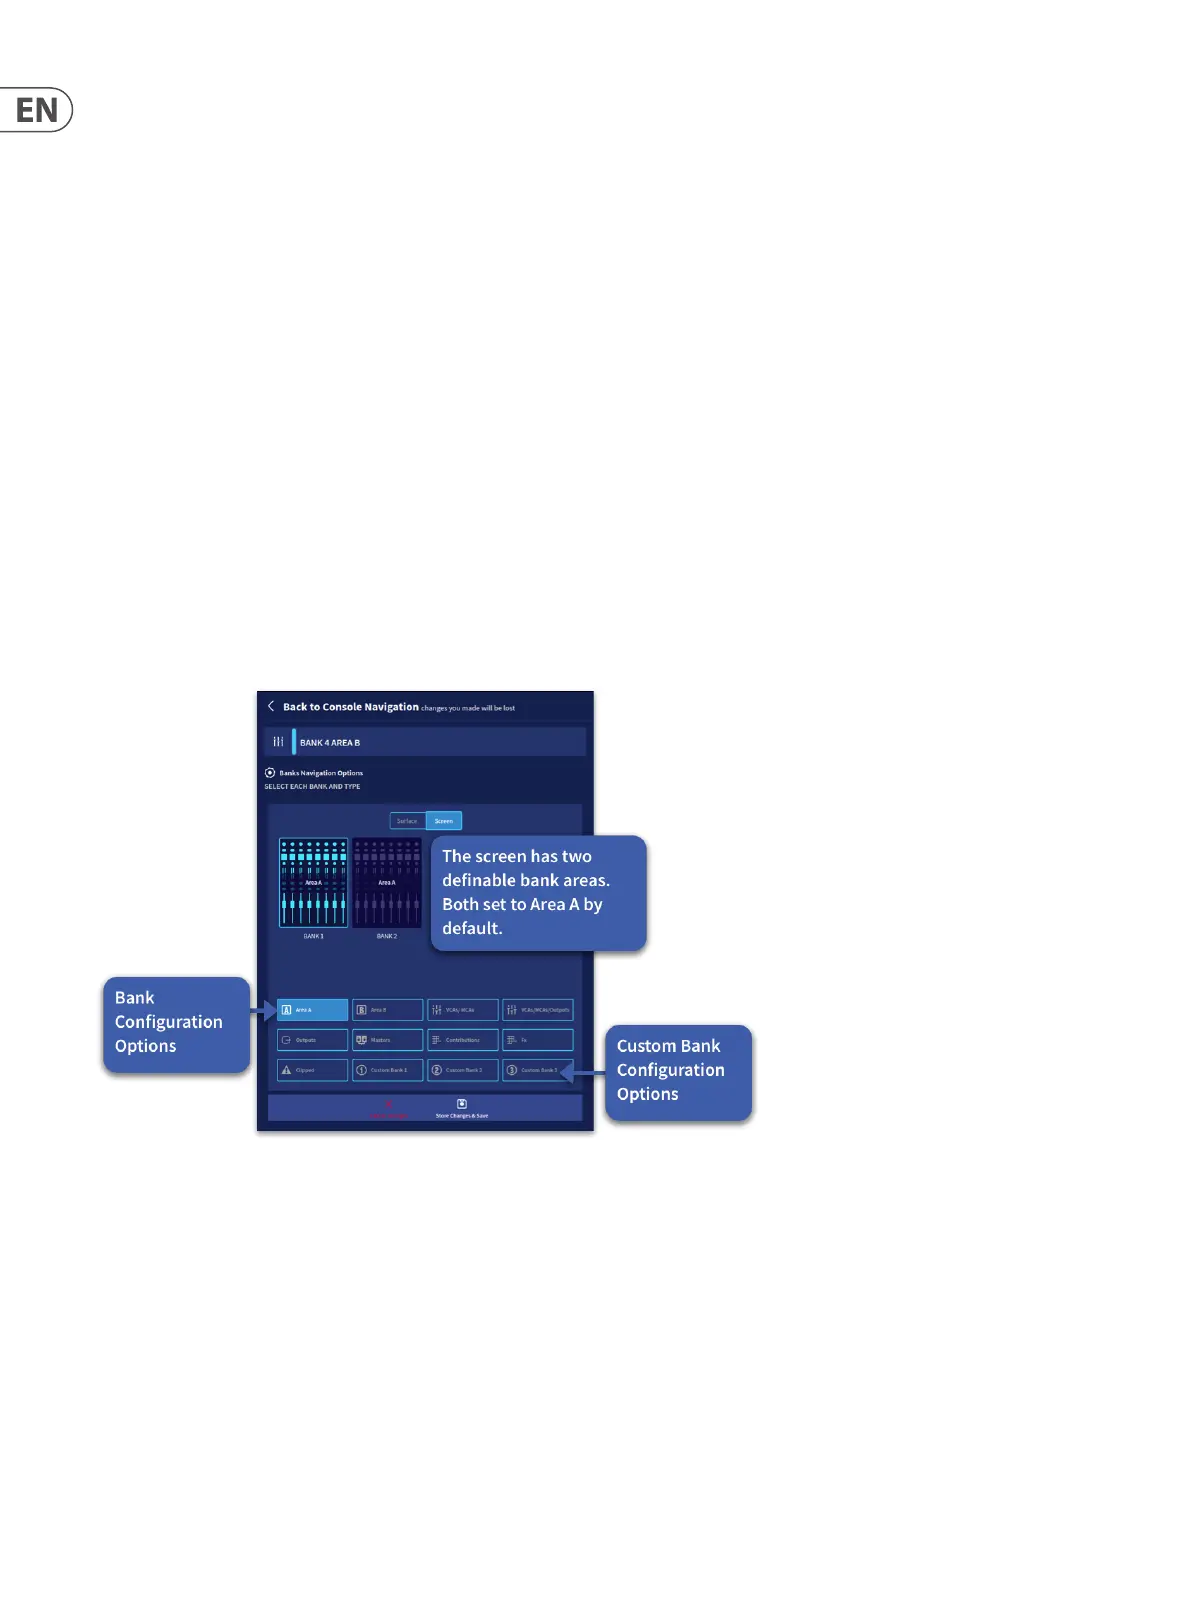
Surface or Screen Setup lets you choose which part of the console you would like to congure. By default, the screen defaults to Area A.
In Bank selection you can freely pick and choose which way you would like the banks to operate. There are 7 Congurable Options plus customised banks options.
1. Area A
2. VCAs
3. VCAs/Outputs
4. Outputs
5. Masters
6. Contributions
7. FX.
Tip – A contribution is any channel type that has already been sent to an output bus i.e. Input to an Aux or Aux to a Matrix.
There are 3 custom bank layers that can contain any combination of inputs, outputs or VCAs which can then be assigned to any bank from the Custom Bank Slots on
from the left-hand side up to can be lled in one Custom Bank. Simply select and long hold the image of the function you wish to assign to a custom bank and drag
to the position you wish it to be. Custom banks automatically link. For example, if you add 8 channels to Custom Bank 1 in Bank 1 and 8 channels to Custom Bank 1 in
Bank 2. Those 16 channels will be displayed on the surface in banks 1 and 2.
In the Bank/Screen Setup page choosing Screen Selection lets you edit the layout of the 2 banks that can be displayed at any one time on the console screen. The same
7 bank options plus 3 Custom Banks, as found in Bank Selection are available for you to use. However, in normal operation, it is recommended that the screen GUI is set
to Area A so that any selected inputs or outputs can be automatically viewed and edited via the touch screen.
 Loading...