63 HD96-24-CC-TP User Manual
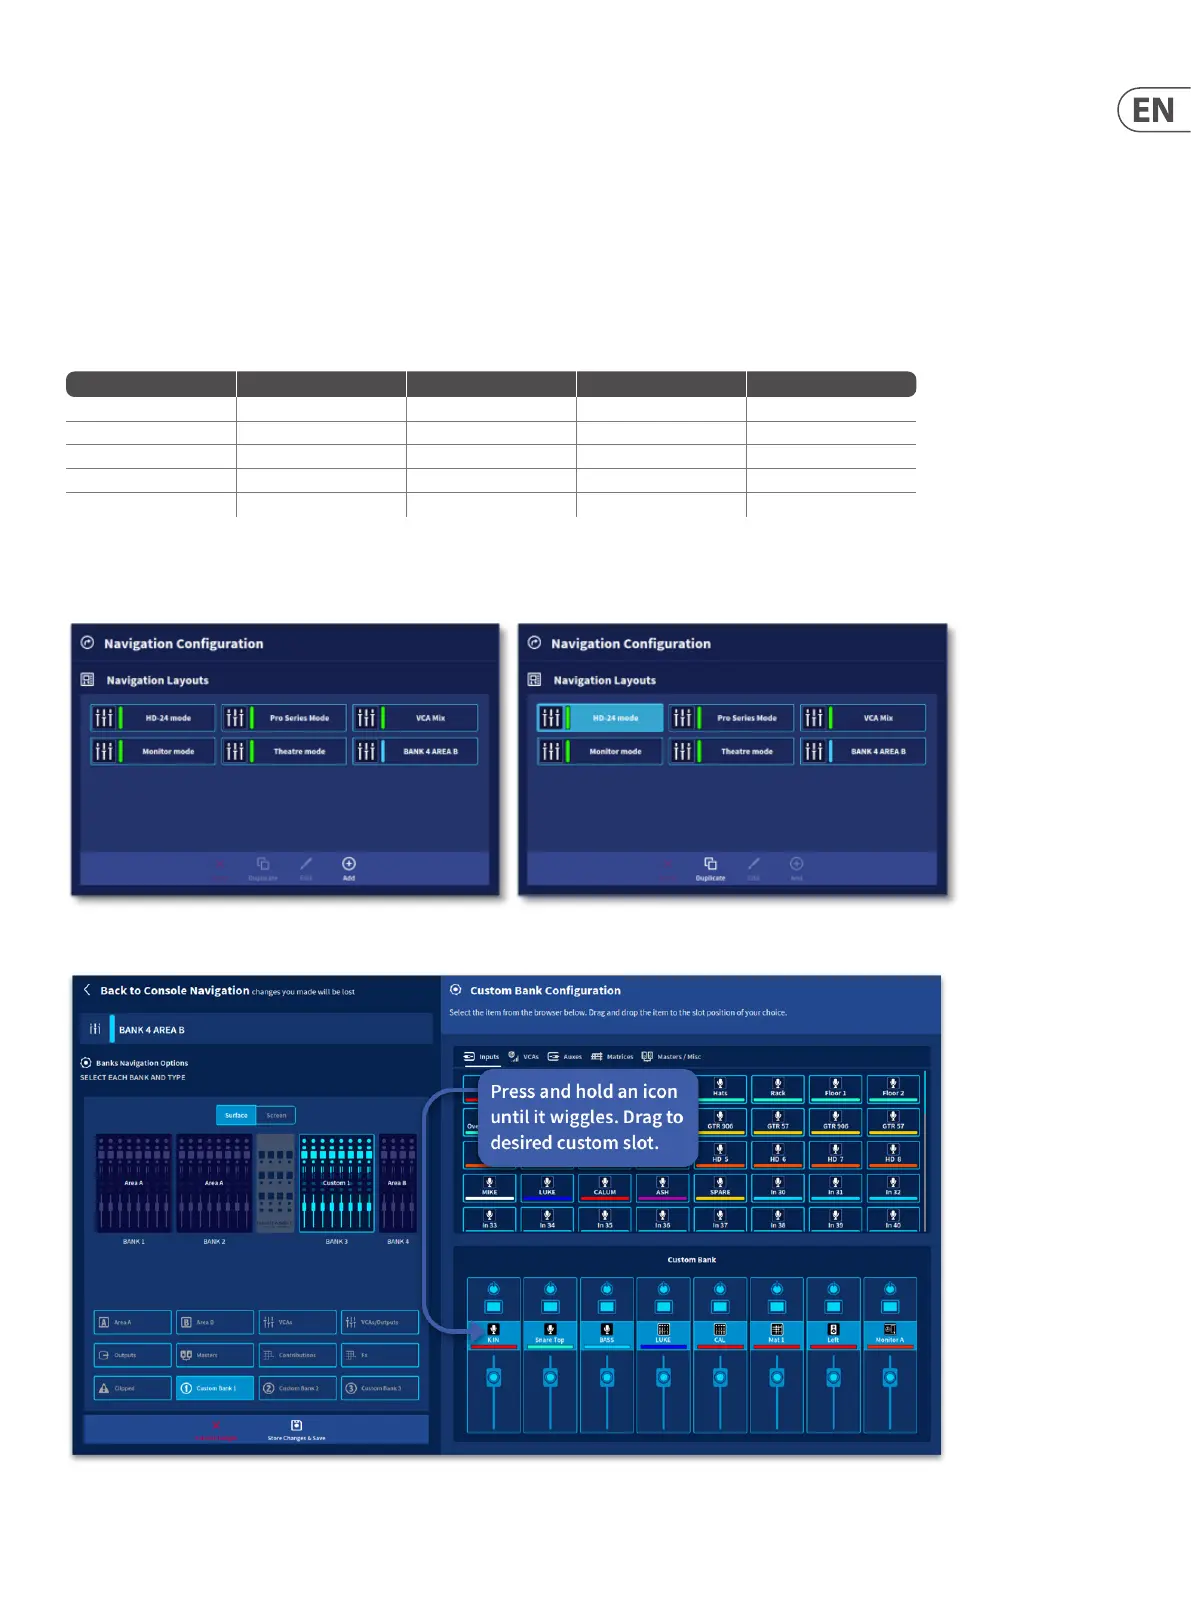
8. There are 3 areas into which layout presets can be assigned. Press the layout icon preset you wish to use, then drag to one of the 3 positions available.
9. Each workow can be assigned to one surface layout only by pressing the associated button in each of the 3-surface layouts. A blue highlighted button shows
which workow will use which surface layout. For example, in the example above, selecting the Home, Front Of House or Automation workows will display paths
using Pro Series Mode layout; Console View will use a user-congurable custom layout, and Single Channel will use the Theatre Mode.
10. User layouts can also be edited when in use by pressing the Edit button.
Tip: Area A assigns inputs or outputs chosen via the GUI or surface to be displayed on both the surface faders and GUI with one touch and give the most
intuitive operation.
Note: Custom surface layouts are automatically stored to the mCloud to be freely used in other shows.
There are 5 standard Workow options which display the following paths on each of the 4 fader banks:
Creating a Custom Layout
To create your own custom layout press, + Add or select an existing layout to Duplicate the selected layout.
Selecting a custom layout and pressing edit will open the Surface/Screen Layout Preview page below.
Workflow Bank 1 Bank 2 Bank 3 Bank 4
Pro Series Mode Area A Area A VCA/Outputs Masters
HD24 Mode Area A Area A Area A Masters
Monitor Mode Area A Area A Outputs Masters
Theatre Mode Area A VCAs Outputs Masters
VCA Mix Area A Area A VCAs VCAs
 Loading...