59 HD96-24-CC-TP User Manual
Navigation via Global Assignable Shortcuts area
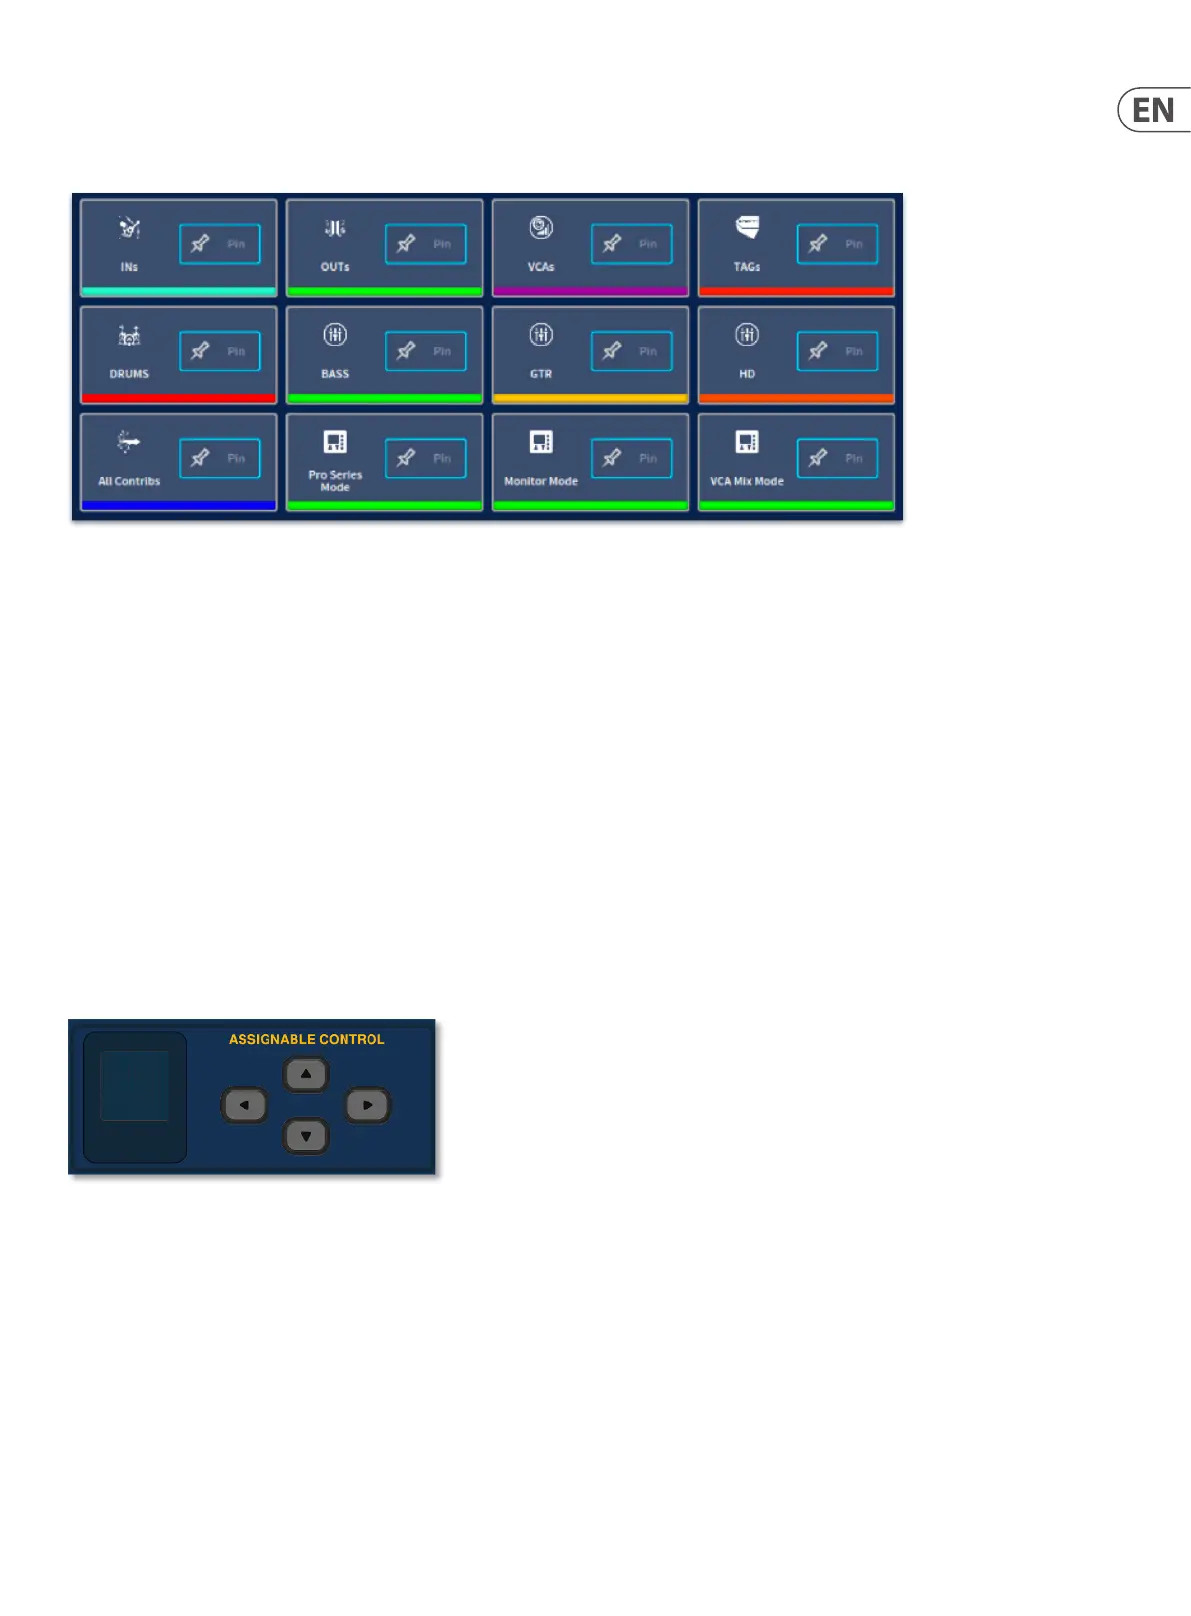
The Global Assignable Shortcuts in its basic form allows various groups of channels to be called to the surface, GUI faders and channel overview area. There are many
dierent options of how inputs, outputs and VCAs can be organised and recalled with a few button presses. This is fully customisable in the Navigation page.
The default options based on Pro Series Mode layout (Bank 1&2 Area A, Bank 3 VCA/Outputs and Bank 4 Masters) are:
• • All – Pressing the ‘All’ Select button cycles through every input or output of the desk bringing them to the rst 2 banks of the control surface and displaying them
on the GUI. The following buttons function in the same way but bring dierent types of paths to the surface.
• • INs – Cycles through all the inputs on the rst 2 banks of the surface.
• • OUTs – Cycles through all the outputs on the 3rd bank of the surface.
• • VCAs – Cycles through all the VCAs on the 3rd bank of the surface.
• • TAGs – Cycles through all the currently selected TAGs on the rst 2 banks of the surface.
• • System Tags – Cycles through all the currently selected System TAGs on the rst 2 banks of the surface.
• • All Contribs – Cycles through all the current contributions on the Area A of the surface.
Tip: A contribution is any channel type that has already been sent to an output bus. i.e. Input to an Aux or Aux to a Matrix.
The Global Assignable Shortcuts area also gives you access to many powerful functions with one button press such as ring scenes, entering ip mode or recalling POP
groups. Macro functions such as changing the console layout mode or eect Tap Tempo control can also be deployed here to give the engineer vital tools, quickly to
hand. Imagine the power of being able to instantly swap the vocal level, compression setting and EQ of two singers if they switch mics mid show, all with one button!
Navigation via Pinned Fader and Assignable Controls
It is possible to pin a channel or path anywhere on the surface, so that the path remains xed to a certain position despite swapping layers. For example, keeping your
lead vocal close to hand or a crucial aux send.
How to pin a path:
First, using the Assignable Controls arrow buttons, navigate to Find/Pin. Then the assignable control buttons under the rotary can be used to select the corresponding
channel or path that you wish to pin to the surface. Use the rotary control to select any channel you wish to pin in that position. When the channel pin is activated the
chosen path will remain in place regardless of any bank or channel changes from either the surface or GUI and a pin icon will be displayed by the path name on the LCD
fader screen.
To remove a pin simply press the associated assignable button again.
For more information on these powerful functions refer to Chapter 18: Assignable Controls and Global Assignable Shortcuts.
 Loading...