ADJUSTMENT
4 - 2
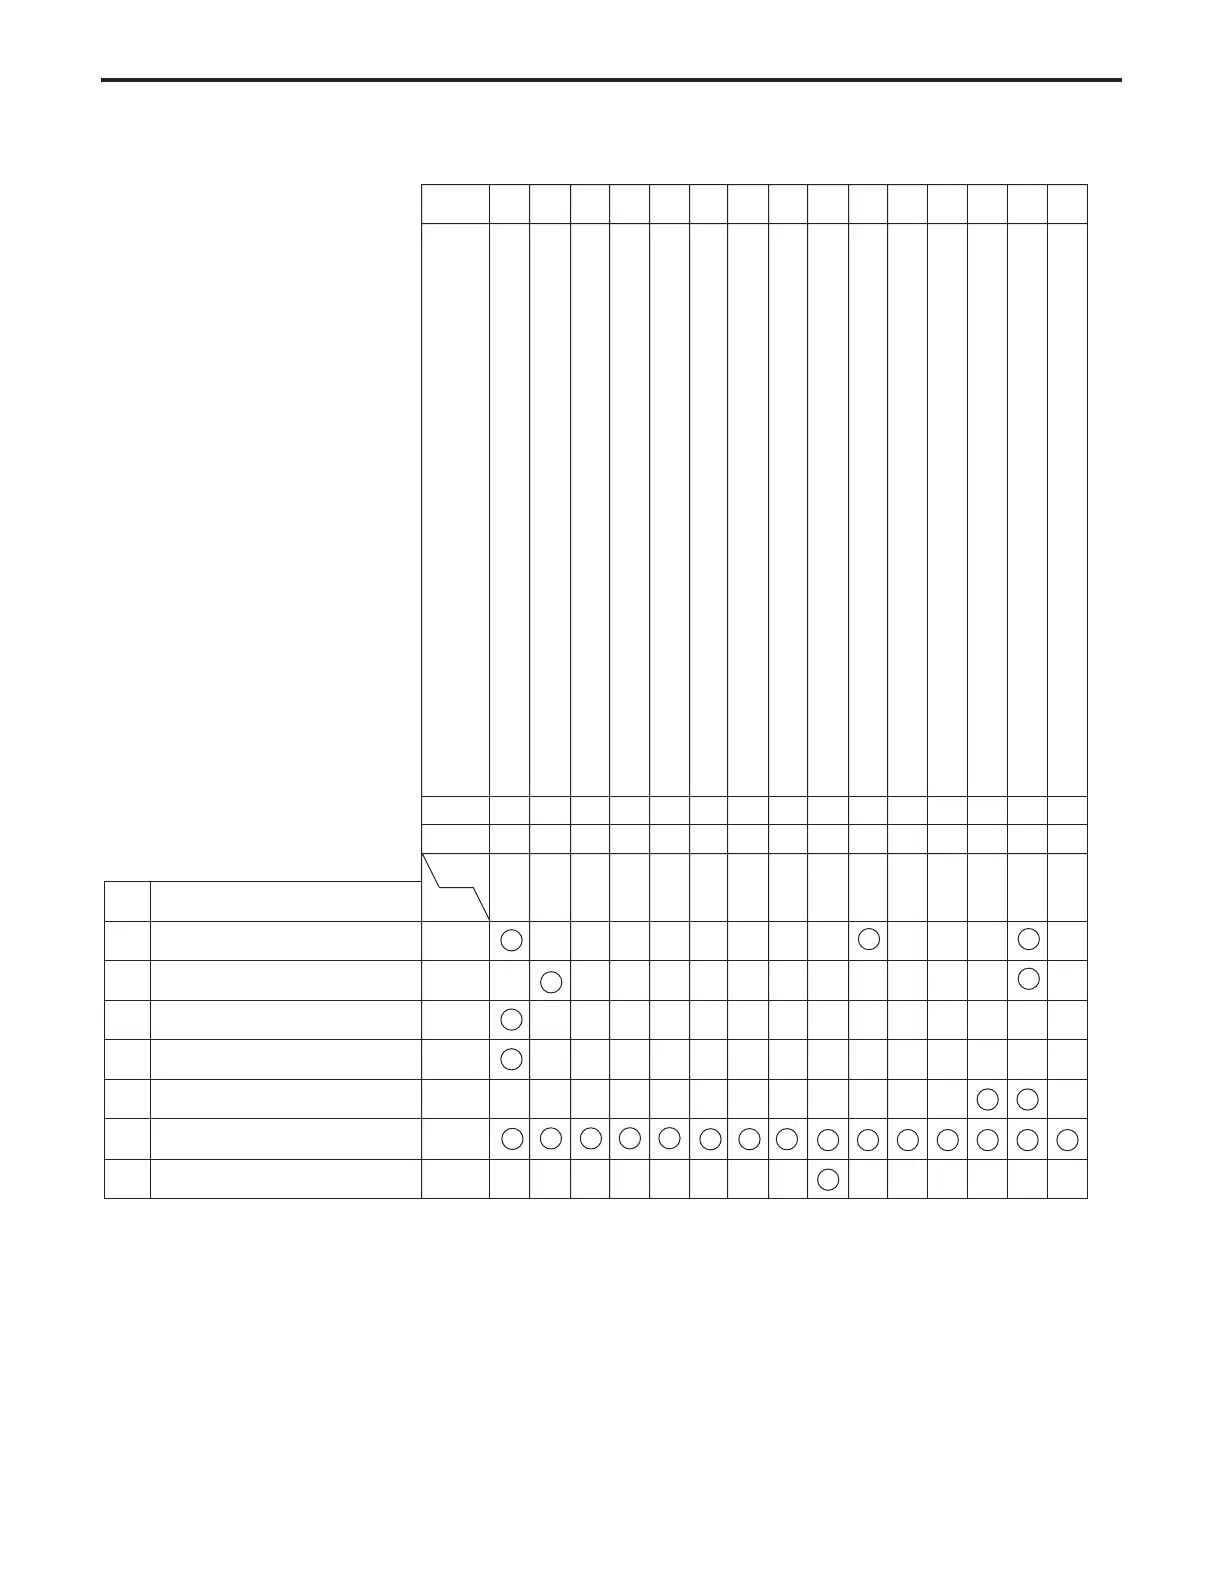
No. Part Name
1 Drum New
2 Developer New
3 Charging control plate New
4 High voltage unit 1 New
5 Writing unit
6 Memory IC New
7
Change of paper size for tray 2.3and4
—
Page
Condition
Mode
Code
36
1
4-30
47
095
4-57
36
2-2
4-33
36
2-2
4-34
36
2-4
4-35
36
2-1
4-31
36
2-1
4-32
36
2-3
4-34
25
2
4-12
2
1
1
New
Reinstall
• New means replace with a new part and Reinstall means to reinstall the part.
• The circles will have a number when there is an adjustment priority.
Cautions
1. When replacing the control PCB, replace the memory IC with the one used before replacement of the PCB.
2. When replacing the memory IC, replace the developer before performing the L detection adjustment.
Adjustment and setting item
Charging Grid Voltage Adjustment
L Detection Adjustment
Restart timing adjustment (copier system)
Restart timing adjustment (printer system)
Leading edge blank margin adjustment
Vertical magnification adjustment (printer system)
Vertical magnification adjustment (scanner system)
Paper feed loop size adjustment
Tray size setting
Drum count reset
PM cycle set
Horizontal magnification adjustment
Centering adjustment
Laser adjustment (gradation adjustment/sub pitch offset adjustment)
RADF original stop position adjustment
No. 123456789101112131415
47
91
4-63
25
3
4-13
36
2-1
4-32
36
2-6
4-36
36
2-7
4-38
36
2-8
4-40
3
2
ADJUSTMENT-1