FIXING UNIT
2 - S - 2
[3] Disassembly and Re-assembly
1. Removing and Re-installing the Fixing Unit
Caution:
1. Be sure that the power cord has been unplugged
from the power outlet.
2. Do not touch the fixing unit immediately after
turning OFF the main switch because it is very hot
and you may receive a burn. Wait until the fixing
unit has cooled down sufficiently before working
on it.
a. Procedure
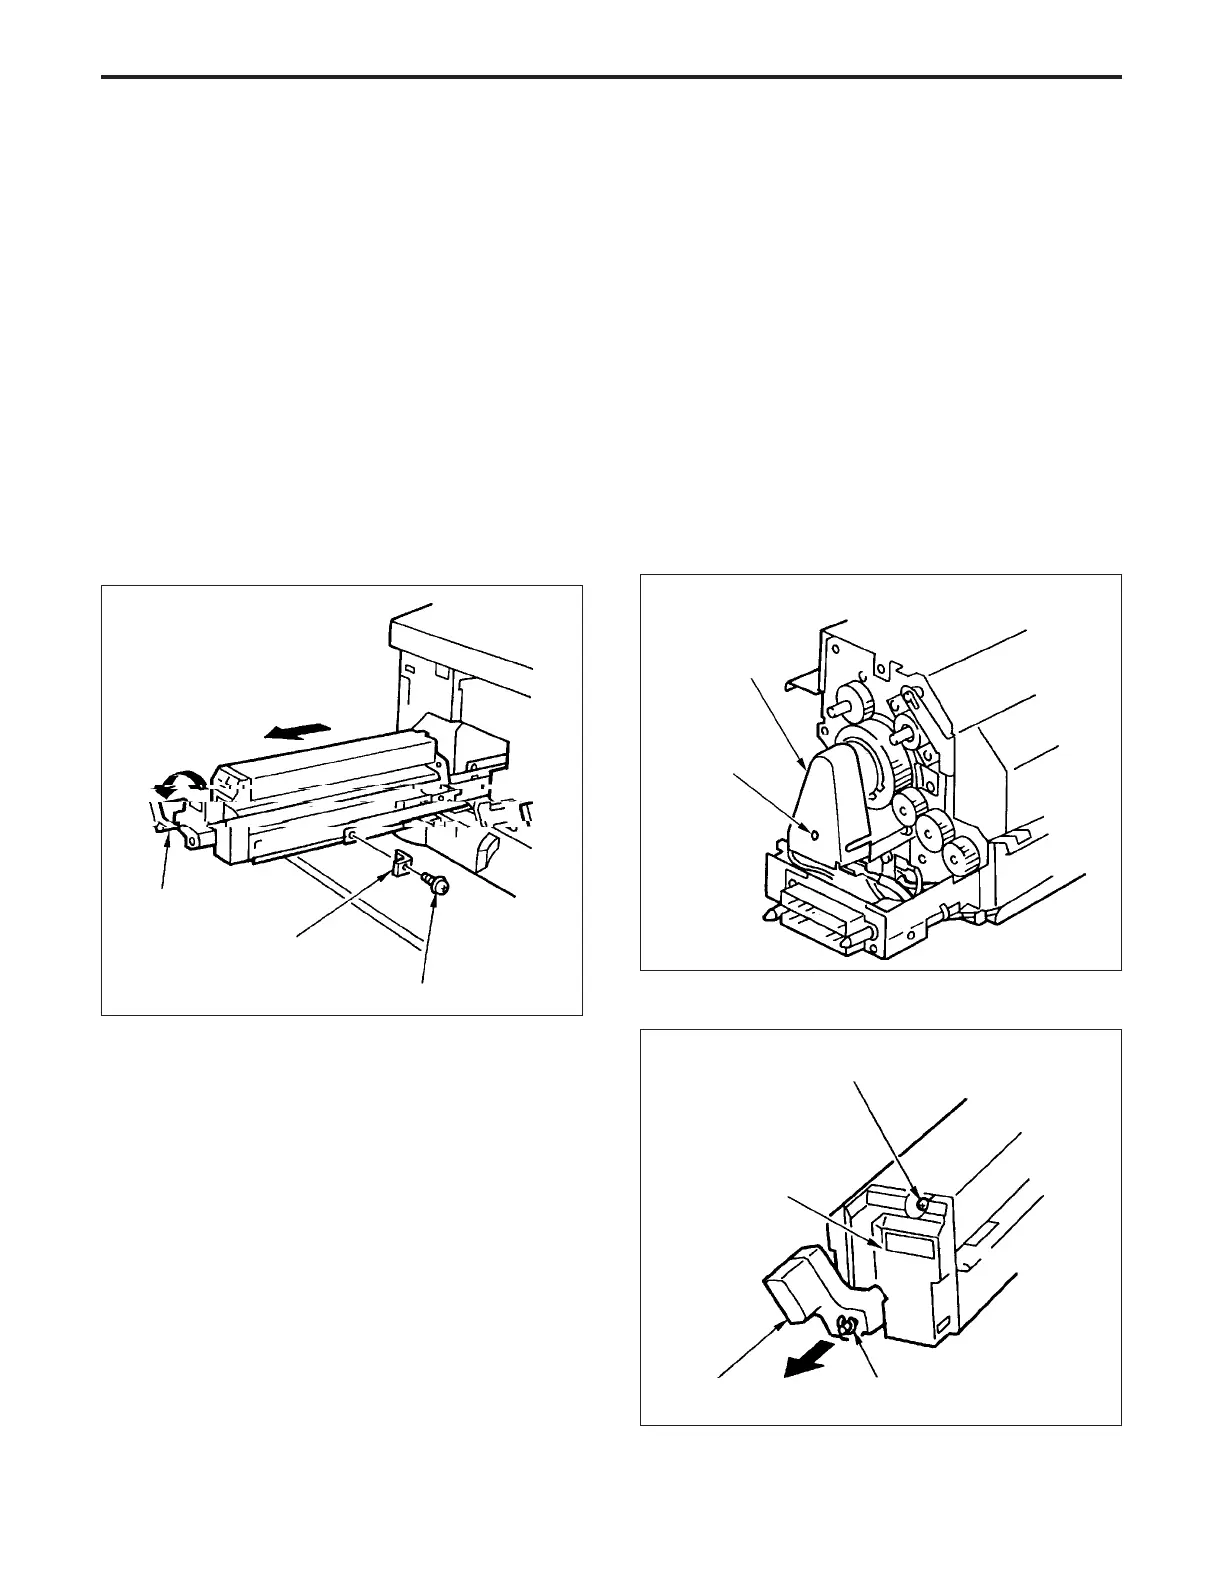
(1) Open the front door, then move the pressure release
lever to the release side.
(2) Grasp the pressure release lever, then pull it out until
it locks.
(3) Remove the set screw, then remove the lock piece.
(4) Pull out the fixing unit further, and remove it.
2. Replacing the Fixing Heater Lamp (upper)
Caution: Do not touch the fixing heater lamp (upper) with
the bare hands.
Caution:
1. Install the fixing heater lamp with the makers mark
facing the drive gear side.
2. Avoid touching the inside of roller with the fixing heater
lamp .
3. When installing the fixing heater lamp, ensure that the
ends of the lamp are facing the correct direction.
4. After replacing the fixing heater lamp, check to ensure
that the ends of the lamp are properly inserted in the
terminals.
a. Procedure
(1) Remove the fixing unit.
(2) Remove the set screw, then remove the lamp cover.
Pressure release lever
Lock piece
Set screw
(5) Re-install the fixing unit in the opposite sequence to
removal.
Set screw
Lamp cover
(3) Remove the front cover.
E ring
Set screw
Pressure release lever
Fixing cover