DIAGNOSTICS
4 - 36
Reference point
Performs the centering adjust-
ment for all trays/By-pass.
Ad
ust b
the ori
inal scale plate.
Adjust ADU centering
Reading
Writing
Trays 1 – 5/By-pass
ADU
(2) (1) (3)
Centering
If the 36 mode menu screen is opened, then
2
Timing Adjust-
ment selected, the timing adjustment menu screen will ap-
pear.
Open this screen, then select
6
Centering Adjustment.
[Centering adjustment screen]
The centering adjustment screen has the following 12 adjust-
ment items. Select an item by pressing the
Next adjustment
key.
* Writing (for collective adjustment)
* Tray 1 (Upper tray)
* Tray 2 (Lower tray)
* Tray 3 (1000 tray)
* Tray 4 (1500 tray)
* Tray 5 (Large capacity tray)
* By-pass
* Side 2: collective
* Side 2: Large (ADU : for A3/11" × 17)
* Side 2: Middle(ADU : for 8
1
/
2
" × 11"R, A4R)
* Side 2: Small (ADU : for 8
1
/
2
" × 11", A4)
* Side 2: Very small (ADU : for A5R Europe only)
Centering adjustment (Writing)
+0 +0 (-32 ~ +32) 1step = 0.1mm
[13] Centering Adjustment
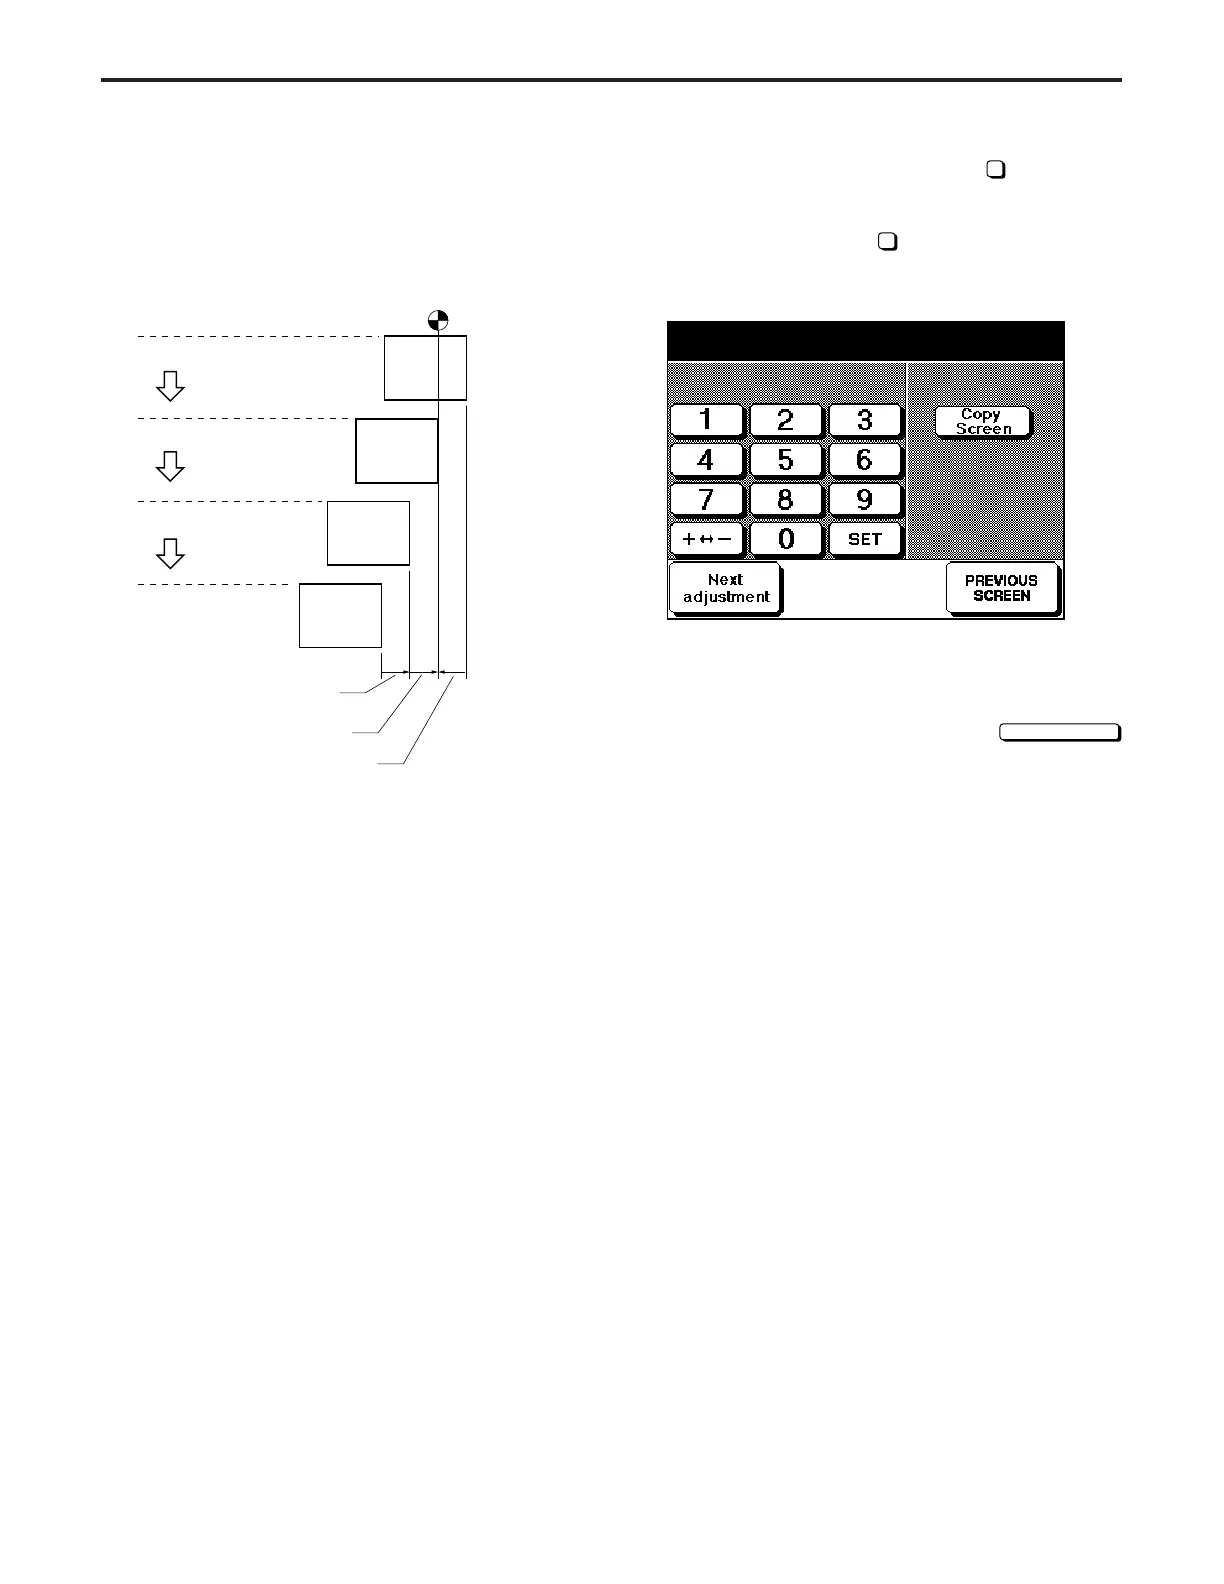
Relation between copy process and Centering
adjustment
When adjusting, be sure to obey the following procedures.
(1) Centering adjustment for all trays
Performs the centering adjustment for all trays/By-pass by
using laser beam writing position to the drum as reference.
(2) ADU centering adjustment
Performs the centering adjustment for the back side for the
front copies adjusted in item (1).
(3) Original position centering adjustment
Adjust the position of the original scale plate by making one
side copy.
Due to this, alignment of the reading portion and writing
portion is ended and the series of centering adjustments is
completed.
DIAGNOSTICS-1