2 - I - 4
DEVELOPING UNIT
[4] M3 (developing drive) Control
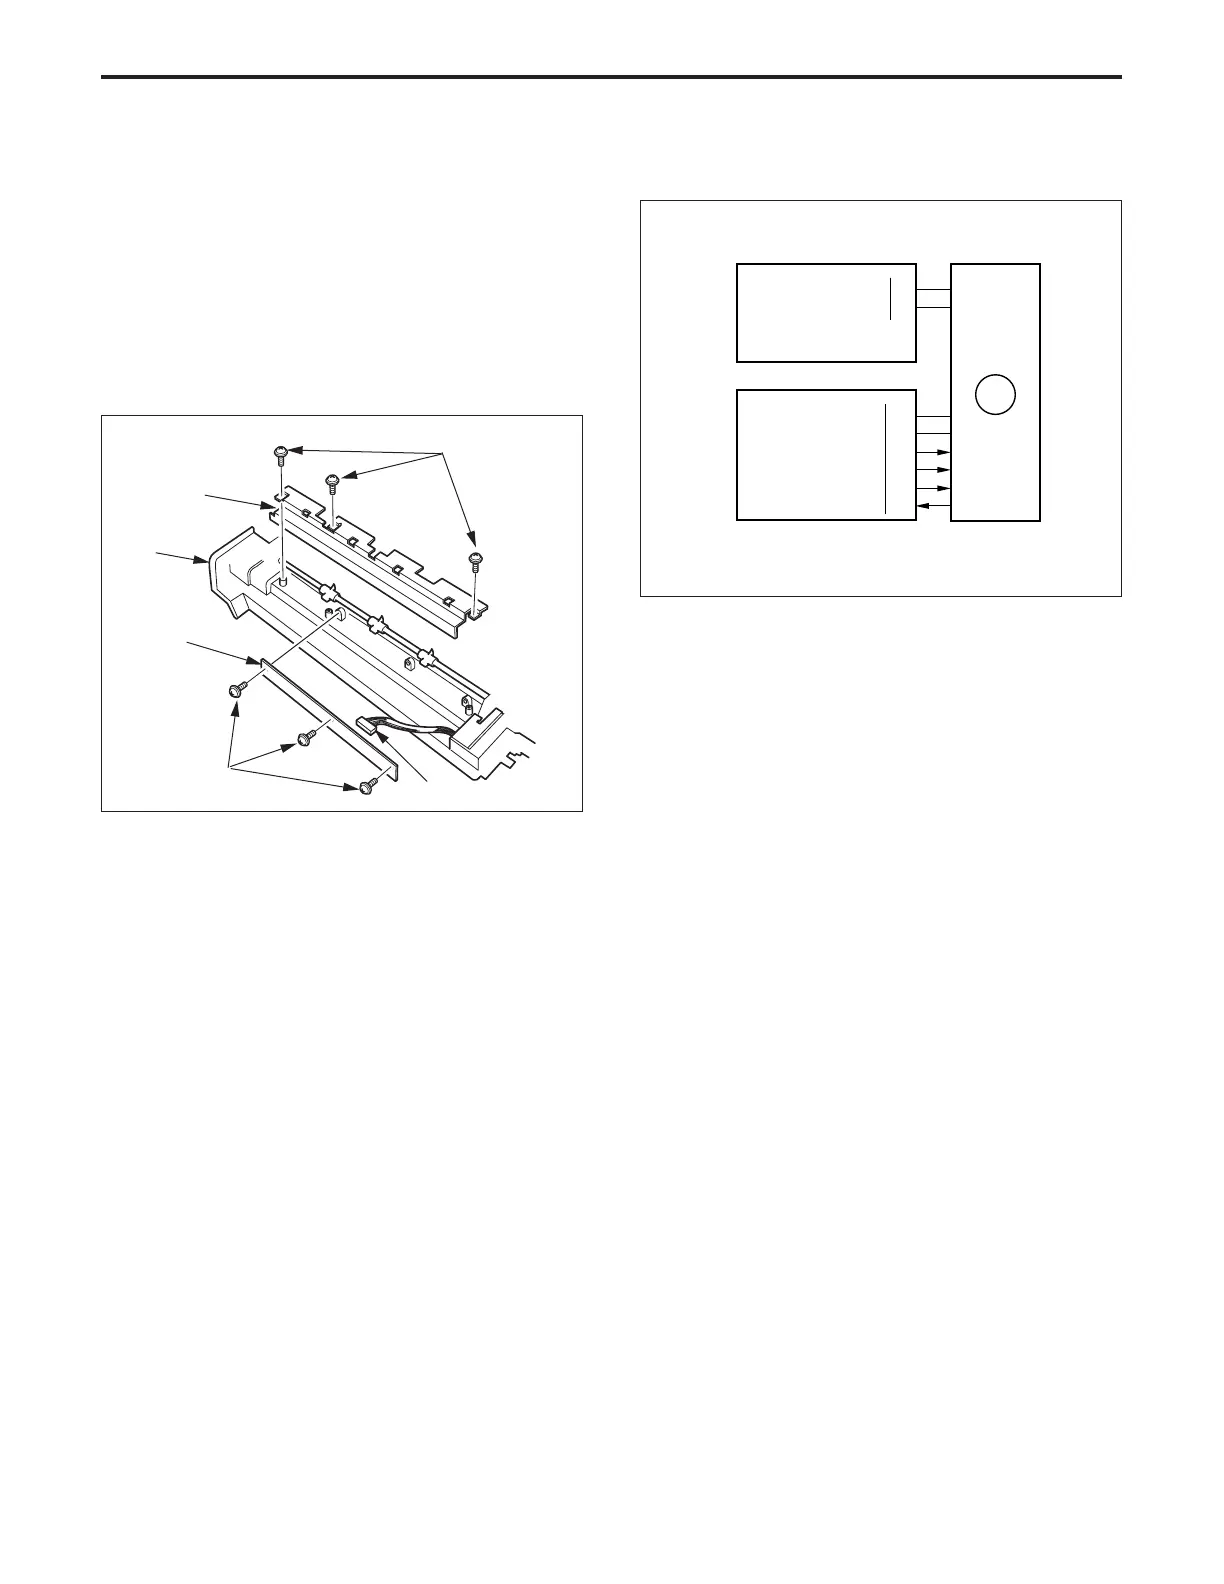
4. Removing and Re-installing the Toner Control
Board Unit
a. Procedure
(1) Remove the drum unit from the main body.
(2) Remove the three set screws, then remove the board
cover.
(3) Remove the three set screws, then remove the toner
control board unit.
(4) Disconnect the connector (CN19) from the toner con-
trol board.
(5) Re-install the toner control board unit in the opposite
sequence to removal.
40VDC
PGND
88-4
88-2
DCPS
5VDC
SGND
M3 CONT
M3 CLK
M3 H/L
M3 LD
65-B3
65-B4
65-B5
65-B6
65-B7
65-B8
CB
M3
Connector (CN19)
Board cover
Drum unit
Toner control
board unit
Set screws
Set screws
M3 (developing drive) is controlled by the CB (control board).
1. Operation
M3 is a 40 V drive DC motor which drives the developing
sleeve. M3 is PLL-controlled by feedback signals from a
speed sensor installed inside M3 itself, maintaining it at a
constant speed.
M3 goes ON after the specified time from when the Copy
button is pressed, and goes OFF again after the specified
time from the completion of charging control.
2. Signals
a. Input signal
(1) M3 LD (M3 →CB)
[L] is output when M3 reaches the specified speed.
b. Output signals
(1) M3 CONT (CB → M3)
M1 drive control signal
[L]: M1 ON
[H]: M1 OFF
(2) M3 CLK (CB → M3)
M3 rotational speed control reference clock signal
(3) M3 H/L (CB → M3)
M3 rotational speed control gain switching signal
[L]: Low speed range
[H]: High speed range
DEVELOPING UNIT-1