DIAGNOSTICS
4 - 39 - 1
Operation
Set the 36 Mode.
[36 Mode Menu Screen]
Press
2
Timing Adjustment.
[Timing Adjustment Menu Screen]
Press
7
Laser adjustment
[Laser Adjustment Screen]
Select either LD1 Offset 600dpi or LD2 Offset
600dpi with the
Next adjustment
key, then press the
Copy Screen
key. (Adjust the LD1 offset 600dpi/
LD2 offset 600dpi.)
Load A3/11" × 17" paper into tray 1, press the PRINT
START button to output the test pattern.
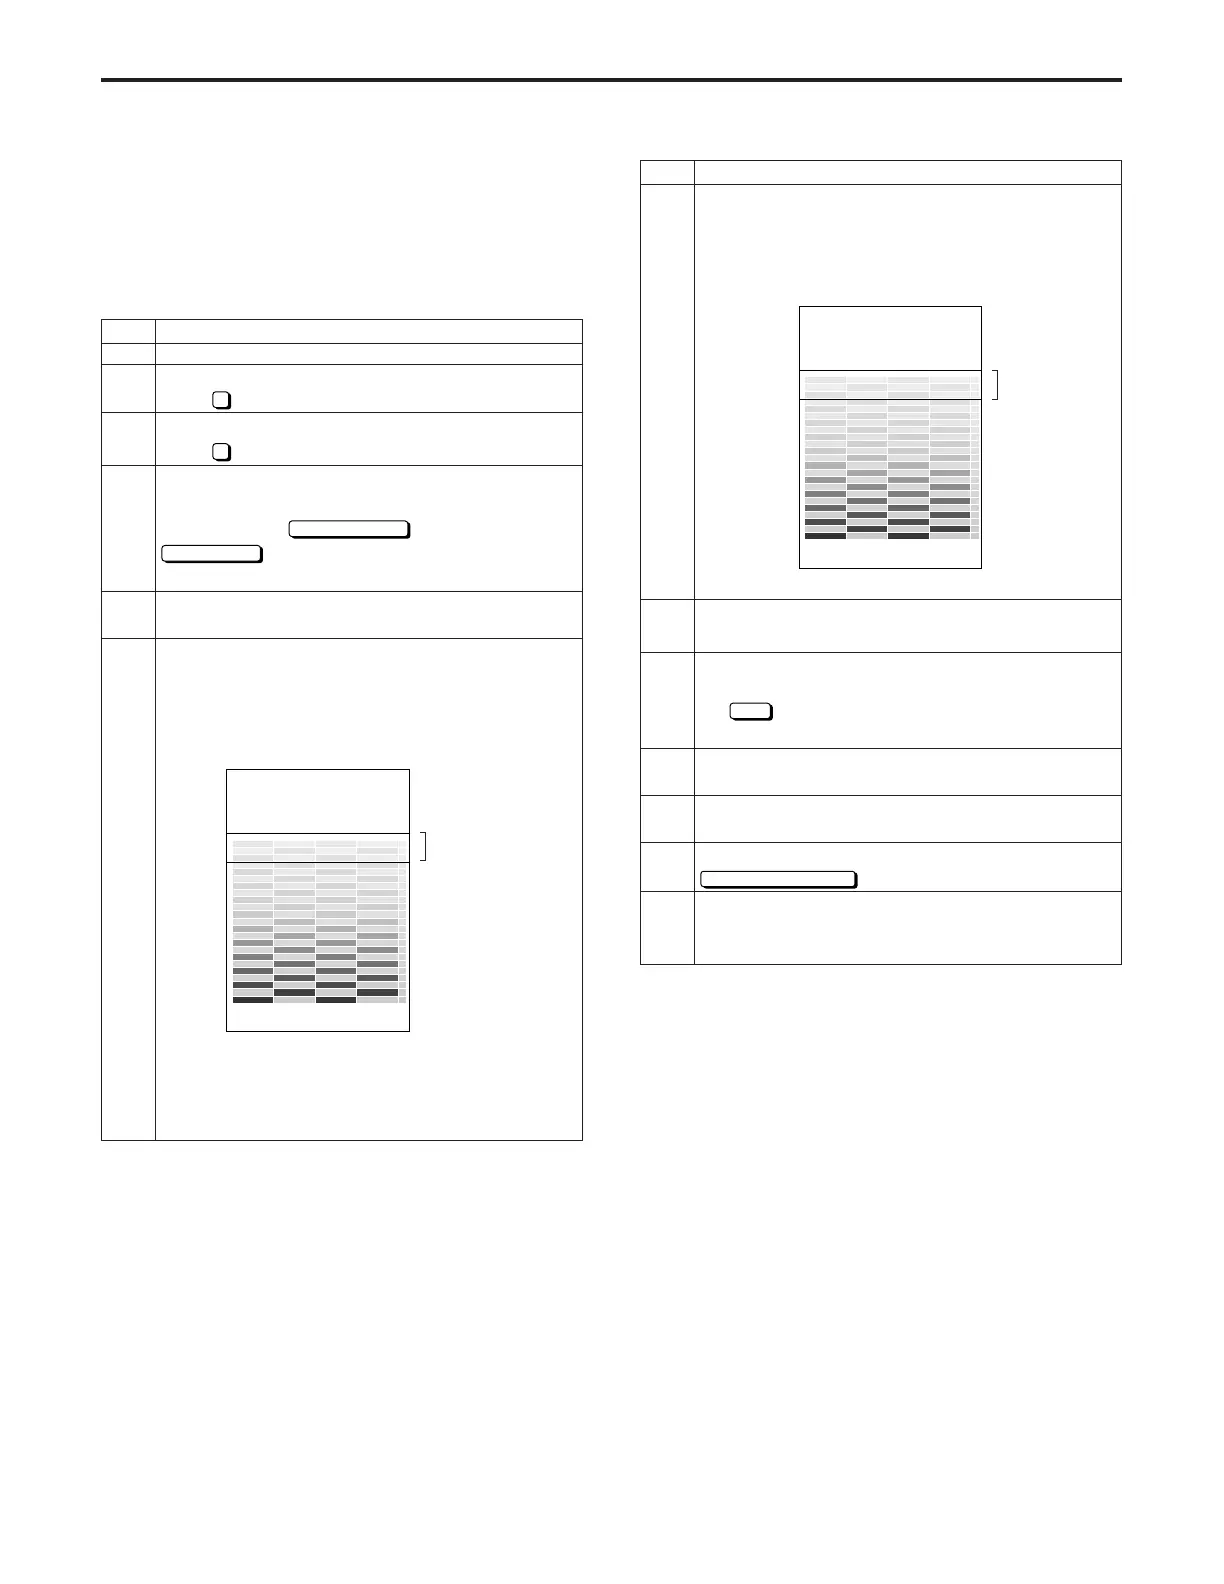
Check the test pattern.
Standard: Check if the output patterns of the
two lasers are uniform and that the low-density
section starts anywhere between the two
standard lines, as shown in the figure below.
* With this test pattern, the LD1 and LD2 outputs
appear alternately, as shown in [Example of Im-
proper Adjustment] below.
[Example of Improper Adjustment]
Light areas: LD1 output
Dark areas: LD2 output
Press the C button while pressing the P button to
return to the Laser Adjustment Screen.
If the test pattern does not conform to the standard,
enter a value from the numeric keypad and then press
the
SET
key.
Setting range: -99 to +127.
Repeat steps 4 through 8 until the offset is within the
standard value.
Perform the same adjustment for LD1 thick paper
offset 600dpi/LD2 thick paper offset 600dpi.
When adjustment is completed, press the
PREVIOUS SCREEN
key.
After this adjustment has been completed, perform
the gamma correction level adjustment (600dpi)
[47 – 114].
(3) Laser adjustment (gradation adjustment/600dpi)
This adjustment is performed when the main unit is also used
as a printer.
Preparations:
- Complete the laser adjustment (gradation adjustment).
- Complete the Dmax level correction (600dpi) [47 – 113].
Step
1
2
3
4
5
6
Standard
Operation
Standard
Step
7
8
9
10
11
12
DIAGNOSTICS-1