127
z Troubleshooting Guide
(5) J5: OVER CAPACITY
Pro-
ce-
dure
Is paper loaded over the MAX?
Is the actuator stuck?
Is the trouble cleared by
adjusting the paper level
sensor?
Is it normal when checked in
HELP mode (H-08)?
Is it normal when checked in
HELP mode (H-08)?
Is it normal when checked in
HELP mode (H-08)?
Amount of paper
loaded
Paper level sensor
Elevator lower
switch
1
2
3
4
5
6
Cause/Defective part Result Countermeasure
Yes
Yes
Yes
Yes
No
No
No
No
Reduce the paper so that it is
below MAX.
Adjust the actuator so that is
moves smoothly.
Finish
Go to procedure 6.
Plug the connector in firmly.
Replace the paper level sensor.
Replace the elevator lower switch.
Replace the main PWB unit.
Items to be checked
HELP mode H-08 \ see p.143
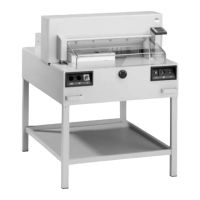
(6) J7: CUTTER LOCK
Pro-
ce-
dure
Does the paper meet specifica-
tions?
Is it normal when checked in
HELP mode (H-08)?
Is the connector for the main
PWB unit 6 firmly plugged in?
Does the blade go up and
down when checked in HELP
mode (H-19)?
While the power is turned off,
remove CN6 from the main
PWB unit and measure the
resistance between CN6-5 and
CN6-6. Is the resistance equal
to some amount of ohms (W)
when all the covers are
closed? Or is the resistance
infinite ohms ( W) when one
of the covers is open?
Paper
Cutter position
switch
Main PWB unit
Cutter motor
Interlock
1
2
3
4
5
Cause/Defective part Result Countermeasure
No
Yes
No
Yes
No
No
Yes
Use paper that meets specifica-
tions.
Go to procedure 4.
Plug the connector in firmly.
Replace the cutter position switch.
If the motor is running, check that
the hollow screw on the cutter
drive is tight. If the motor is not
running, replace the cutter motor.
Check the interlock SW wires, if
they are normal, replace the
switch.
Replace the main PWB unit.
Items to be checked
HELP mode H-08 \ see p.143
HELP mode H-19 \ see p.145
Chap.6