90
Chap.3
. Electric Section
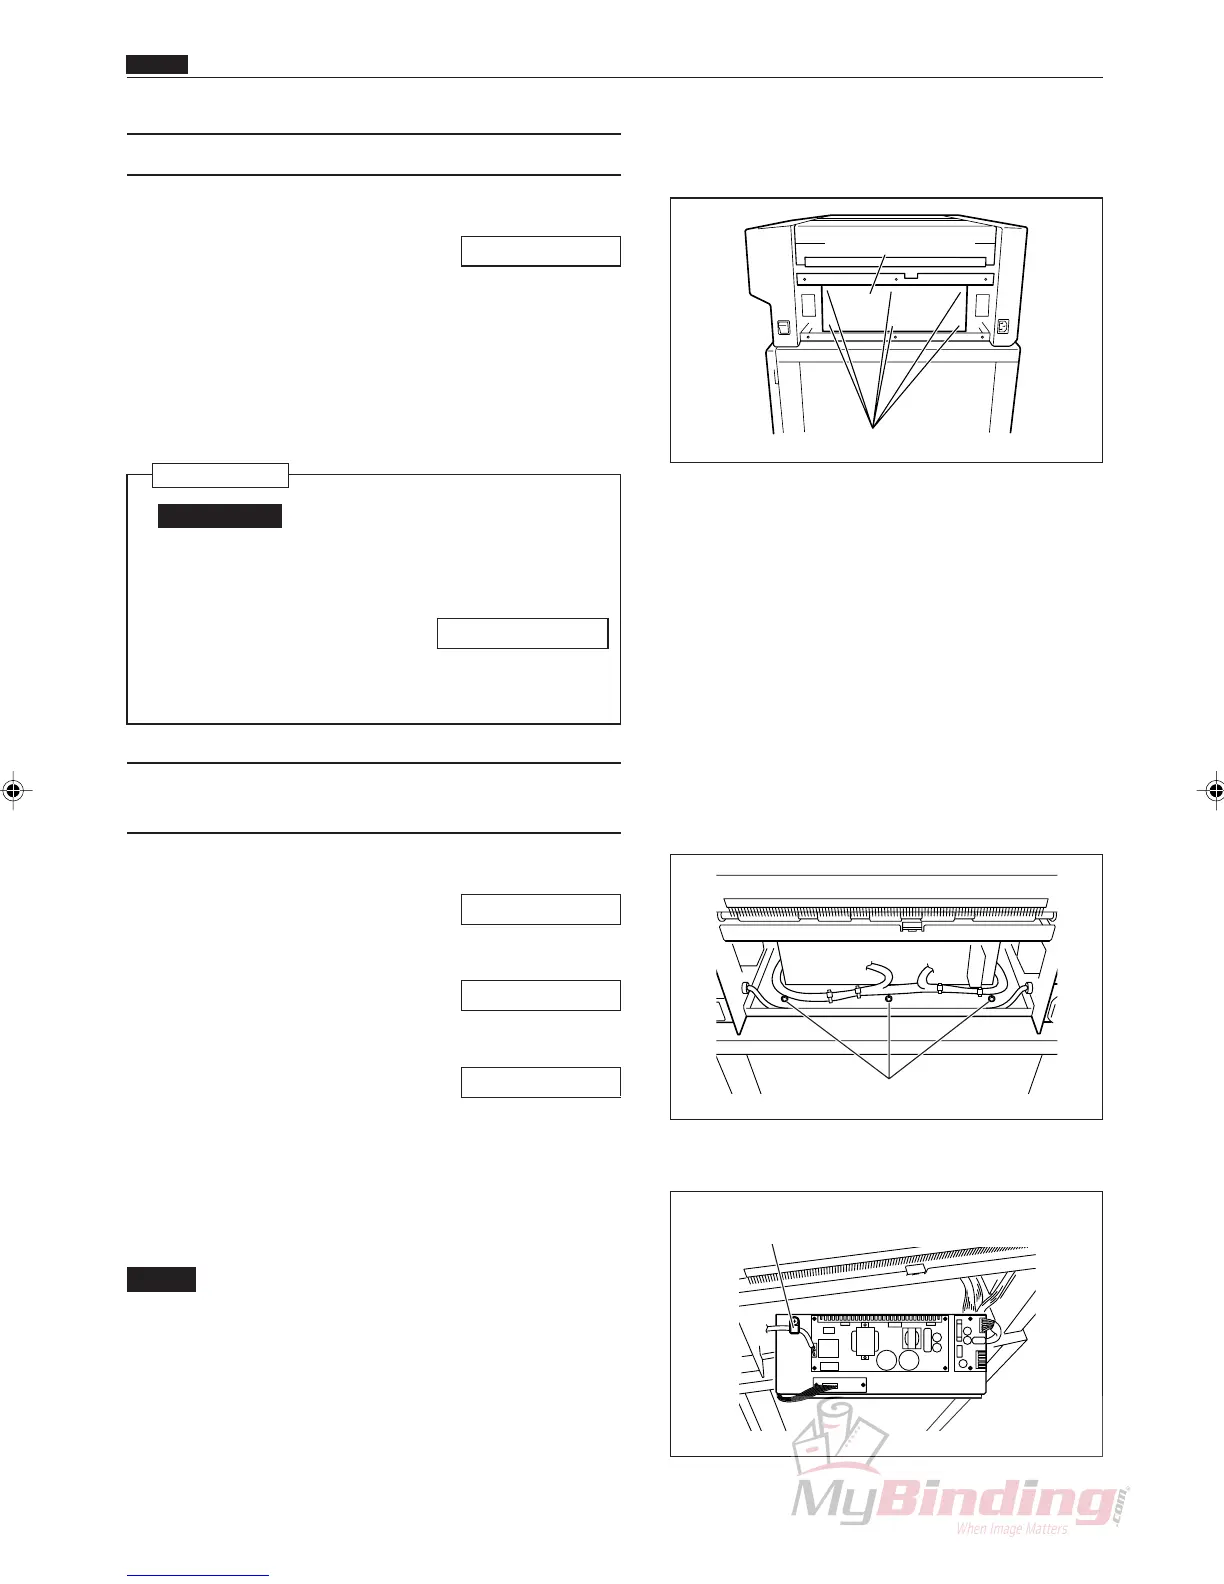
(9) Removing the Main P.W.B. Unit
q Remove the lid.
\See page 50
w Remove all of the connectors from the Main P.W.B.
unit. (There are 13 positions when the OP2 is not
installed, and 14 positions when it is installed).
e Take out the 6 screws, and remove the main P.W.B.
unit.
Reinstallation
IMPORTANT:
• Note the values on the following Help
before changing the main P.W.B.
H-09, H-24, H-26, H-27
\See page 140
• Enter the values that you noted after
replacing the main P.W.B.
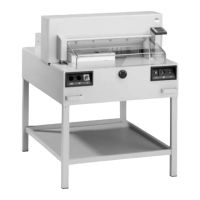
(10) Removing the Power Supply, Power
Board, and Memory Board
q Remove the DC-545 cover R unit.
\See page 49
w Remove the center slitter drive motor.
\See page 71
e Remove the lid.
\See page 50
r Remove all of the connectors from the Main P.W.B.
unit.
t Remove the 3 screws and take off the plate and then
remove the cable cramp.
NOTE :
• The main board, power supply, power board
and memory board are attached to the Plate.
Screws
Main P.W.B unit
Screws
Cable Cramp