124
z Troubleshooting Guide
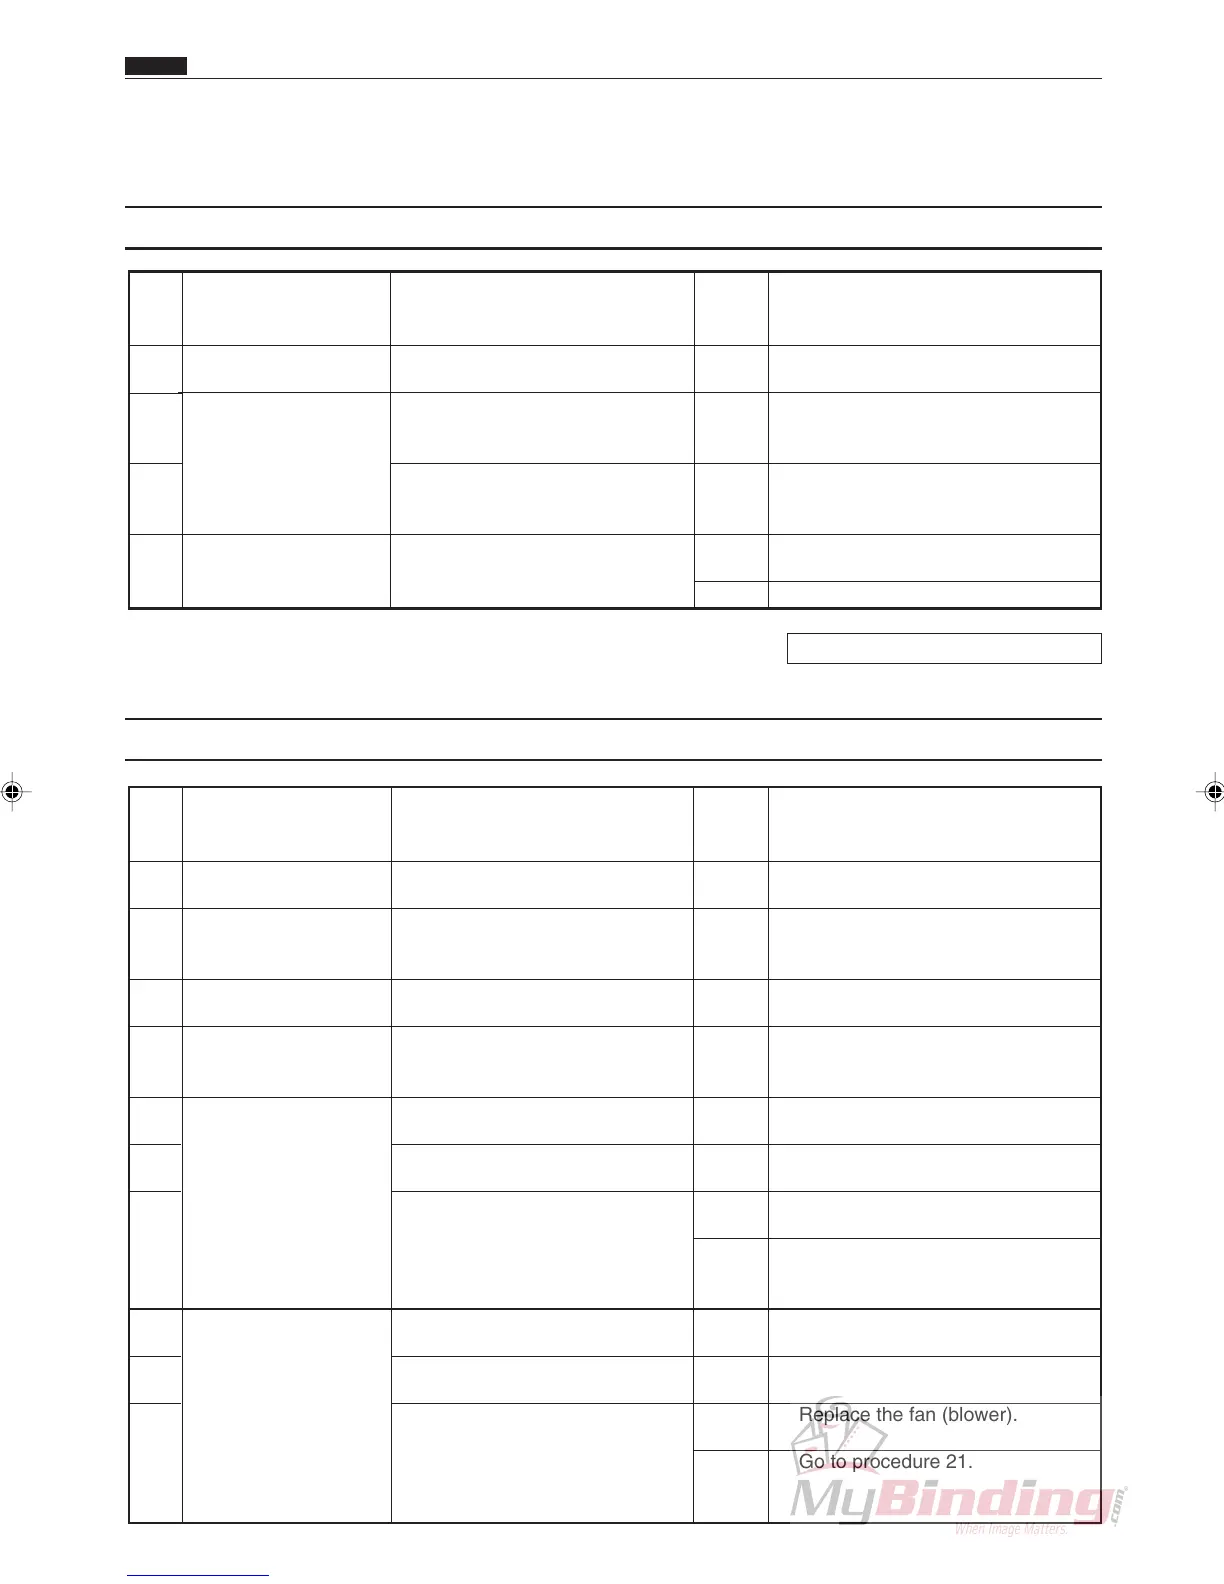
(1) J1: REJECT PAPER
Chap.6
z Troubleshooting Guide
Pro-
ce-
dure
Is there some paper in the
machine?
Is the sensor normal when
checked in HELP mode (H-
08)?
Was the sensor level check
done at HELP mode (H-03, 04,
05, and 06) correct?
Is the main PWB unit connec-
tor CN4 plugged in?
In the machine
PPS
Main PWB unit
1
2
3
4
Cause/Defective part Result Countermeasure
Yes
Yes
No
No
Yes
Remove the paper from inside the
machine.
Finish.
Clean the relevant sensors. If this
does not solve the trouble, replace
the sensors.
Plug the connector in firmly. Plug
the connector in firmly.
Replace the faulty sensor.
Items to be checked
HELP mode H-08 \ see p.143
Pro-
ce-
dure
Does the paper meet specifica-
tions?
Is the trouble cleared by
adjusting the space between the
separator and the suction belt?
Is the trouble cleared by setting
the suction appropriately?
Is the trouble cleared by
correcting the position of the
paper level sensor?
Does it operate in HELP mode
(H-31)?
Is the connector for the feed
motor firmly plugged in?
Is the voltage measured with a
tester between CN2-9 (+) and
CN2-10 (GND) on the feed
PCB unit +24 V (DC) while the
feed motor is operating?
Does it operate in HELP mode
(H-30)?
Is the connector for the fan
(blower) firmly plugged in?
Is the voltage measured with a
tester between CN2-3 (+) and
CN2-4 (GND) on the feed PCB
unit +24 V (DC) while the fan
(blower) is operating?
Paper
Separator
Suction fan
Paper level sensor
Feed motor
Fan (blower)
1
2
3
4
5
6
7
8
9
10
Cause/Defective part
Result
Countermeasure
No
Yes
Yes
Yes
Yes
No
Yes
No
Yes
No
Yes
No
Use paper that meets specifica-
tions.
Finish
Finish
Finish
Go to procedure 8.
Plug the connector in firmly.
Replace the feed motor.
Go to procedure 21.
Go to procedure 11.
Plug the connector in firmly.
Replace the fan (blower).
Go to procedure 21.
Items to be checked
(2) J2: FEED JAM