Preparations
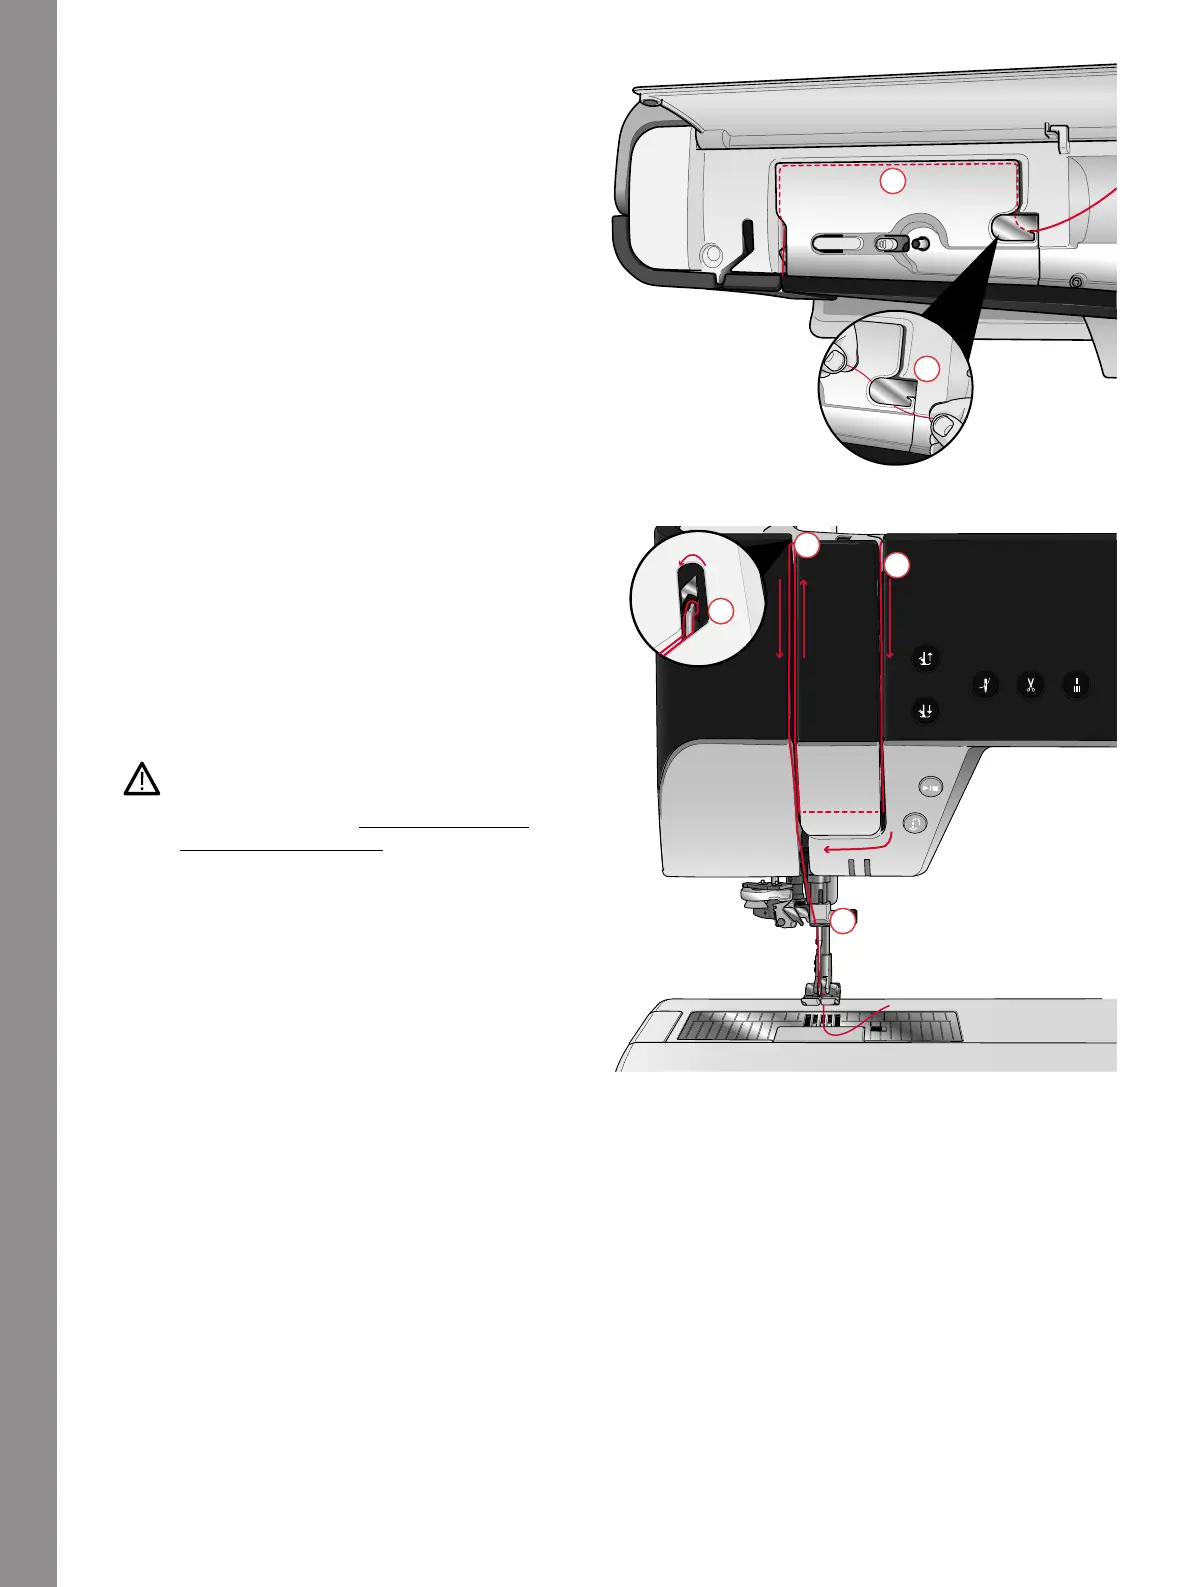
3. Hold the thread with two hands as illustrated. Floss
the thread under the thread guide (A) from front to
back. Pull thread back into and through threading
slot (B).
Note: Continue to hold the thread lightly next to the
thread guide (A) throughout the threading process. This
will create a bit of tension on the thread and ensure that
the thread is properly seated in the threading path.
4. Pull the thread between the thread tension discs (C).
Thread down through the right threading slot and
then upwards through the left threading slot. Bring
the thread from the right into the take-up lever (D)
until it clicks into place (E), and down in the left
threading slot to the last thread guide (F) just above
the needle.
5. Thread the needle using the automatic needle
threader or manually.
Before using the automatic needle threader,
carefully read the instructions and
recommendations, see Using the Automatic
Needle Threader, page 38.
36