EasyManuals Logo

Pfaff creative icon User Manual

Pfaff creative icon
211 pages
To Next Page IconTo Next Page
To Previous Page IconTo Previous Page
Page #47 background imageLoading...
Page #47 background image
Preparations
Changing the Presser Foot
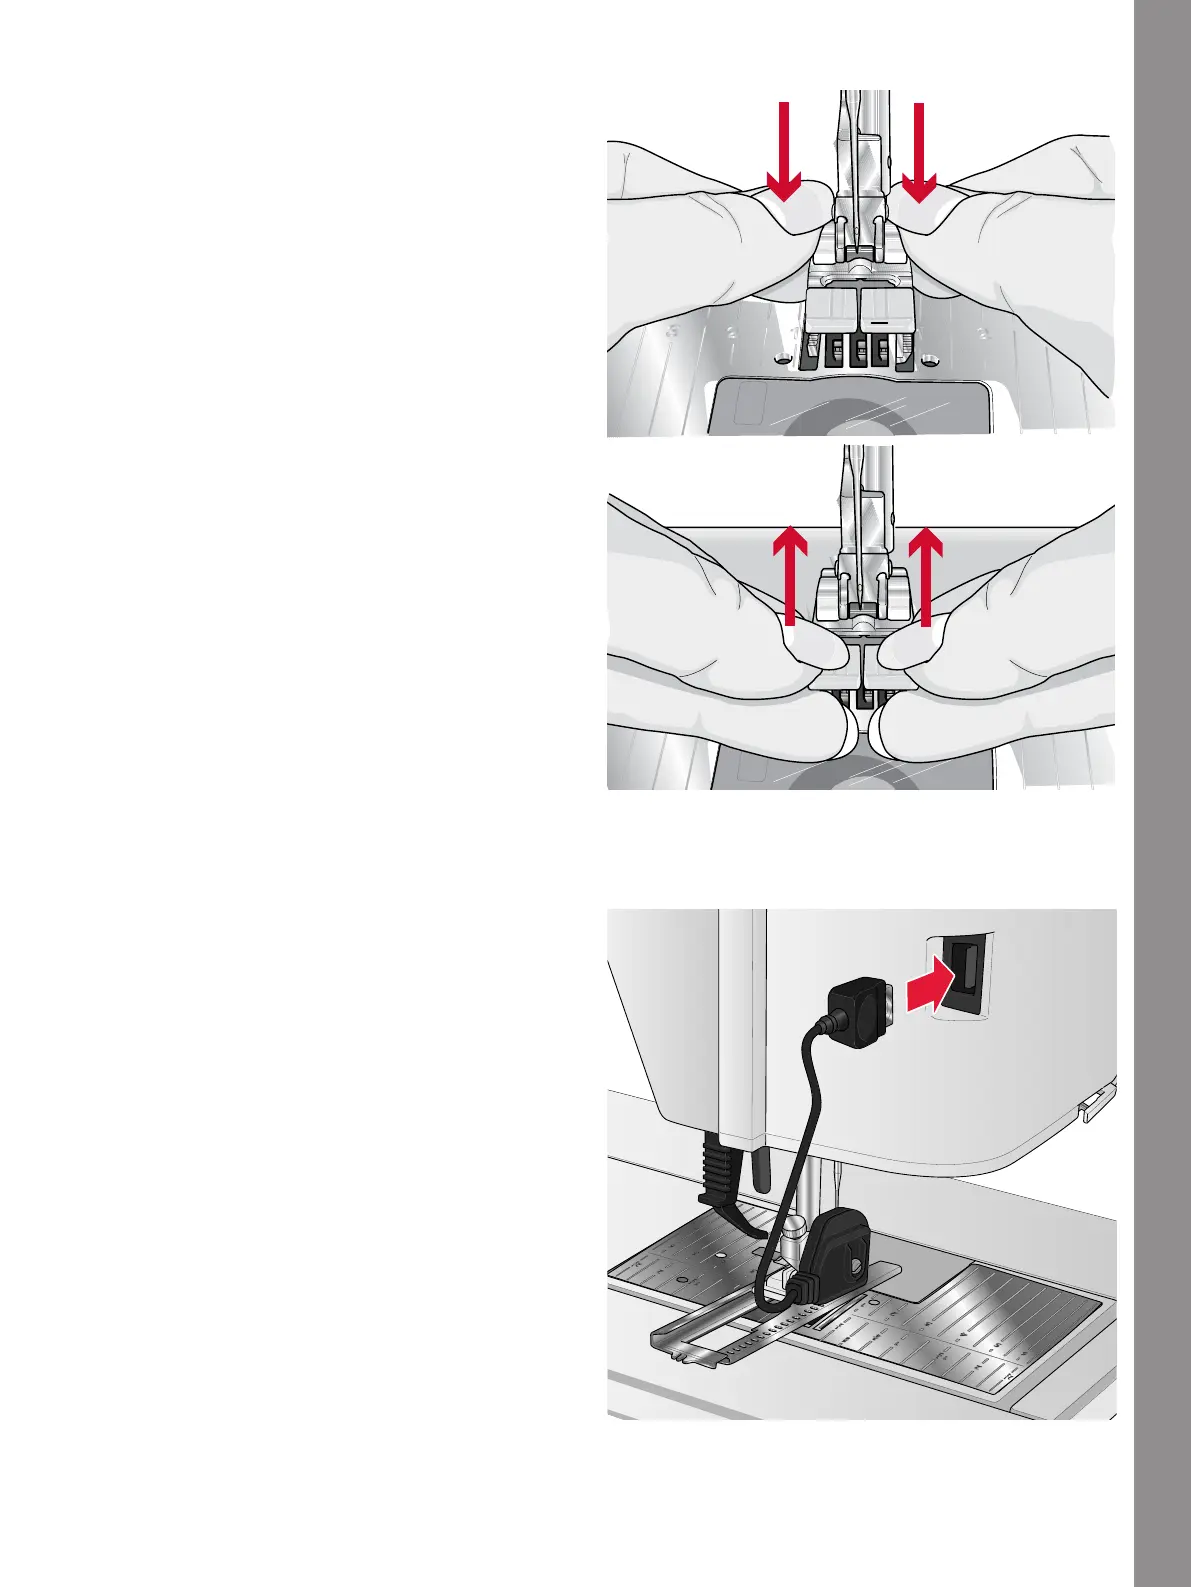
Remove Presser Foot
Press the presser foot downwards until it disengages
from the presser foot holder.
Attach Presser Foot
Line up the pins on the foot with the gap underneath
the presser foot holder. Press upwards until the foot
snaps into place.
You can also use the presser foot up/down buttons to
raise or lower the presser foot holder. Place the presser
foot under the presser foot holder, so that the pins of the
foot snap onto the presser foot holder when lowered.
Attaching the Sensormatic
Buttonhole Foot
1. Snap on the Sensormatic Buttonhole Foot.
2. Insert the plug, with the three dots facing out, into
the accessory socket at the back of the sewing head.
47

Table of Contents

Questions and Answers:

Question and Answer IconNeed help?

Do you have a question about the Pfaff creative icon and is the answer not in the manual?

Pfaff creative icon Specifications

General IconGeneral
Stitch Width9 mm
Needle Positions37
LightingLED
USB PortYes
Automatic Thread CutterYes
Built-in MemoryYes
Maximum Sewing Speed1050 stitches per minute
ConnectivityWiFi, USB
Needle ThreaderFully Automatic
Bobbin WindingSeparate bobbin winding motor
Screen10.1" Full Color Touch Screen
Weight15.6 kg

Related product manuals