ODIN Intercom Matrix Installation and Maintenance 57
Connecting OMNEO devices to ODIN
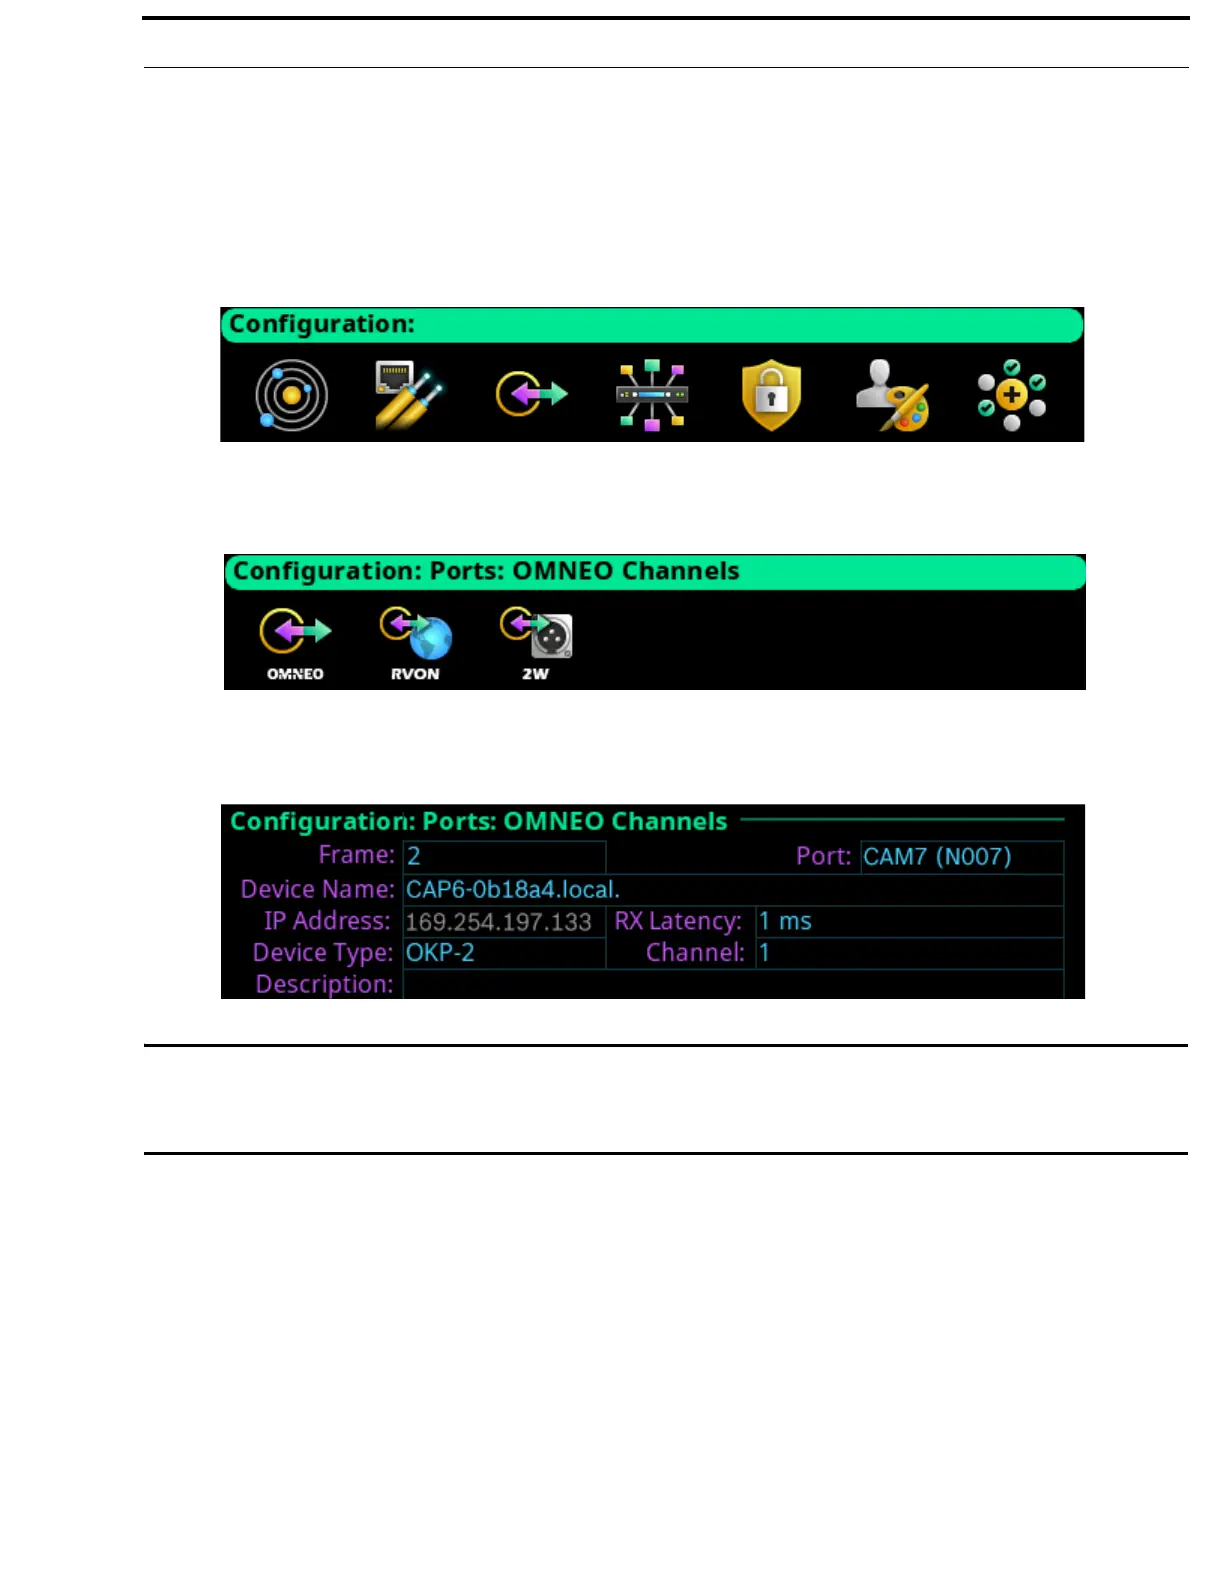
To connect OMNEO devices to ODIN, do the following:
1. Using the Port Allocation table, assign the device channel. See “Allocate Ports from the Front Panel of ODIN” on
page 38.
2. Rotating the right encoder knob, navigate to the Configuration icon.
3. Click the right encoder knob.
The Configuration Menu appears.
4. Rotating the right knob, navigate to the Ports menu icon.
5. Click the right encoder knob.
The Ports menu appears.
6. Rotating the right encoder knob, navigate to the OMNEO menu icon.
7. Click the right encoder knob.
The OMNEO Channels screen appears.
IMPORTANT: If the intercom system contains only one ODIN frame, the Frame field is not displayed. If the intercom
system contains multiple ODIN frames, the Frame field activates allows ports in other frames to be selected
and configured. While the Frame field is highlighted, press the right encoder knob to activate the field.
Once activated, turn the right encoder knob to select another frame in the system.
8. Rotating the right encoder knob, navigate to the Port field.
9. Click the right encoder knob.
The Port field becomes active.
10. Rotating the right encoder knob, scroll to the desired port.
11. Click the right encoder knob.
The Port field is changed.
12. Rotating the right encoder knob, navigate to the Device Name field.
13. Click the right encoder knob.
The Device Name field becomes active.
14. Enter the Device Name of the partner device to connect to this port.
15. When finished entering the device name, click the right encoder knob.
The Device Name field turns yellow (modification made).
16. Rotating the right encoder knob, navigate to the Device Type field.