66 Installation and Maintenance ODIN Intercom Matrix
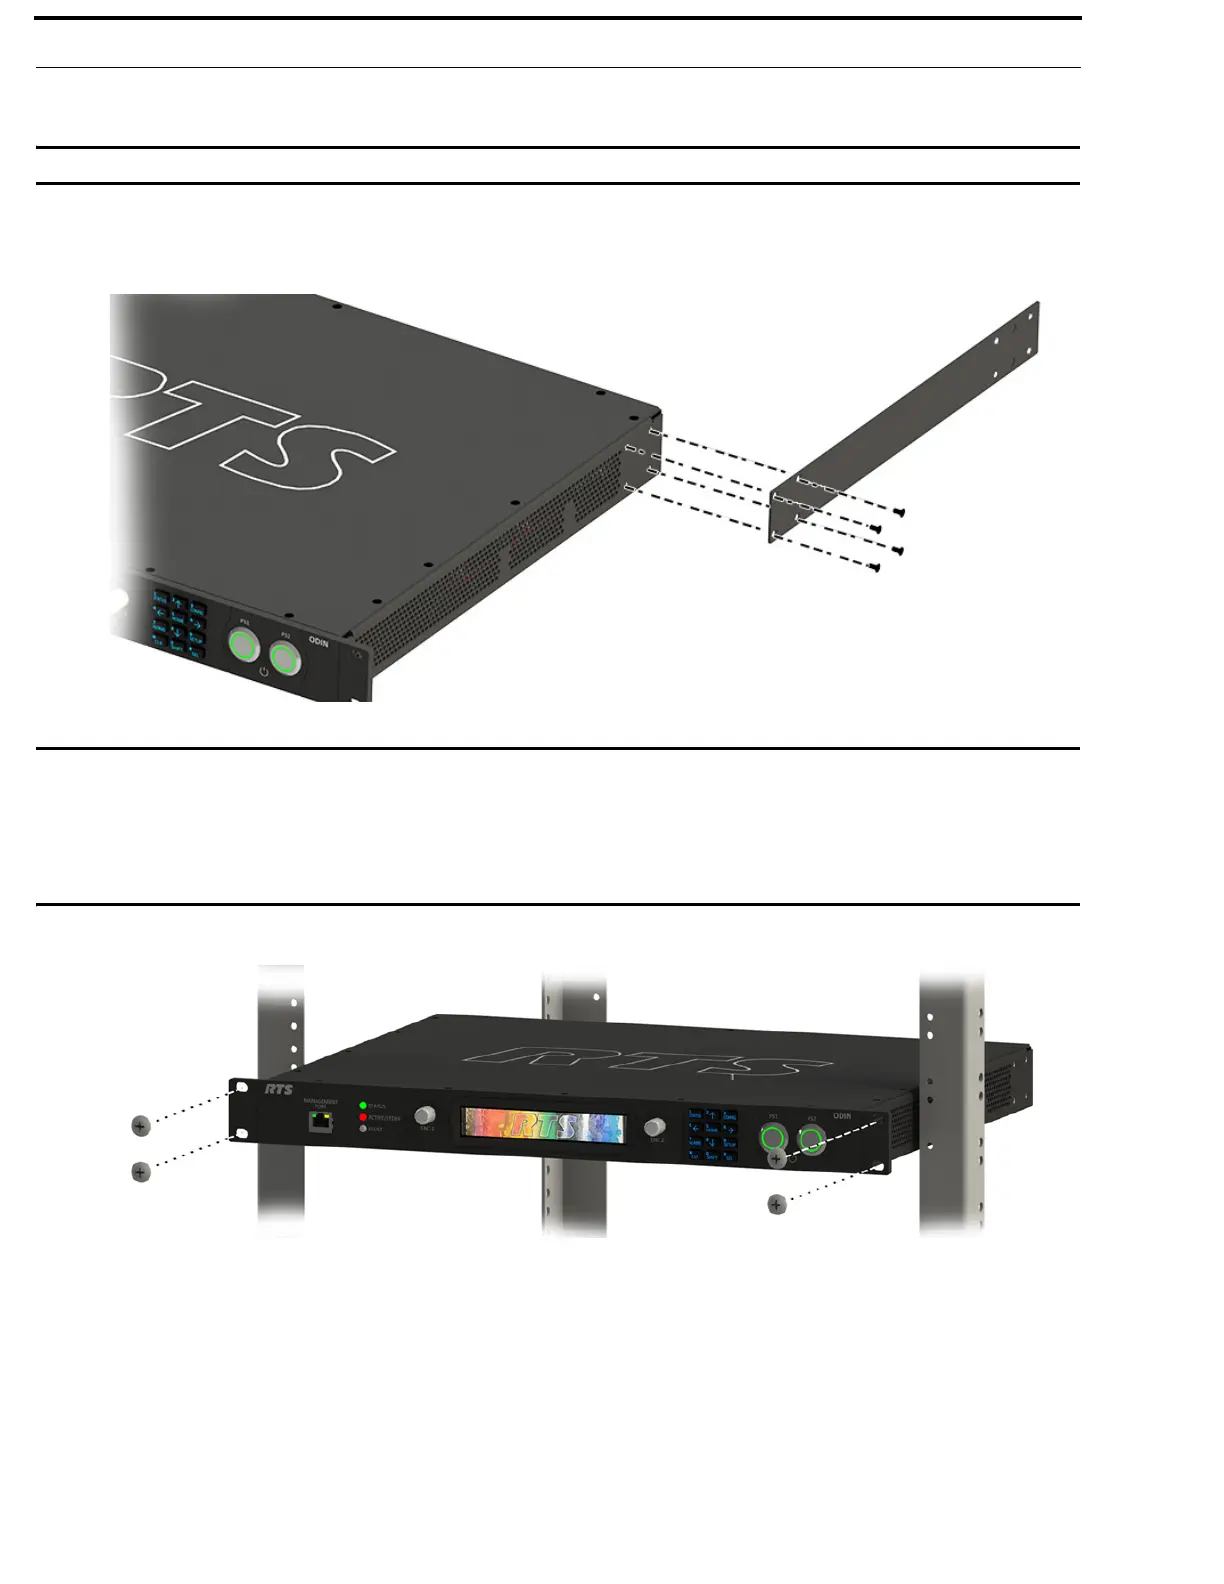
To mount an ODIN frame in a rack using the optional rear brackets, do the following:
IMPORTANT: Do not over-tighten the fasteners. Over-tightening can result in stripped or broken screws.
1. Using the supplied flat-head screws (four on each side), secure the matrix side brackets to each side of the ODIN frame.
NOTE: Take care to verify the guide pins on the side brackets face inward.
IMPORTANT: Alternately, attaching the rear side brackets before putting the ODIN frame in the rack is possible. The frame
may need to be slightly tilted for the rear side bracket to clear the back of the rack before securing it to the
rack.
The screws that attach the rear side bracket to the matrix side brackets should be slightly loosened to allow
for the bracket to slide smoothly into position. Once in position, the screws can be tightened to keep the
bracket in place.
2. Using four rack screws (not supplied), secure the frame into the rack.