SATO M-10e TT/DT Printers Service Manual
PN 9001098
Rev. A
1-6
Section 1. Overview and Specifications
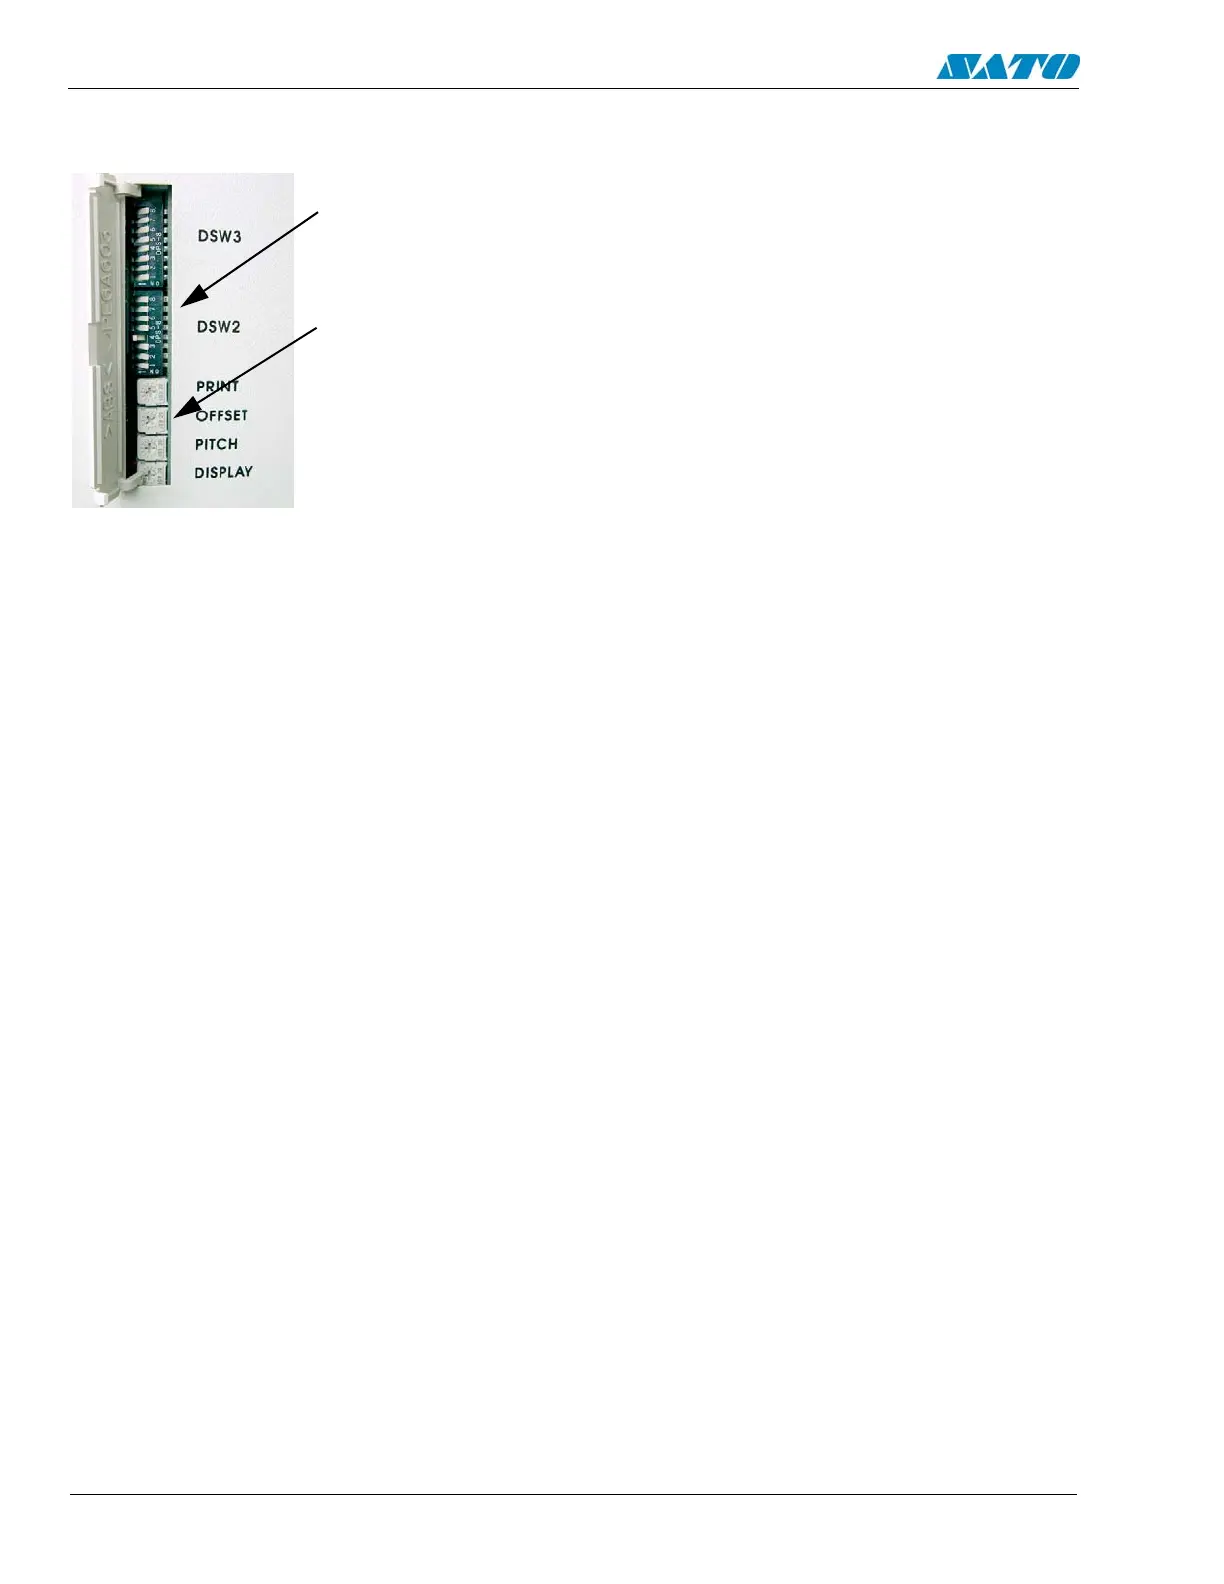
Components
Dip Switches
Potentiometers
The DIP switches and Potentiometers are located inside the cover
and contains two 8-position DIP switches and three adjustment
potentiometers. Adjustment procedures for these are listed in
Section 2 Configuration.
PRINT
The PRINT potentiometer is used to adjust the amount of heat (i.e. power) applied to the head for
printing. It provides a continuous range of adjustment. Maximum print darkness is obtained by
turning the potentiometer all the way clockwise and a maximum counterclockwise setting will give the
lightest print.
NOTE: The PRINT potentometer adjustment will affect the darkness in all the command
code speed and darkness ranges.
OFFSET (Backfeed)
When a label is printed, it must be correctly positioned for dispensing and application. The Backfeed
adjustment is used to position the label so that it is fully dispensed and ready for application. It may
then be necessary to reposition the next label before printing. The Backfeed (repositioning of the
label) operation is enabled if DSW3-4 is in the Off position. If Backfeed is enabled, placing DSW3-1
is in the Off position, it will cause the backfeed operation to be performed immediately before each
label is printed. If DSW3-1 is in the On position, the backfeed operation is performed as soon as the
dispensed label has been printed and taken from the printer.
The amount of backfeed is controlled by the OFFSET potentiometer. When turned all the
wayclockwise, the amount of backfeed is +3.75 mm, and -3.75 when turned all the way
counterclockwise.
1. Turn the printer on.
2. Press the LINE key to place the printer in the Off Line status.
3. Press the FEED key to feed out a blank label.
4. Adjust the position using the OFFSET potentiometer and feed another label by depressing the
FEED key. Repeat this procedure until. the label is fully released from the liner.

 Loading...


