19
11 SetupSetup
1
3
5
2
4
6
7
8
12
14
13
9
10
11
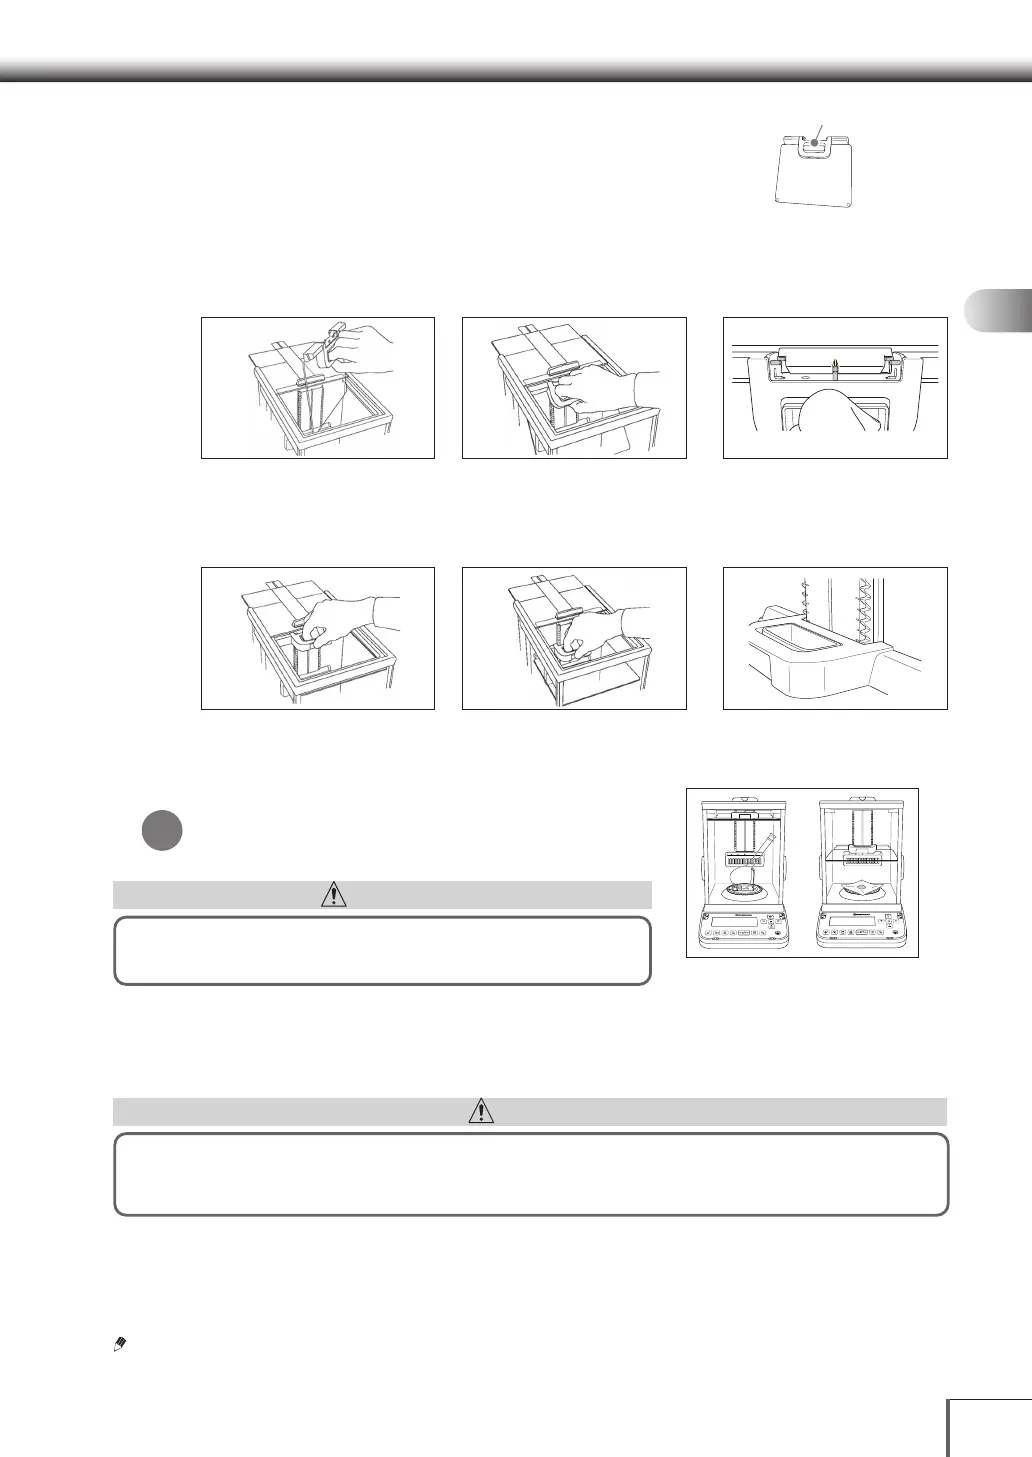
4.
Attach the Adjustable Windbreak Plate
(semi-micro models only)
(1) Fully open the glass door (top)
(2) Hold the Adjustable Windbreak
Plate handle with your dominant hand.
Insert the adjustable windshield plate
slowly and carefully from the top
opening to avoid interfering with the
glass door as shown in the figure.
(3) Insert the pin on the bottom center
of the Adjustable Windbreak Plate into
the groove in the center of the slide
guide from the front.
(4) Insert the bottom pins (both
sides) into the slide guide groove.
(5) Insert the top pins into each groove
while holding the Adjustable Windbreak
Plate up to ensure that is horizontal.
(6) The Adjustable Windbreak Plate can
be moved up and down by holding the
handle and pulling the lever. The lever
will reset and the adjustable windshield
plate will be locked in place when the
handle is released.
(7) Set the Adjustable Windbreak
Plate at a height so that the top of
the adjustable windshield plate is
the same height as the slide guide
scale.
(8) The Adjustable Windbreak Plate
cannot be locked in place at any
position in the middle of the slide guide
scale. Make absolutely sure the lever
resets after setting.
(9) Adjust the position and use the Adjustable Windbreak Plate based on the
samples/containers being weighed and so that it does not get in the way.
An ionizer (STABLOAP) is installed on the bottom of the
Adjustable Windbreak Plate so that items to be weighed
can be neutralized while inside the weighing chamber.
CAUTION
Do not place any items on top of the glass surface after installing the
Adjustable Windbreak Plate. (The withstand load is 220 g.)
5.
Adjustable Windbreak Plate removal method
(semi-micro models only)
Remove the Adjustable Windbreak Plate by carrying out the attachment procedure in reverse.
CAUTION
If laying the removed Adjustable Windbreak Plate down somewhere, be sure to lay the adjustable windshield plate
flat on a level surface with the cushion rubber on the bottom. Do not touch the glass sections while the adjustable
windshield plate is laid down, as doing so could cause damage to the glass sections.
6. Wire the ionizer (STABLO-AP)
Wire as shown in the figure on next page so that the ionizer can be used.
Check that the switch is turned ON before using the ionizer.
If the ionizer AC adapter cable interferes with the glass doors when the glass doors are opened
and closed, the doors will not open or close correctly. Make sure to secure the cable using the
adapter cable holder as shown in the figure below. For models other than semi-micro models,
please attach the included adapter cable holder before use.
Adjustable Windbreak Plate
*
Precautions

 Loading...