60
66 SettingsSettings
Auto zero Function
Setting the Auto zero function automatically corrects discrepancies in the zero point caused by residue
left on the pan after measurements and the display will show zero.
This function cannot be used in combination with formula measurements (formulation).
1. Call out the measurement setting menu
(1) Press [ MENU] while in the weight measurement mode, and then press [ LEFT].
(2) Select [ Measurement Settings], and then press [ OK].
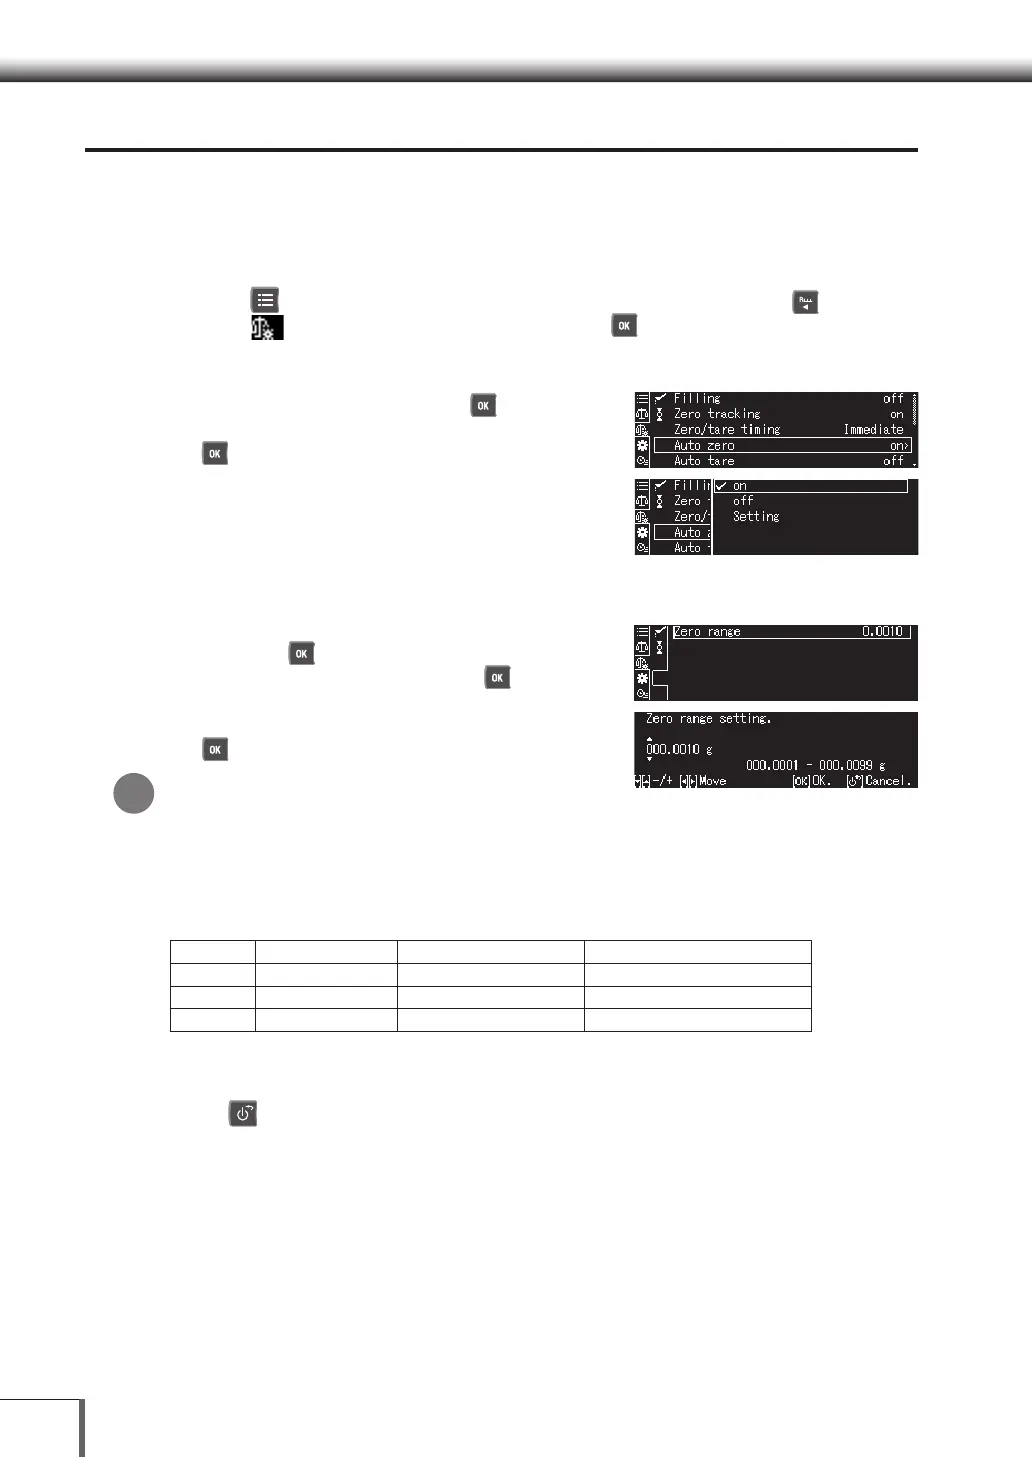
2. Set the Auto zero function to ON or OFF
(1) Select [Auto zero], and then press [ OK].
(2) Select [on] or [off] for the function, and then press
[ OK].
· Proceed to Step 3 if [on] was selected.
· Proceed to Step 4 if [off] was selected.
3. Enter the range for automatic zero point correction (zero range)
(1) Select the [setting] for the Auto zero function, and
then press [ OK].
(2) Select [Zero Range] and then press [ OK].
[Entering Numerals and Characters] (P.43)
(3) Enter the zero range value, and then press
[ OK].
Zero Range Value
The zero range value is only valid for the unit displayed at the time of input. When the unit
is switched to a different unit, it is necessary to set (update) the zero range again from Step
1 when that unit is displayed. The upper limit for the zero range is 99d. 1d represents the
minimum display for the unit displayed. For example, the following will be in effect when a
minimum display of 0.0001g is set for the balance.
Ex:
Unit Minimum Display Upper Zero Range Limit Setting area for zero range value
g 0.0001g 0.0099g 0.0001~0.0099g
g 0.00001g 0.00099g 0.00001~0.00099g
ct 0.001ct 0.099ct 0.001~0.099ct
4. Return to the weight measurement mode
Press [ POWER].
*

 Loading...