Hydro:Evolved User Manual
Page 84 © 2022 Smartrise Engineering, Inc. All Rights Reserved October 2022
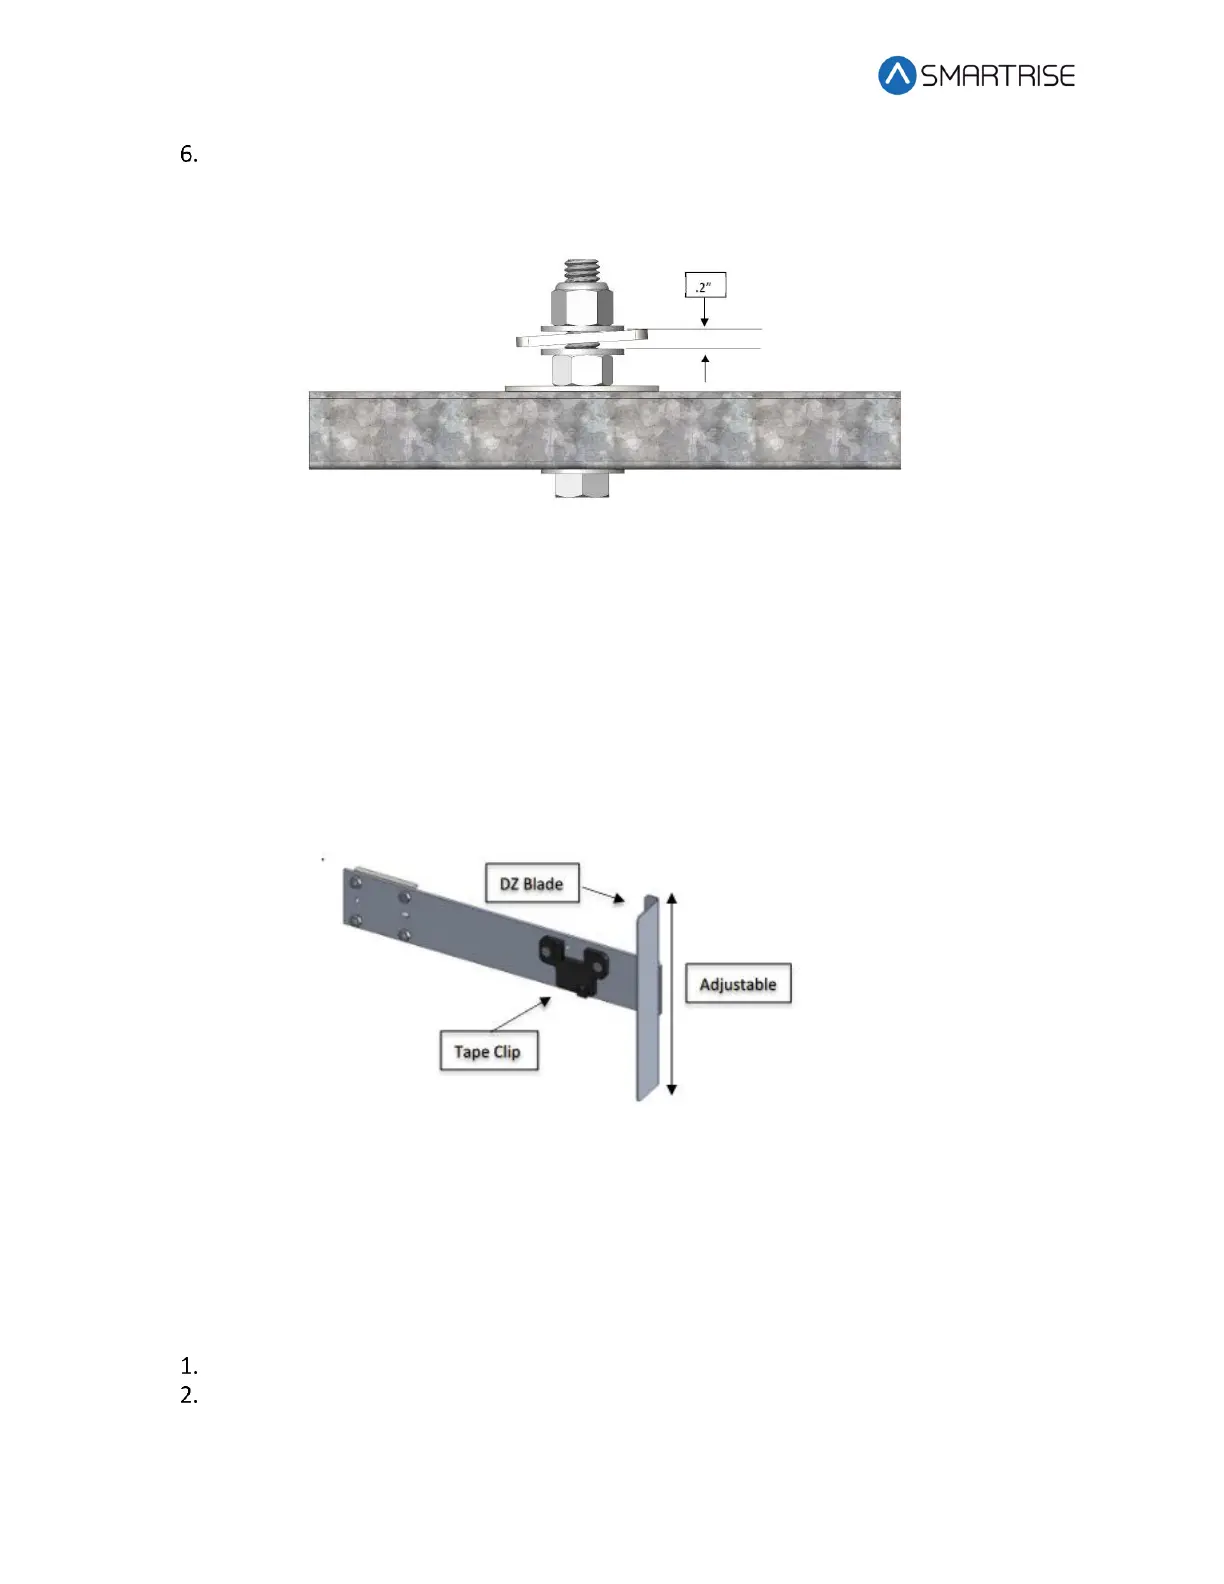
Thread the Nylock nut on the bolt until there is a 0.2” gap between the two flat washers
that are on either side of the Tape Interlock bracket. This gap is required to relieve twist
in the tape.
Figure 91: Gap Verification
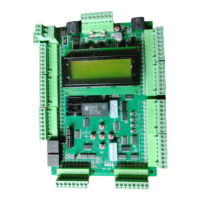
9.4 Tape Clip Assembly
As you descend, unspool the tape, install the Tape Clip Assemblies and set the door zones.
The Tape Clip Assembly includes:
• Tape guide clip
• Door zone (DZ) blade
• Mounting magnets (preassembled)
Figure 92: Tape Clip Assembly
NOTE: In applications where there is 15 ft. of distance between door zones, an extra bracket
needs to be placed between those door zones. The bracket will only contain the tape clip and
NOT the DZ blade. This will minimize tape twisting caused by long distances between the door
zones. These extra tape clip brackets will be provided as needed.
The following procedure describes how to install the Tape Clip Assembly.
Bring the car to floor level.
Wipe the rail clean where the Tape Clip Assembly is being attached.