DOC-06810 Rev. A 6–35
Objet1000 Plus User Guide
Optimumheadalignmentisshownwhenthefourthlinesintheupper
andlowerrowsarealigned,asinfigure 6‐44.Intheexampleshown,no
changetotheheadalignmentisnecessary.Ifotherlinesinthesetare
aligned,youneedtochangethealignmentofthathead—inthe
next
wizardscreens.
10. Inthewizardscreenshowninfigure 6‐42,selecttheTransparency
removedcheckbox,andclick
Next.
Thefirstinaseriesofalignmentscreensappears.
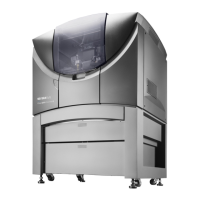
Figure 6-45: Head alignment screen
11. Inthehead‐alignmentscreen,selectthenumberthatindicateswhich
linesalignintheupperandlowerrowsofapaironthetransparency
(countingfromtheleft)forthisprinthead.
Note: Because the alignment of the fourth lines is optimum, the number “4”
is selected, by default, in the wizard screen. This does not change the head
alignment. If you select other numbers, the wizard adjusts the head
alignment, accordingly.
12. ClickNexttodisplaythenextheadalignmentscreen,andagainselect
thenumberrepresentingthemostcloselyalignedverticallinesonthe
transparencyforthatprinthead.
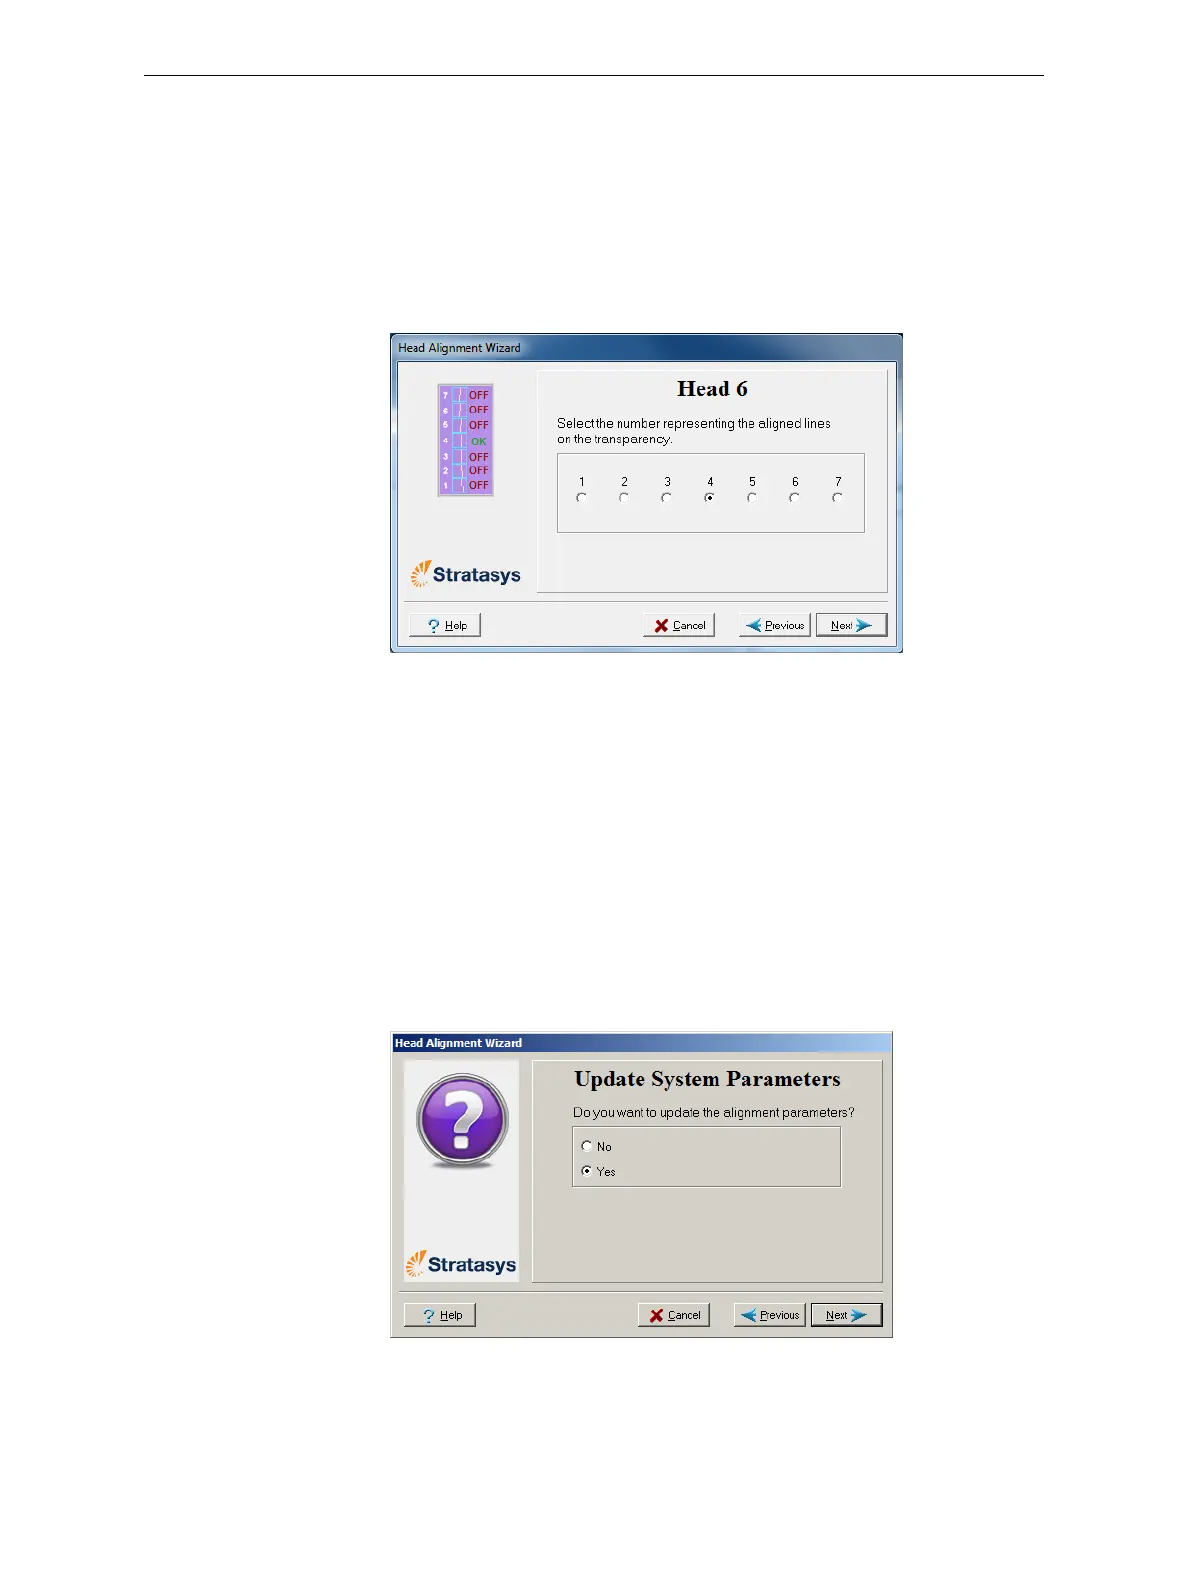
Whenyouhavefinishedaligningalloftheheads,thefollowingscreen
isdisplayed.
Figure 6-46: Parameter update confirmation