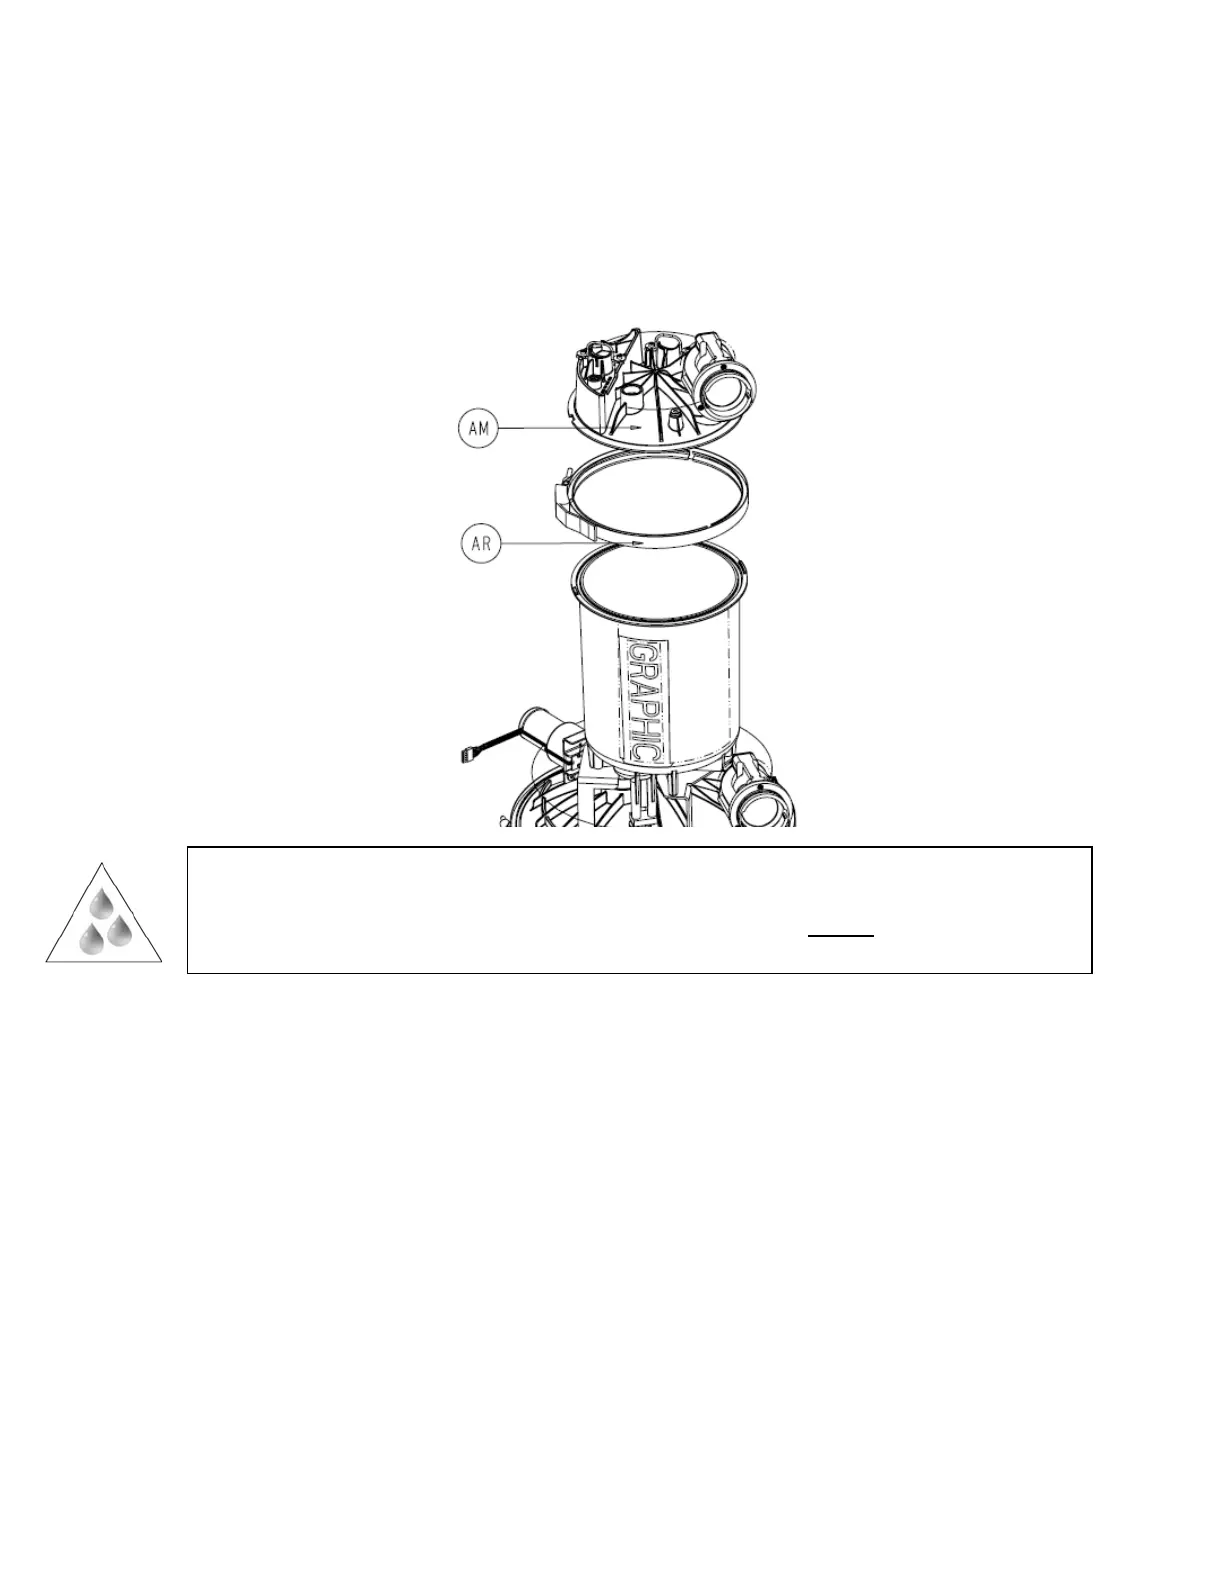
4. Remove the small v-clamp (P/N 702-001-304) (AR) that holds the small canister cap
assembly (P/N 702-1-200) (AM) to the small canister assembly (P/N 702-001-300)
(AK) and set the v-clamp aside.
5. Remove the small canister cap assembly (P/N 702-001-200) (AM) from the small
canister assembly (P/N 702-001-300) (AK) and set aside.
Caution: There is a small amount of water that remains in the drain valve
assembly after the prefill has been emptied. After all the bolts have been
removed, make sure to lift the small canister assembly slowly to allow the fluid
to drain into the large canister assembly.
6. Remove the four socket head cap screws (P/N 0004-645-000) (BT) located on the
front left side, and the front and back right sides using a 3/16” allen wrench. (Do not
remove the screw closest to the drain valve at this time.)
7. Remove the last socket head cap screw (P/N 0004-645-000) (BT) from the back left
side. (Screw closest to the drain valve.)
2-33
 Loading...


