EasyManuals Logo

Stryker Neptune 2 Service And Installation Manual

Stryker Neptune 2
232 pages
To Next Page IconTo Next Page
To Previous Page IconTo Previous Page
Page #66 background imageLoading...
Page #66 background image
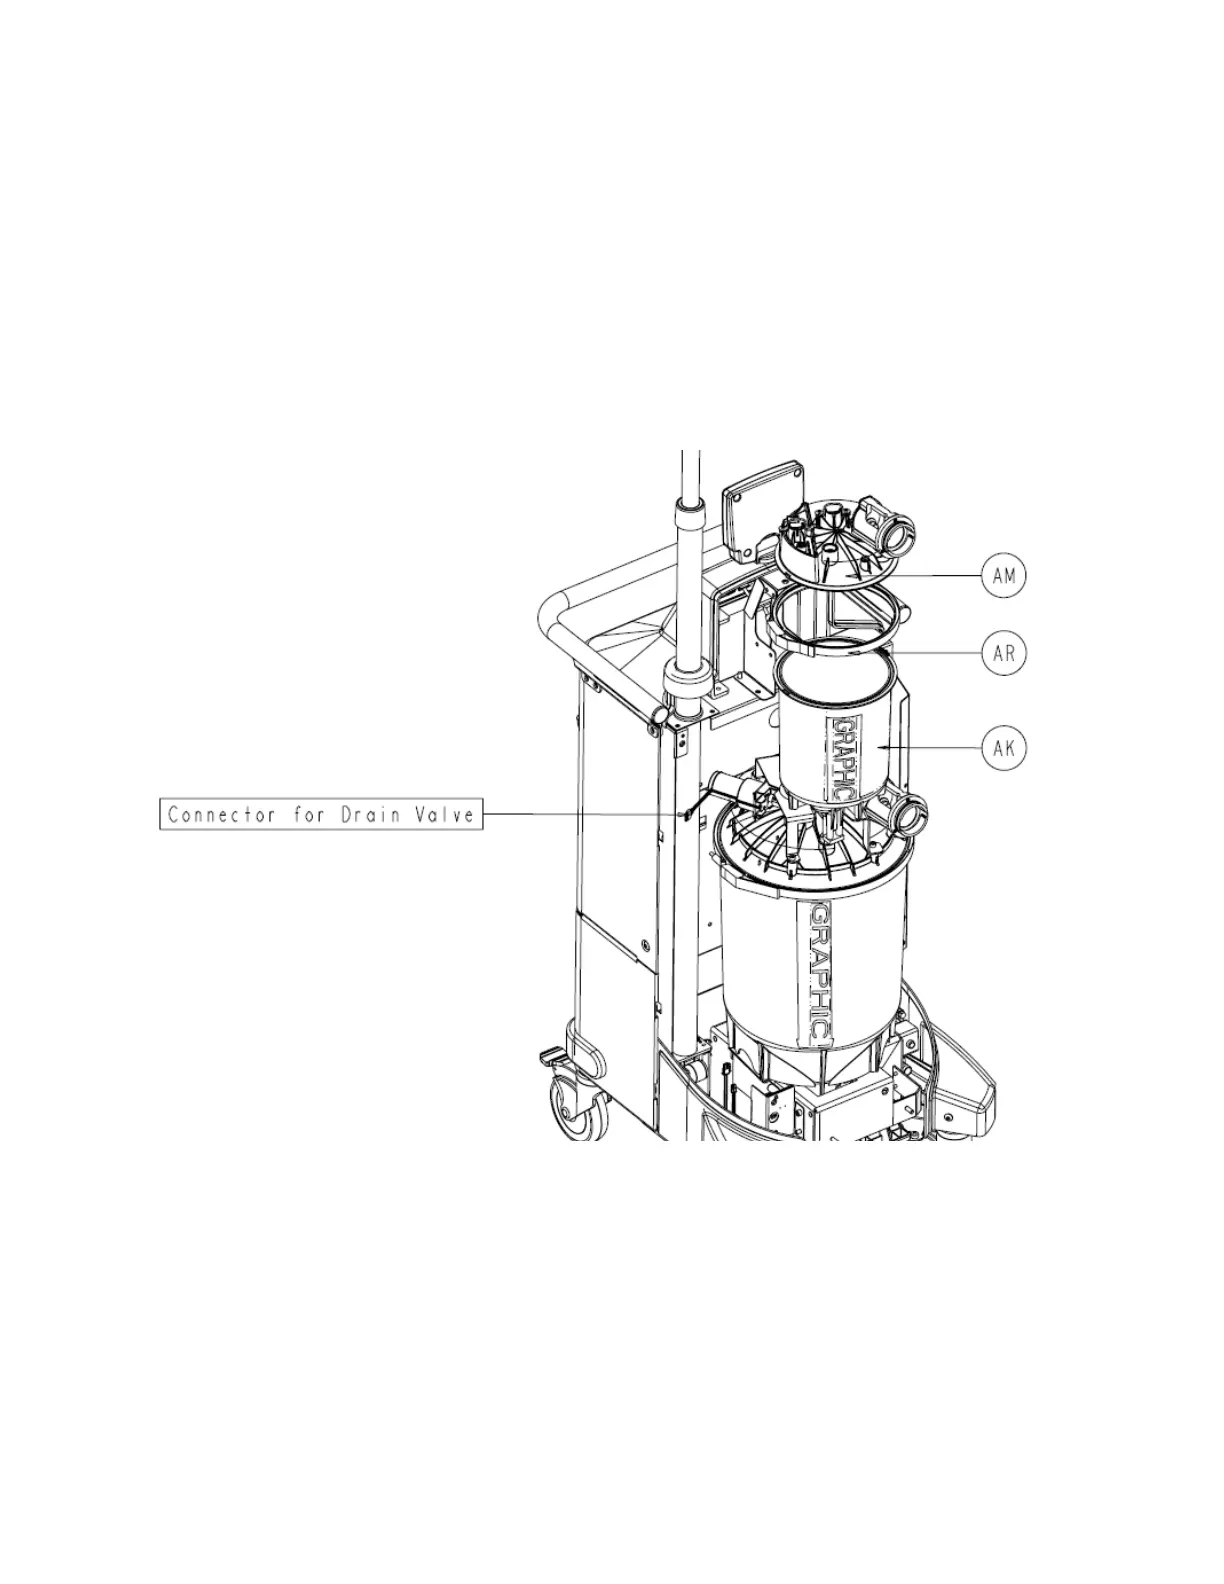
8. Remove the small v-clamp (P/N 702-1-304) (AR) that holds the small canister cap
assembly (P/N 702-1-200) (AM) to the small canister assembly (P/N 702-1-300) (AK)
and set the v-clamp aside.
9. Remove the small canister cap assembly (P/N 702-1-200) (AM) from the small
canister assembly (P/N 702-1-300) (AK) and set aside.
10. Remove the grey cable labeled small canister PCBA from the canister calibration
PCBA (P/N 702-1-803) (F).
11. Remove the connector going from the cable labeled drain valve to the drain valve
assembly (P/N 702-1-360) (D).
2-37

Table of Contents

Other manuals for Stryker Neptune 2

Questions and Answers:

Question and Answer IconNeed help?

Do you have a question about the Stryker Neptune 2 and is the answer not in the manual?

Stryker Neptune 2 Specifications

General IconGeneral
BrandStryker
ModelNeptune 2
CategoryMedical Equipment
LanguageEnglish

Related product manuals