EasyManuals Logo

Stryker Neptune 2 Service And Installation Manual

Stryker Neptune 2
232 pages
To Next Page IconTo Next Page
To Previous Page IconTo Previous Page
Page #83 background imageLoading...
Page #83 background image
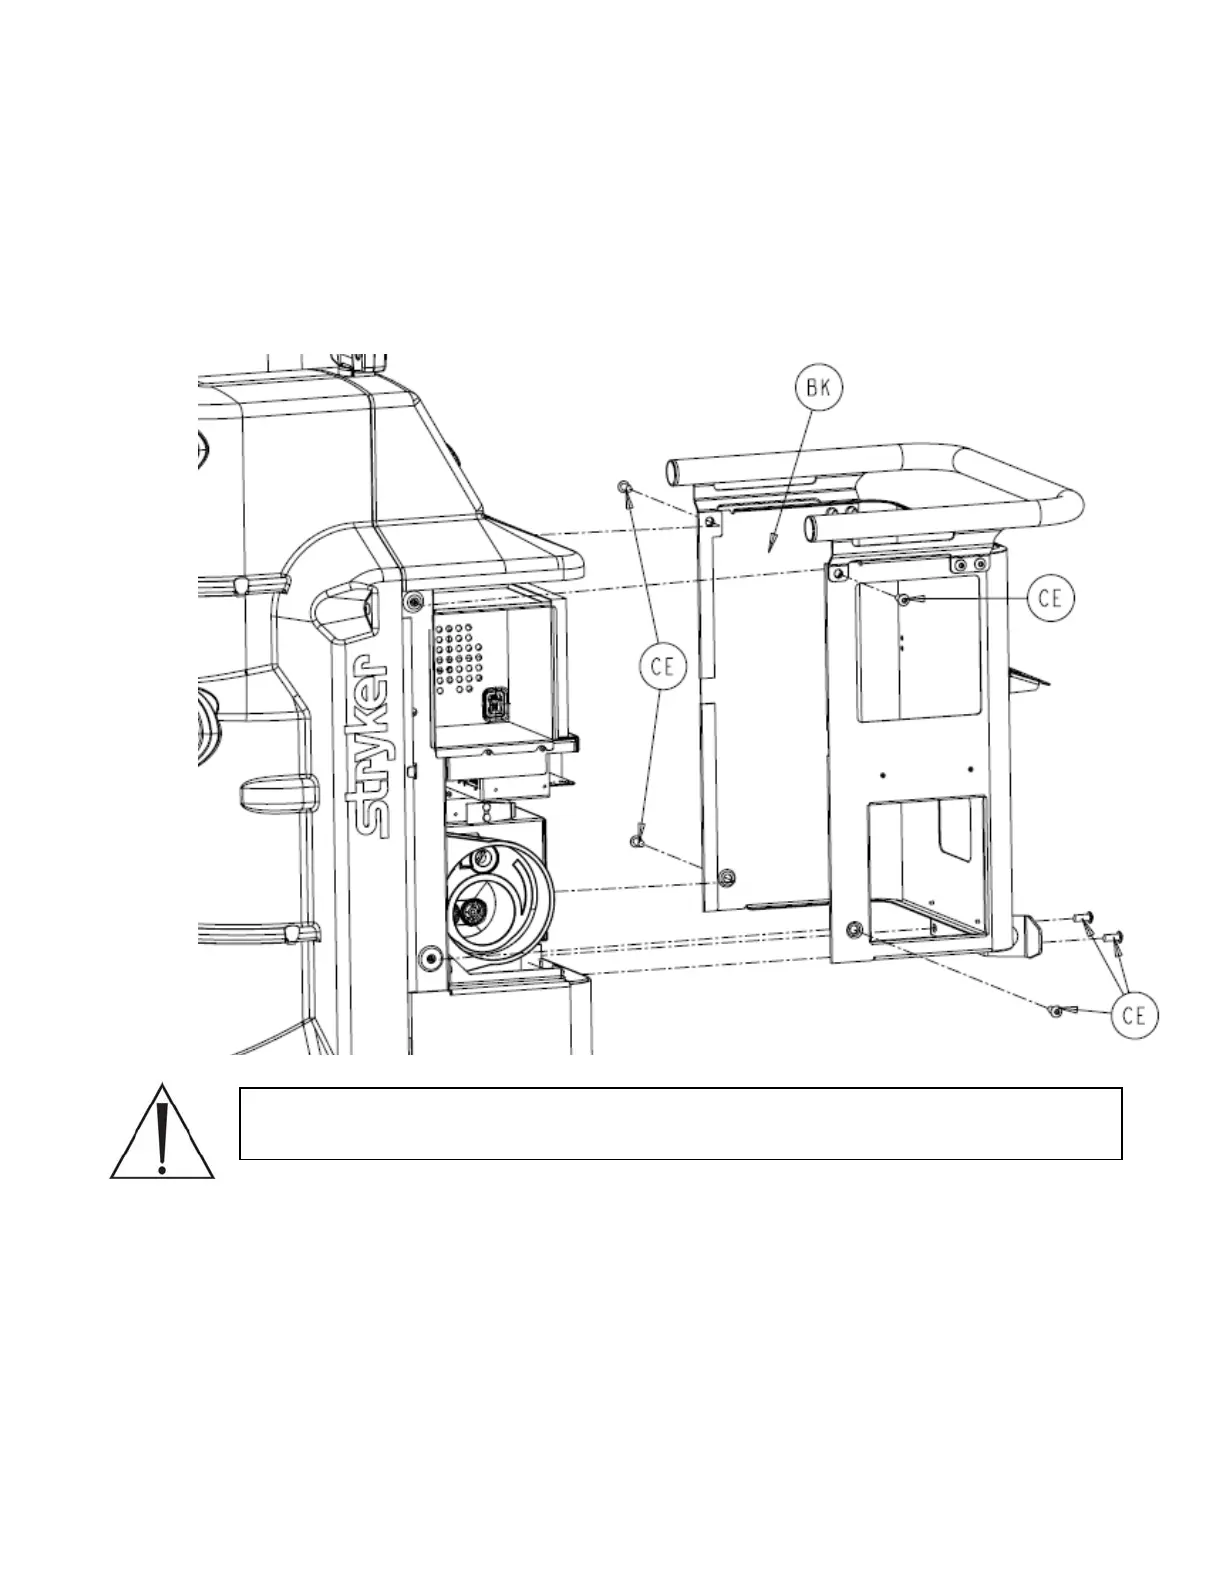
6. Using a 3/16” allen wrench, remove 6 socket head button cap screws (P/N 0004-651-
000) (CE) from rear panel assembly (P/N 0702-001-060) (BK).
7. Remove rear panel assembly (P/N 0702-001-060) (BK) and place aside.
Caution: Be careful not to cut the wire harness or any tubing when cutting cable
ties.
8. Cut the cable tie (P/N 0058-099-000) that holds the tubing coming from the vacuum
manifold assembly (P/N 702-001-110) (N). (Leave the cable tie in the chassis of the
assembly.)
2-54

Table of Contents

Other manuals for Stryker Neptune 2

Questions and Answers:

Question and Answer IconNeed help?

Do you have a question about the Stryker Neptune 2 and is the answer not in the manual?

Stryker Neptune 2 Specifications

General IconGeneral
BrandStryker
ModelNeptune 2
CategoryMedical Equipment
LanguageEnglish

Related product manuals