Getting acquainted with your instrument
The following content provides a high-level description of the instrument controls and user interface.
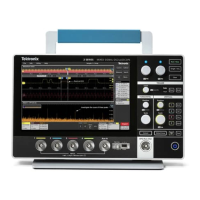
Front panel controls and connectors
The front panel controls provide direct access to key instrument settings such as vertical, horizontal, trigger, cursors, and zoom. The
connectors are where you input signals with probes or cables.
Description
1 Use the Acquisition controls to start and stop waveform acquisition, enable making a single waveform acquisition, calculate the
average of all the samples for each acquisition interval, and delete the current acquisitions and measurement values from memory
.
2 Use the Multipurpose Knobs (A, B) to move cursors, adjust the zoom, and set parameter values in configuration menu input fields.
3 Use the Trigger controls to force a trigger event at a random point in the waveform and capture the acquisition, set the amplitude
level that the signal must pass through to be considered a valid transition, and set how the instrument behaves in the absence or
presence of a trigger event.
4 Use the Horizontal controls to move the waveform from side to side on the screen, and set the time per major horizontal graticule
division and samples/second parameters for the oscilloscope.
5 Use the Vertical controls to move the selected waveform up or down on the screen, set the amplitude units per vertical graticule
division of the selected waveform, turn on (display) or select channels, and add or select a math, reference (saved), bus, and digital
waveform on the Waveform view.
6 Use the Miscellaneous controls to turn touchscreen capability off, restore the oscilloscope settings to the default settings,
automatically display a stable waveform, and save files or settings (using the current File > Save As settings).
7 After connecting the supplied power cord, use the power button to power the instrument on and off. The power button color indicates
the following instrument states; amber is standby, blue is on, unlit is off.
When the batteries in the 2-BP battery pack on your instrument have a low battery charge and the power cord is not connected, the
power button will blink twice and then your instrument will turn off.
Note: Always allow 10 seconds between power down and power up of the instrument before operating the instrument.
Table continued…
Getting acquainted with your instrument
2 Series MSO MSO24 and MSO22 27
 Loading...