5-41
IM 760201-01E
Power Measurement
3
2
1
4
5
6
7
8
9
10
11
12
13
14
App
Index
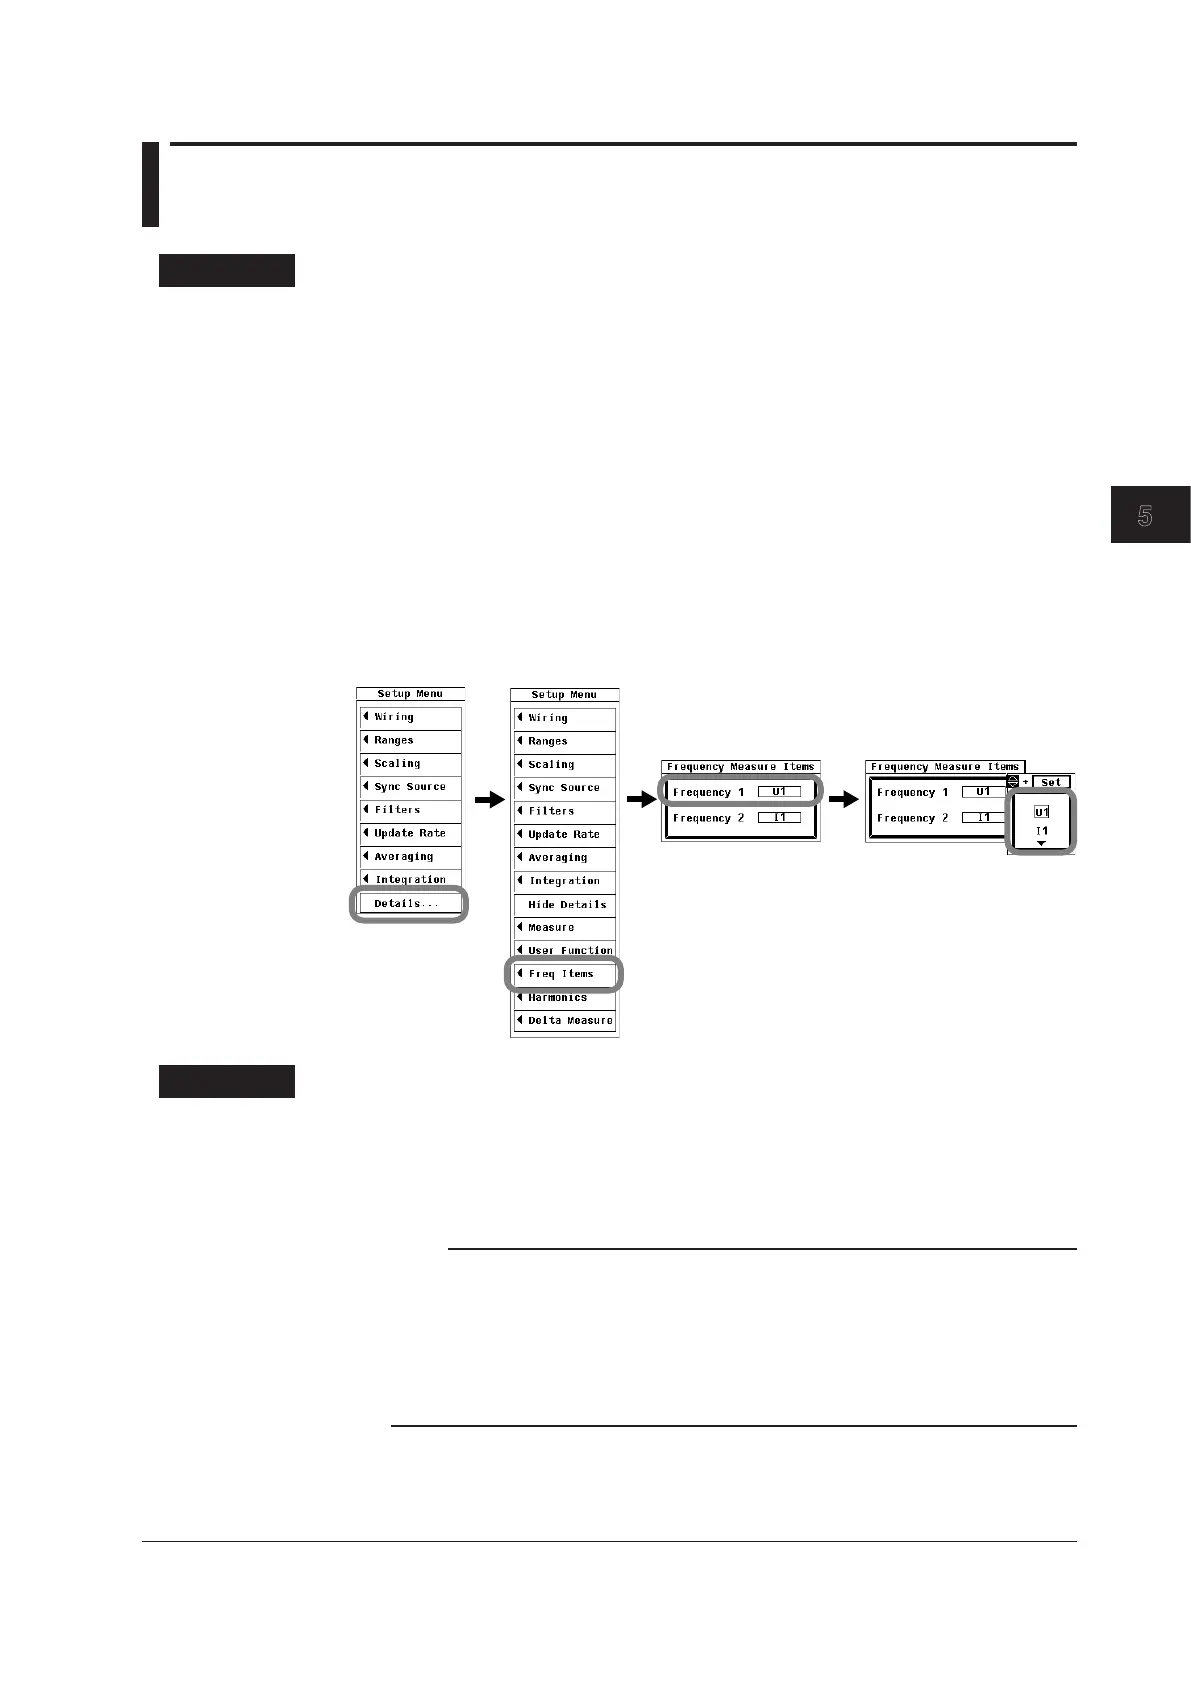
5.16 Selecting What Frequency to Measure
Procedure
1.
Press SETUP to display the Setup menu.
If the full Setup menu does not appear, proceed to step 2. If the full Setup menu appears,
proceed to step 4.
2.
Use the cursor keys to select Details.
3.
Press SET to display the full Setup menu.
4.
Use the cursor keys to select Freq Items.
5.
Press SET to display the Frequency Measure Items dialog box.
Only the input signals of installed elements appear.
6.
Use the cursor keys to select Frequency1 or Frequency2.
7.
Press SET to display the frequency selection box.
8.
Use the cursor keys to select the input signal that you want to measure the
frequency of.
9.
Press SET to confirm the selection.
Explanation
You can measure two of the input element signal frequencies.
However, on models with the frequency measurement add-on option, the frequencies of
all elements can be measured, so there is no need to set which input signals to measure.
On those models, the Freq Items menu option will not appear when you press SETUP.
Note
• If the frequency measurement is not stable due to noise, try using the frequency filter
explained in section 4.8.
• The frequency cannot be detected if the AC amplitude is small. For information about
detectable frequency levels, see “Accuracy” under “Frequency Measurement” in section
14.6, “Functions.”
• The measured data for the frequencies of input signals whose frequencies are not measured
is displayed as “-------” (no data).

 Loading...


