9-2
IM 760201-01E
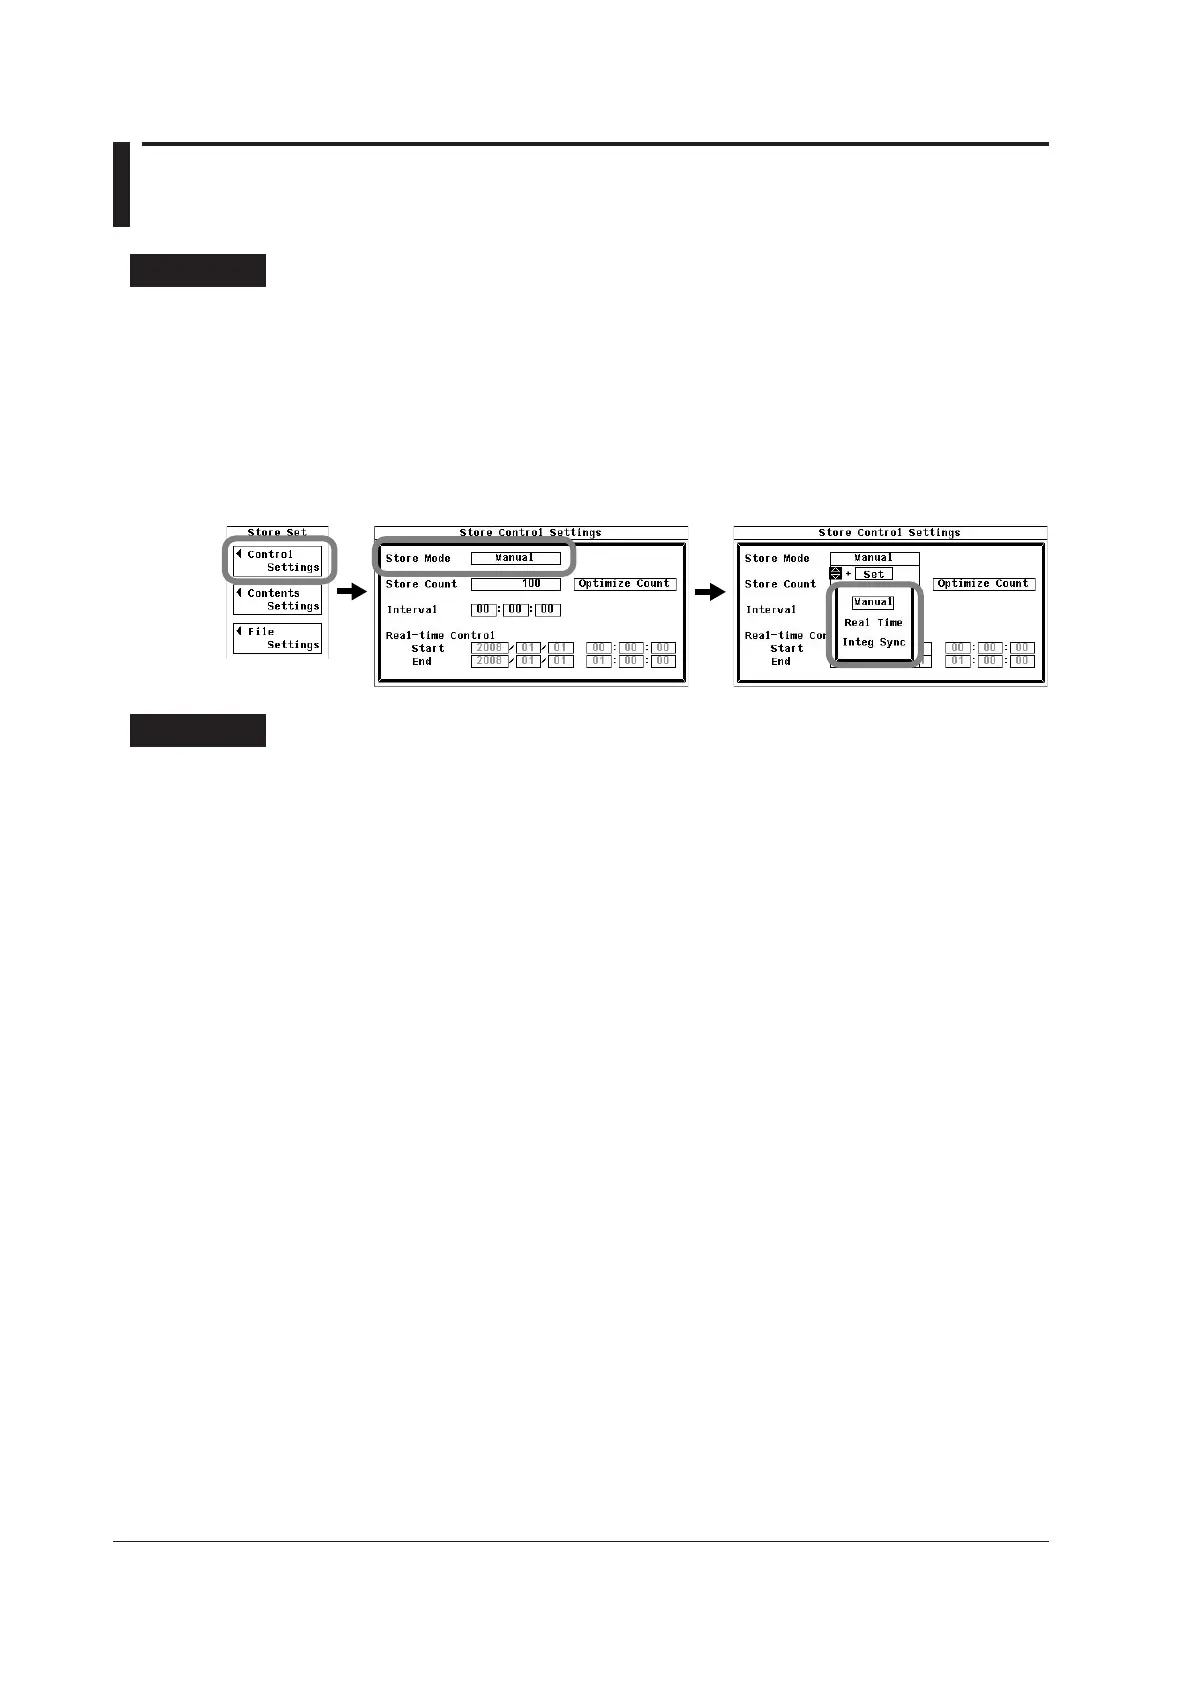
9.2 Setting the Storage Mode
Procedure
1.
Press SHIFT+STORE (STORE SET) to display the Store Set menu.
2.
Use the cursor keys to select Control Settings.
3.
Press SET to display the Store Control Settings menu.
4.
Use the cursor keys to select Store Mode.
5.
Press SET to display the storage mode selection box.
6.
Use the cursor keys to select a storage mode.
7.
Press SET to confirm the selection.
Explanation
Before you can start storing numeric data, you must set the storage mode, store count,
store interval, and the scheduled storage start and end times. This section discusses the
storage mode. For information about the store count, store interval, and the scheduled
storage start and end times, see section 9.4. For information about how to start the
storage operation, see section 9.5.
Storage Mode
You can choose from one of the following methods for starting and stopping storage.
• Manual
When you press ST
ORE, numeric data is stored for the number of times specified by
the store count at the rate specified by the store interval.
•
Real Time
After you press ST
ORE, numeric data storage starts at the scheduled storage start
time and continues at the rate specified by the store interval for the number of times
specified by the store count (or until the scheduled storage end time is reached).
•
Integ Sync
•
Storage is synchronized with integration. After you press STORE, numeric data
storage starts at the same time as integration and continues at the rate specified
by the store interval for the number of times specified by the store count (or until
integration stops).
•
If you set the integration timer (see section 5.8 and 5.9 for details) so that it is an
integer multiple of the store interval, you can store the final integrated value each
time that the integration timer expires and integration resets.

 Loading...


