STARTUP
Axio Scope.A1 Mounting the Standard Components Carl Zeiss
M60-2-0007 e 05/08 41
3.1.10 Mounting the LED Illuminator for
Transmitted Light
BE CAREFUL, LED radiation!
LED class 2M, do not look into the
beam!
The LED illuminator can only be
inserted on the lower stand part for
LED illumination.
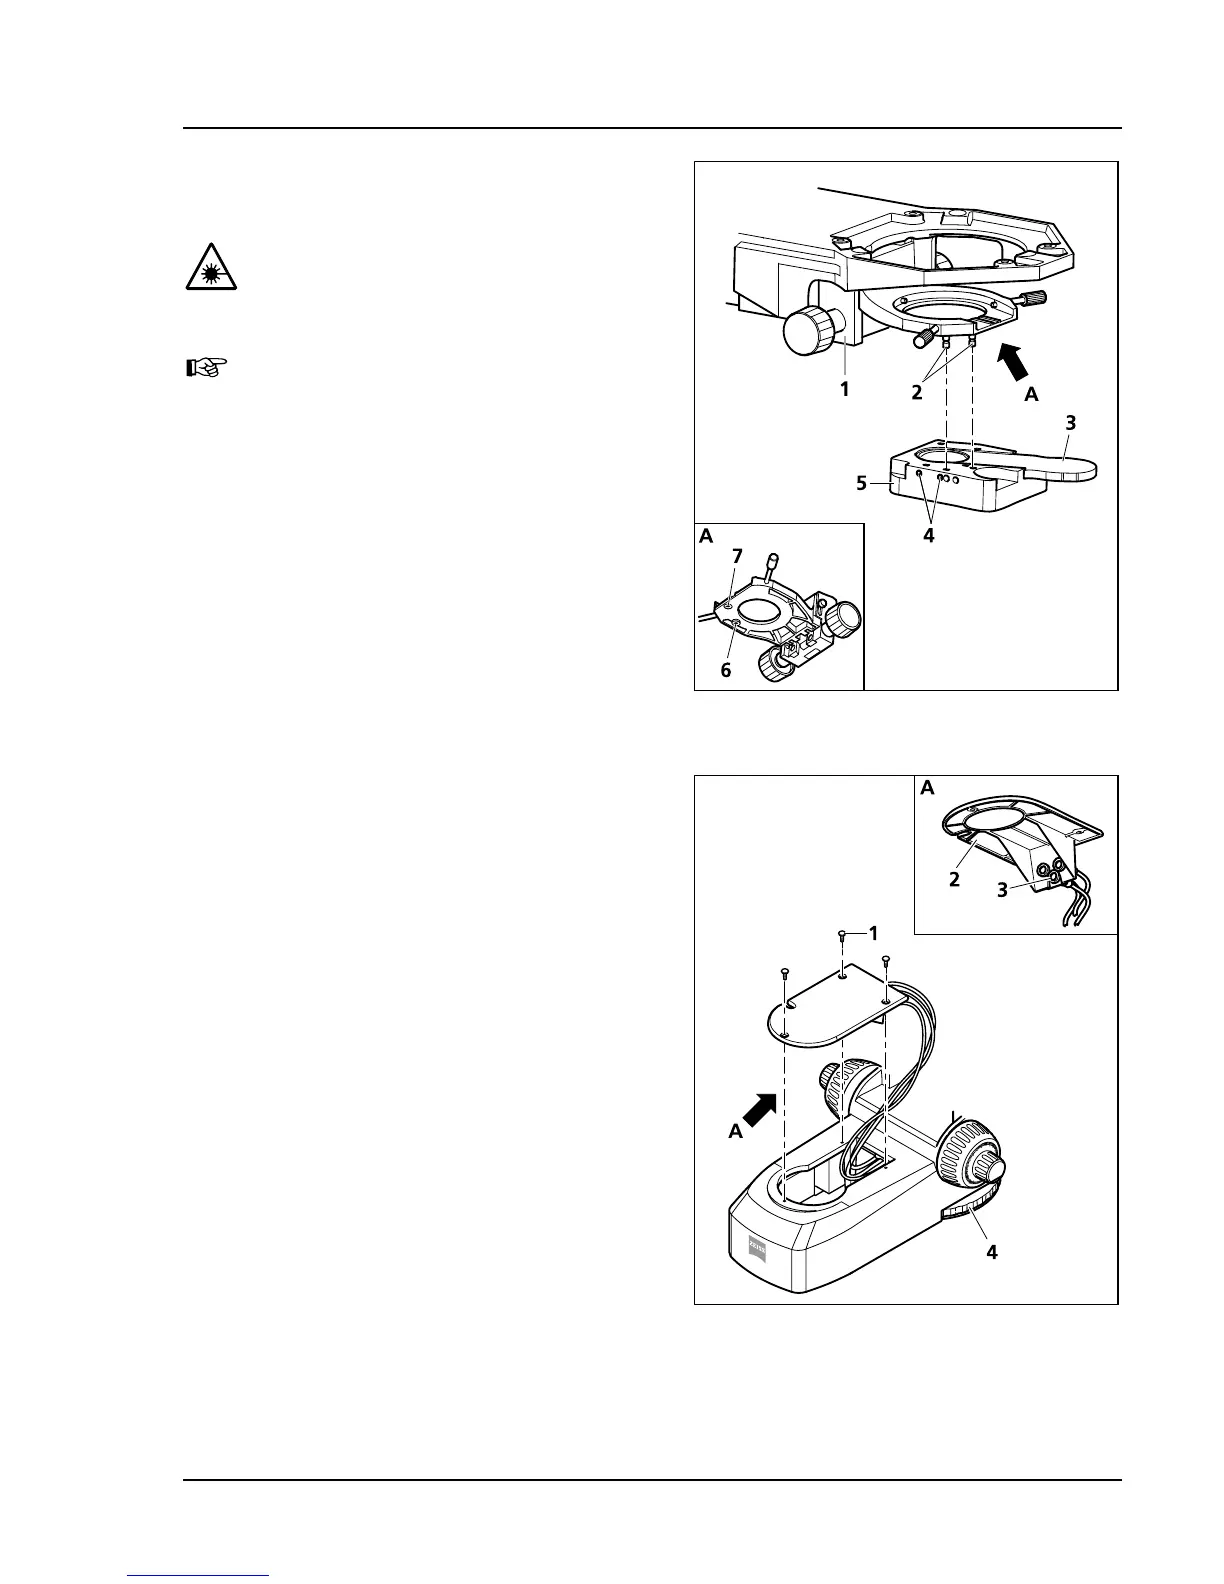
• If the condenser carrier is already mounted,
remove the stage carrier from the stand (see
chapter
378H378H3.1.13).
• Screw the bolt (
379H379HFig. 3-16/2) by hand into the
threaded holes on the bottom of the condenser
carrier (
380H380HFig. 3-16/6 and 7).
• Hold the LED illuminator (
381H381HFig. 3-16/5) parallel to
the bottom of the condenser carrier
(
382H382HFig. 3-16/1), pin it upward onto the bolts
(
383H383HFig. 3-16/2) and lock it with the screws
(
384H384HFig. 3-16/4) on the left side of the LED
illuminator.
• Slide the slider with the diffusion disk
(
385H385HFig. 3-16/3) into the LED illuminator or, for
transmitted light polarization contrast, slide in
the polarizer for LED (427708-0000-000).
• Unscrew three screws (
386H386HFig. 3-17/1) of the cover
(
387H387HFig. 3-17/2) of the foot and remove the cover.
• Plug the LED illuminator into the port on the
cover (
388H388HFig. 3-17/3).
• Place the cover on the foot, thread the cord
through the hole in the cover and tighten the
three screws.
• Mount the stage carrier (see chapter
389H389H3.1.13).
The intensity of the LED reflected light can be
controlled with the control wheel (operable from
both sides) (
390H390HFig. 3-17/4).
Fig. 3-16 Mounting the LED illuminator on
the condenser
Fig. 3-17 Connecting the LED illuminator