STARTUP
Carl Zeiss Mounting Optional Components Axio Scope.A1
56 M60-2-0007 e 05/08
3.4 Mounting Optional Components
Make sure to unplug the stand and the external power supply units before you begin any
mounting work.
After finishing working the appropriate components must be put back into functional condition
(see chapters
501H501H3.1 to 502H502H3.3).
3.4.1 Changing the Upper Stand Part and
Inserting a Centerpiece for Larger
Specimens
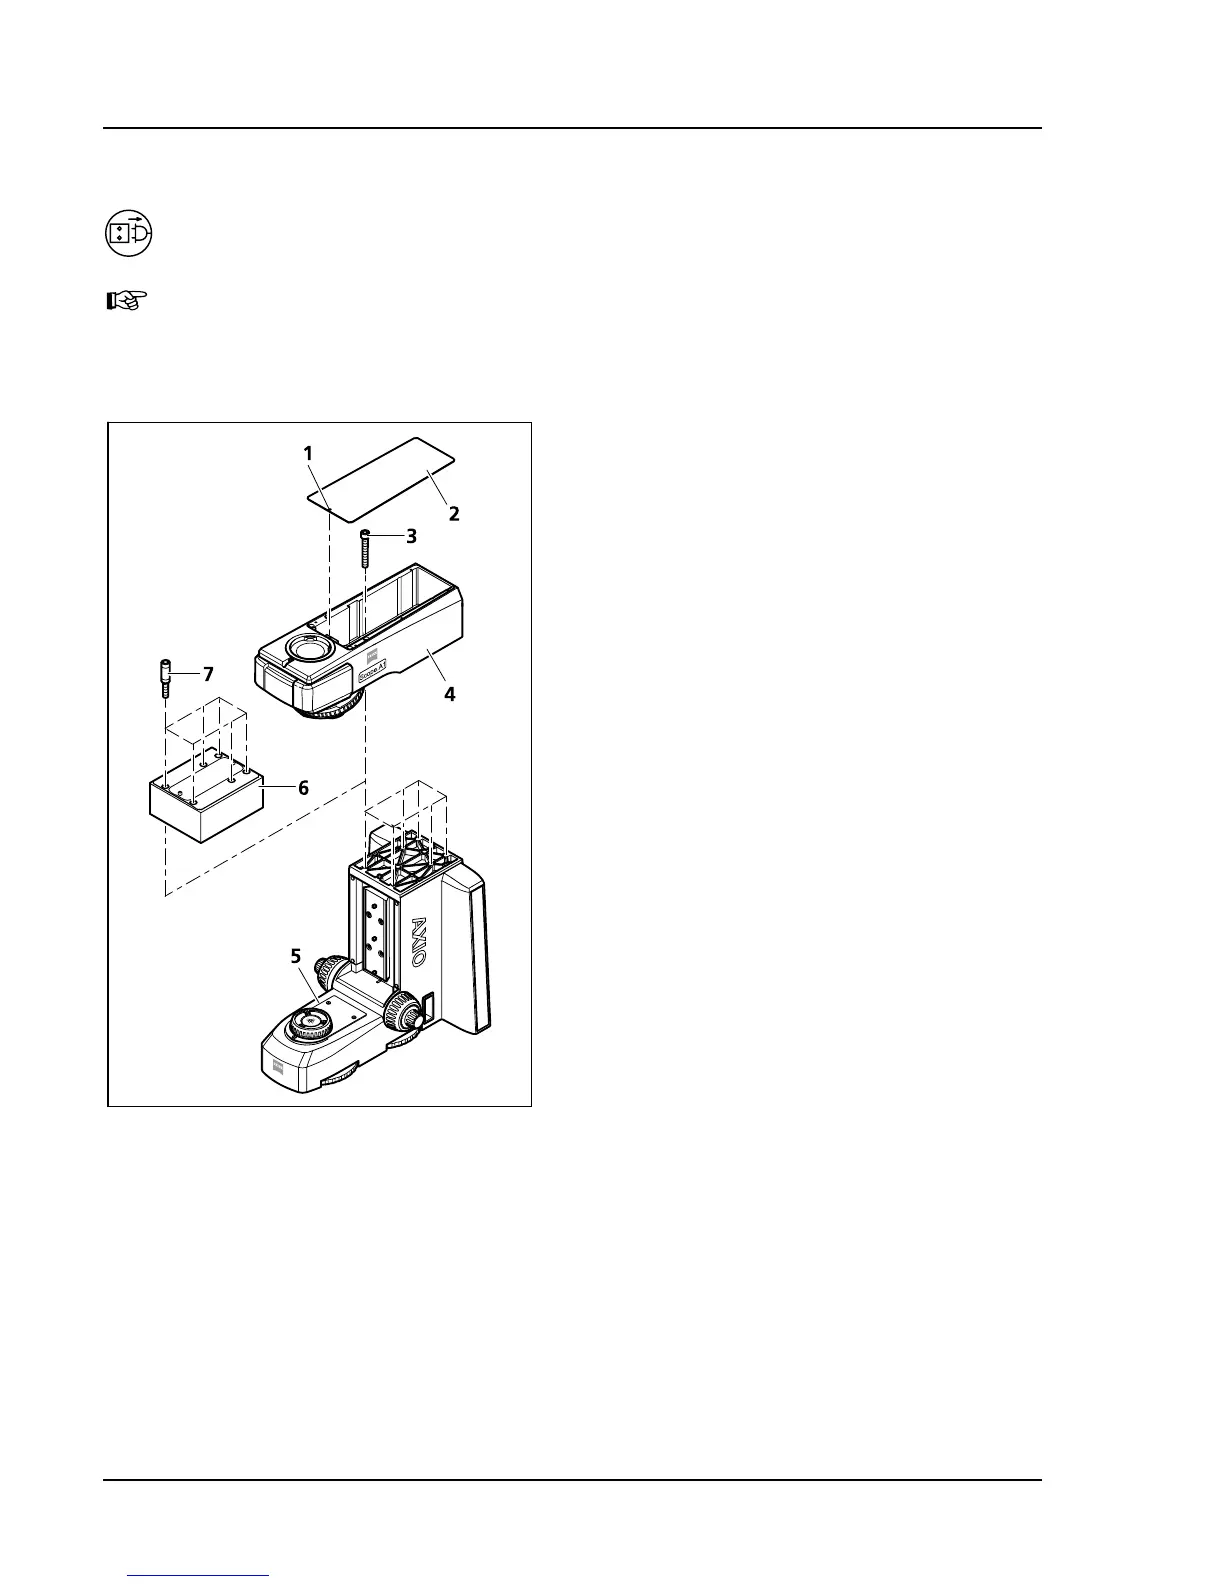
• Remove the magnetically held cover (
503H503HFig.
3-39/2) of the upper stand part by inserting a
screwdriver into the special front opening (
504H504HFig.
3-39/1). Then lift the cover.
• Hold the upper stand part (
505H505HFig. 3-39/4),
unscrew the six hexagon socket screws (
506H506HFig.
3-39/3) with the ball head screwdriver SW 5
and remove the upper stand part.
• If you want to mount a centerpiece (
507H507HFig.
3-39/6), then proceed by screwing the
appropriate spacers (
508H508HFig. 3-39/7) with the
included key SW 8 into the lower stand part.
Then mount the centerpiece 30 mm or 60 mm
• Mount the upper stand part to be mounted
(
509H509HFig. 3-39/4) onto the lower stand part or the
centerpiece, hold it and tighten the six hexagon
socket screws (
510H510HFig. 3-39/3).
• Replace the cover.
• Check the stage carrier position and change it if
necessary (see chapter
511H511H3.1.13).
Fig. 3-39 Changing the upper stand part,
inserting a centerpiece