STARTUP
Axio Scope.A1 Mounting the Standard Components Carl Zeiss
M60-2-0007 e 05/08 47
3.1.15.2 Adjusting the halogen lamp
HAL 100
Rough setting
• After loosening the clamping screw (
428H428HFig. 3-23/1
or
429H429HFig. 3-23/7), remove the ready-to-operate
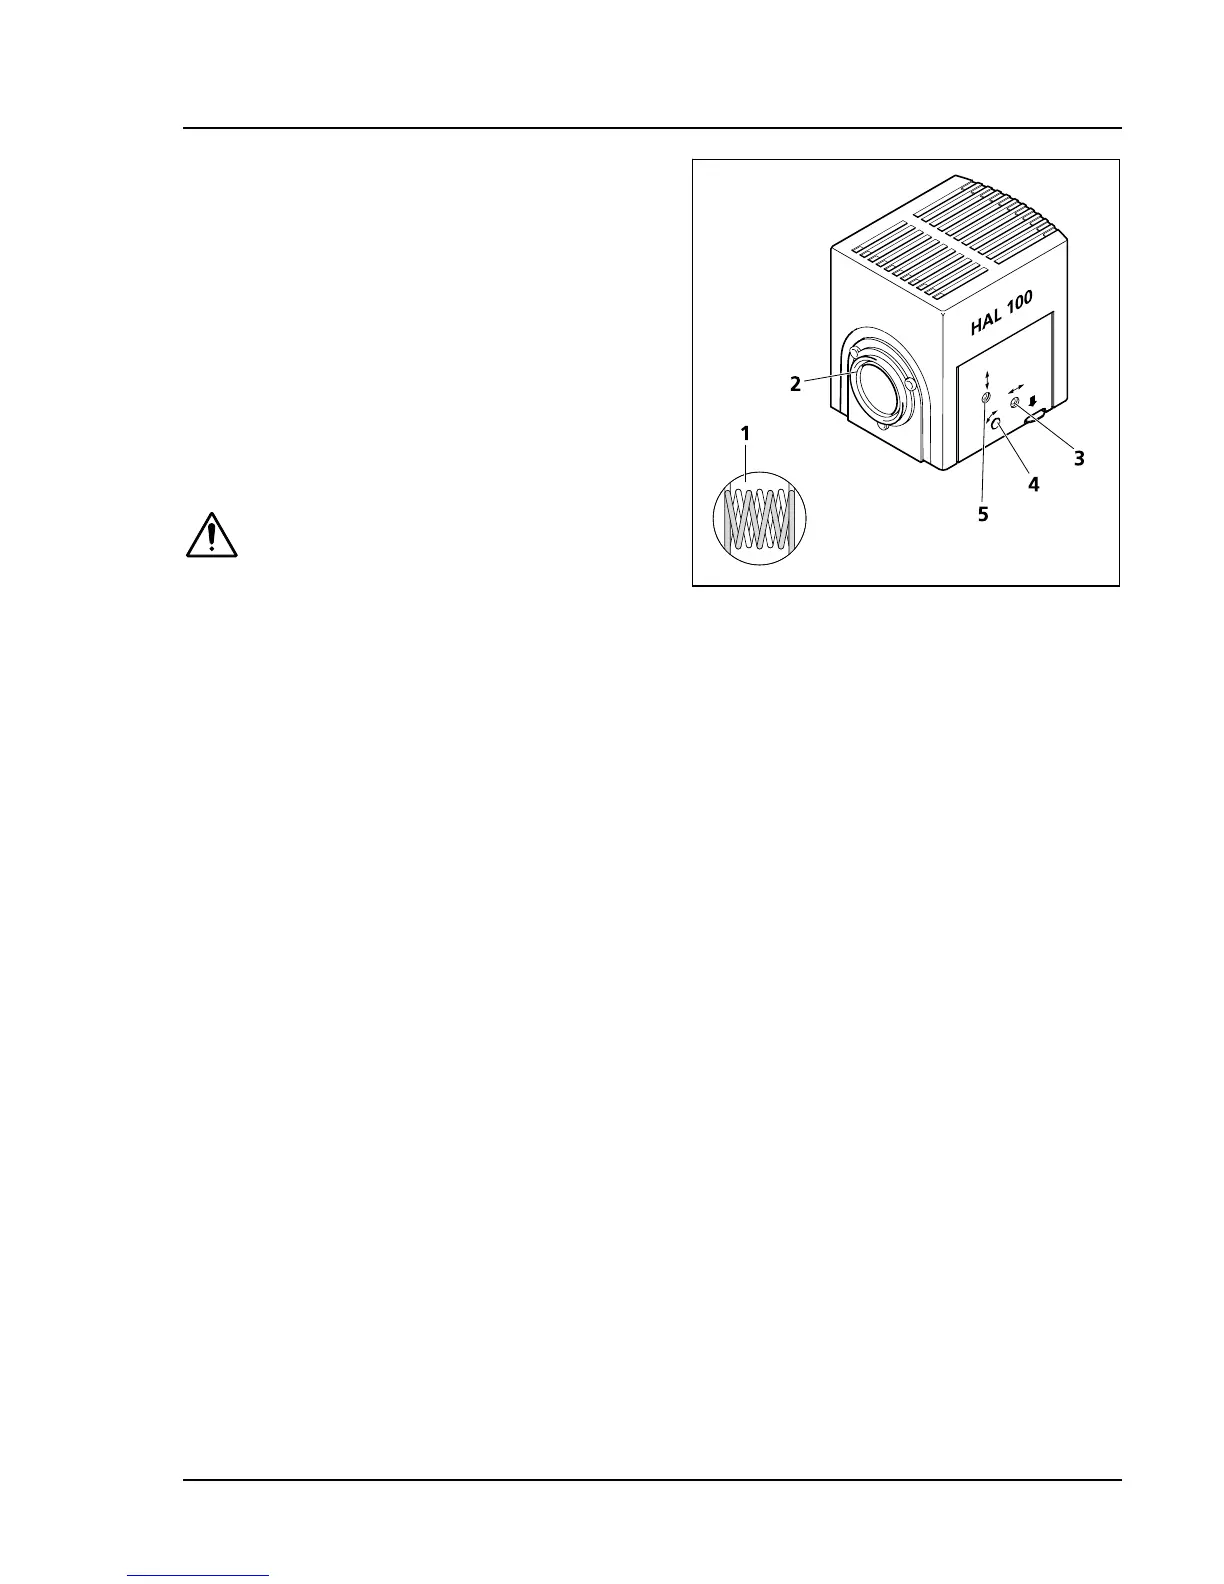
halogen lamp (
430H430HFig. 3-24/2) from the microscope
stand.
• Switch on the auxiliary power supply unit of the
halogen lamp HAL 100 (see chapter
431H431H3.3).
• Direct the light beam towards a projecting
surface (wall) which is at least 3 m away.
Never look directly into the light
emitting aperture of the lamp!
• Adjust the adjustment screw (
432H432HFig. 3-24/3) with a
ball head screwdriver SW 3 until both images of
the lamp filament appear as sharp as possible
on the projection surface.
• Adjust the adjustment screws (
433H433HFig. 3-24/4 and
5) so that the lamp filament of one image
exactly fills the gaps of the reflected image
(
434H434HFig. 3-24/1).
Fine setting
• Mount the microscope lamp on the microscope stand again and tighten the clamping screw to lock it.
• If applicable, turn off the diffusion disk transmitted light and remove the filter from the beam path.
• Focus the objective ≤ 40x on the sample and go to a free place of the object.
• Remove the eyepiece and center the lamp filament and its reflection in the eye pupil image with the
adjustment screws (
435H435HFig. 3-24/4 and 5).
• Optimize the even illumination of the pupil image with the adjustment screws (
436H436HFig. 3-24/3).
• Switch on the diffusion disk and replace the filter wheels.
Fig. 3-24 Adjusting a halogen lamp HAL 100