STARTUP
Carl Zeiss Mounting the Standard Components Axio Scope.A1
48 M60-2-0007 e 05/08
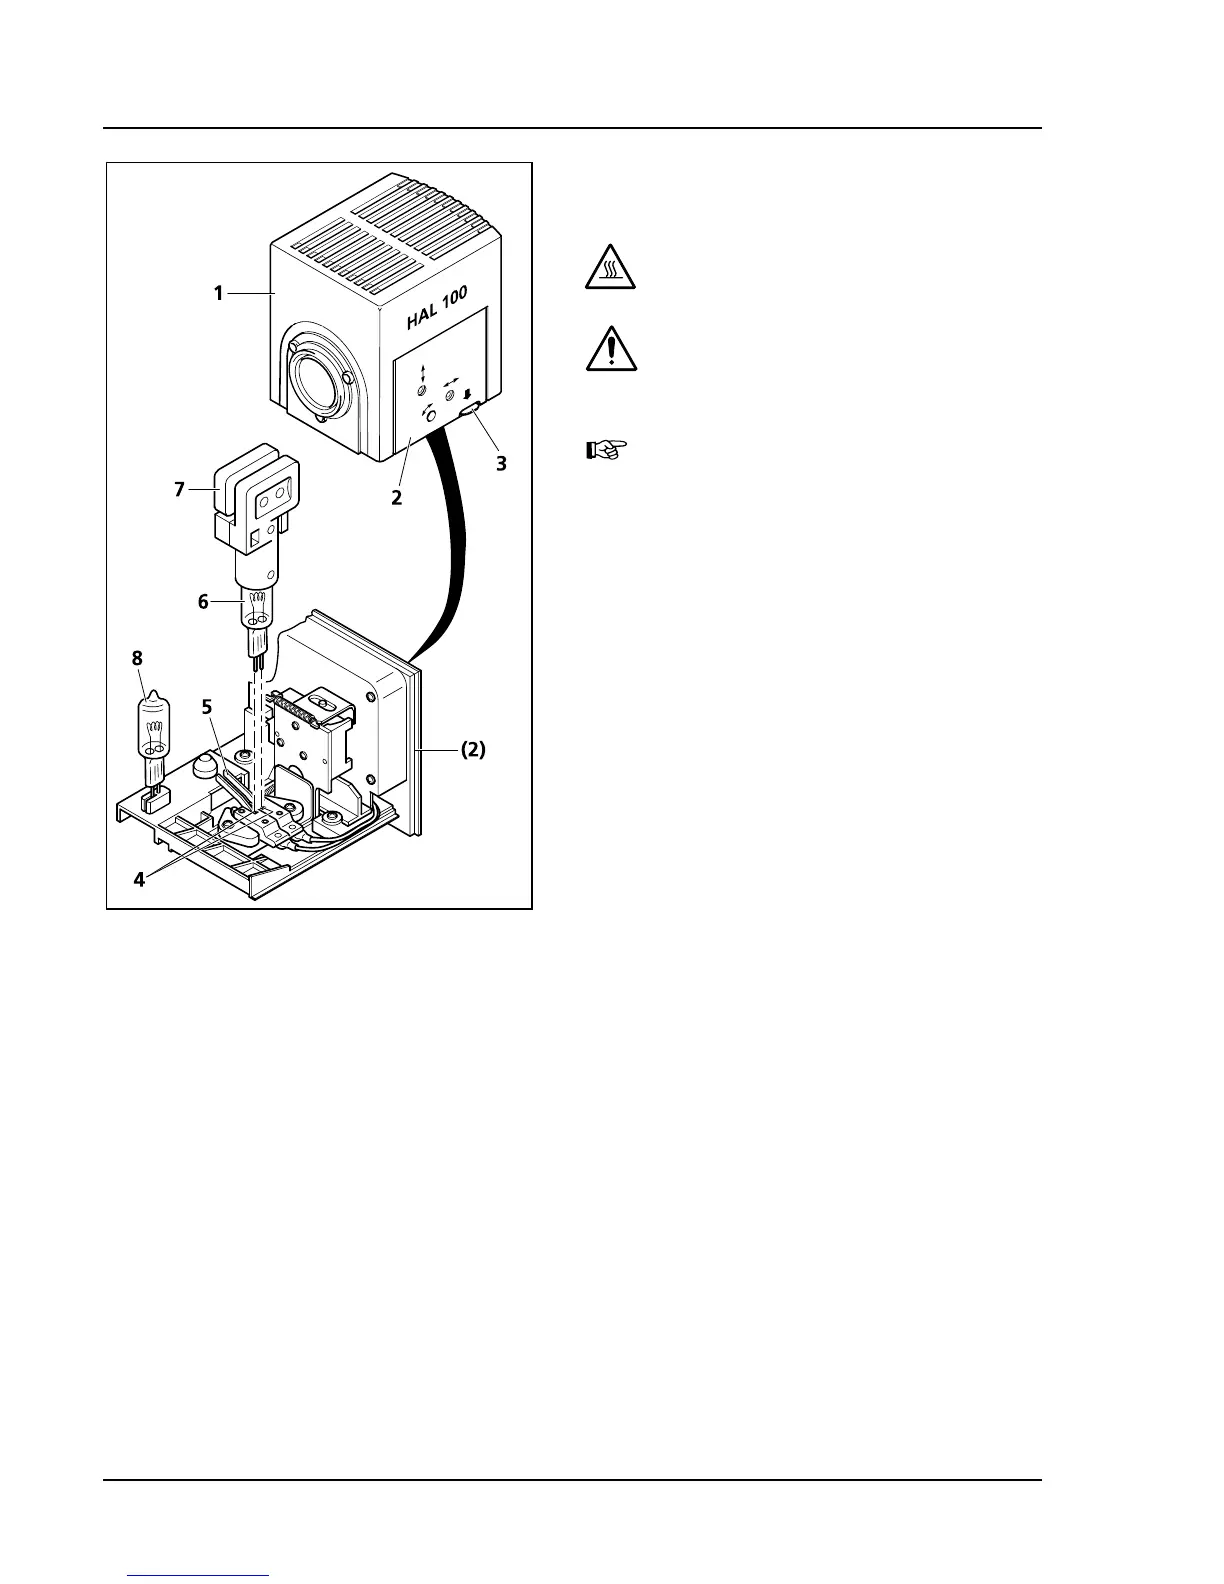
3.1.15.3 Changing the halogen lamp 12 V,
100 W
CAUTION
Hot surface!
DANGER OF BURNS!
Always let the lamp case cool off for at
least 15 min.!
It is not necessary to remove the lamp
case from the stand when replacing
the halogen lamp. Do not store the
included tools for the halogen lamp
(
437H437HFig. 3-25/7) in the lamp case when the
halogen lamp is in operation.
The replacement lamp (
438H438HFig. 3-25/8) can
remain in the lamp case.
• Switch off the auxiliary power supply unit of the
HAL 100 (see chapter
439H439H3.2.3). Remove 3-pin plug
of the HAL 100.
• Press down the release button (
440H440HFig. 3-25/3) of
halogen lamp HAL 100 (
441H441HFig. 3-25/1). Pull the
lamp carrier (
442H442HFig. 3-25/2) out completely and
put it aside.
• Press down both spring levers (
443H443HFig. 3-25/5) and
pull out the old halogen lamp (
444H444HFig. 3-25/6) in an
upward motion.
• Press down both spring levers, insert the new
lamp into the lamp cap (
445H445HFig. 3-25/4) and release
the spring levers. Use only the included special
tools (
446H446HFig. 3-25/7) when holding/grabbing the
halogen lamp. Traces of skin grease on the
halogen lamp can impair its life span.
• Press the spring levers down again briefly. The
lamp is now centered.
• Replace the lamp carrier and slide it in until it
engages fully.
• Replug the 3-pin plug of HAL 100.
Fig. 3-25 Changing a halogen lamp