STARTUP
Carl Zeiss Mounting the Standard Components Axio Scope.A1
46 M60-2-0007 e 05/08
3.1.15 Halogen Lamp HAL 100
The halogen lamp HAL 100 may serve as light source for transmitted light and reflected light procedures
(except fluorescence light) as long as either the lower stand part or the upper stand part are equipped
with the appropriate connection piece. When mounting the halogen lamp, no difference is made
between reflected light and transmitted light procedures.
3.1.15.1 Mounting the halogen lamp
HAL 100
Before you switch on the halogen
lamp, please be sure to remove the
tools which are included in the lamp
case. The lamp generates a lot of heat
which could damage these tools (see
chapter
417H417H3.1.15.3).
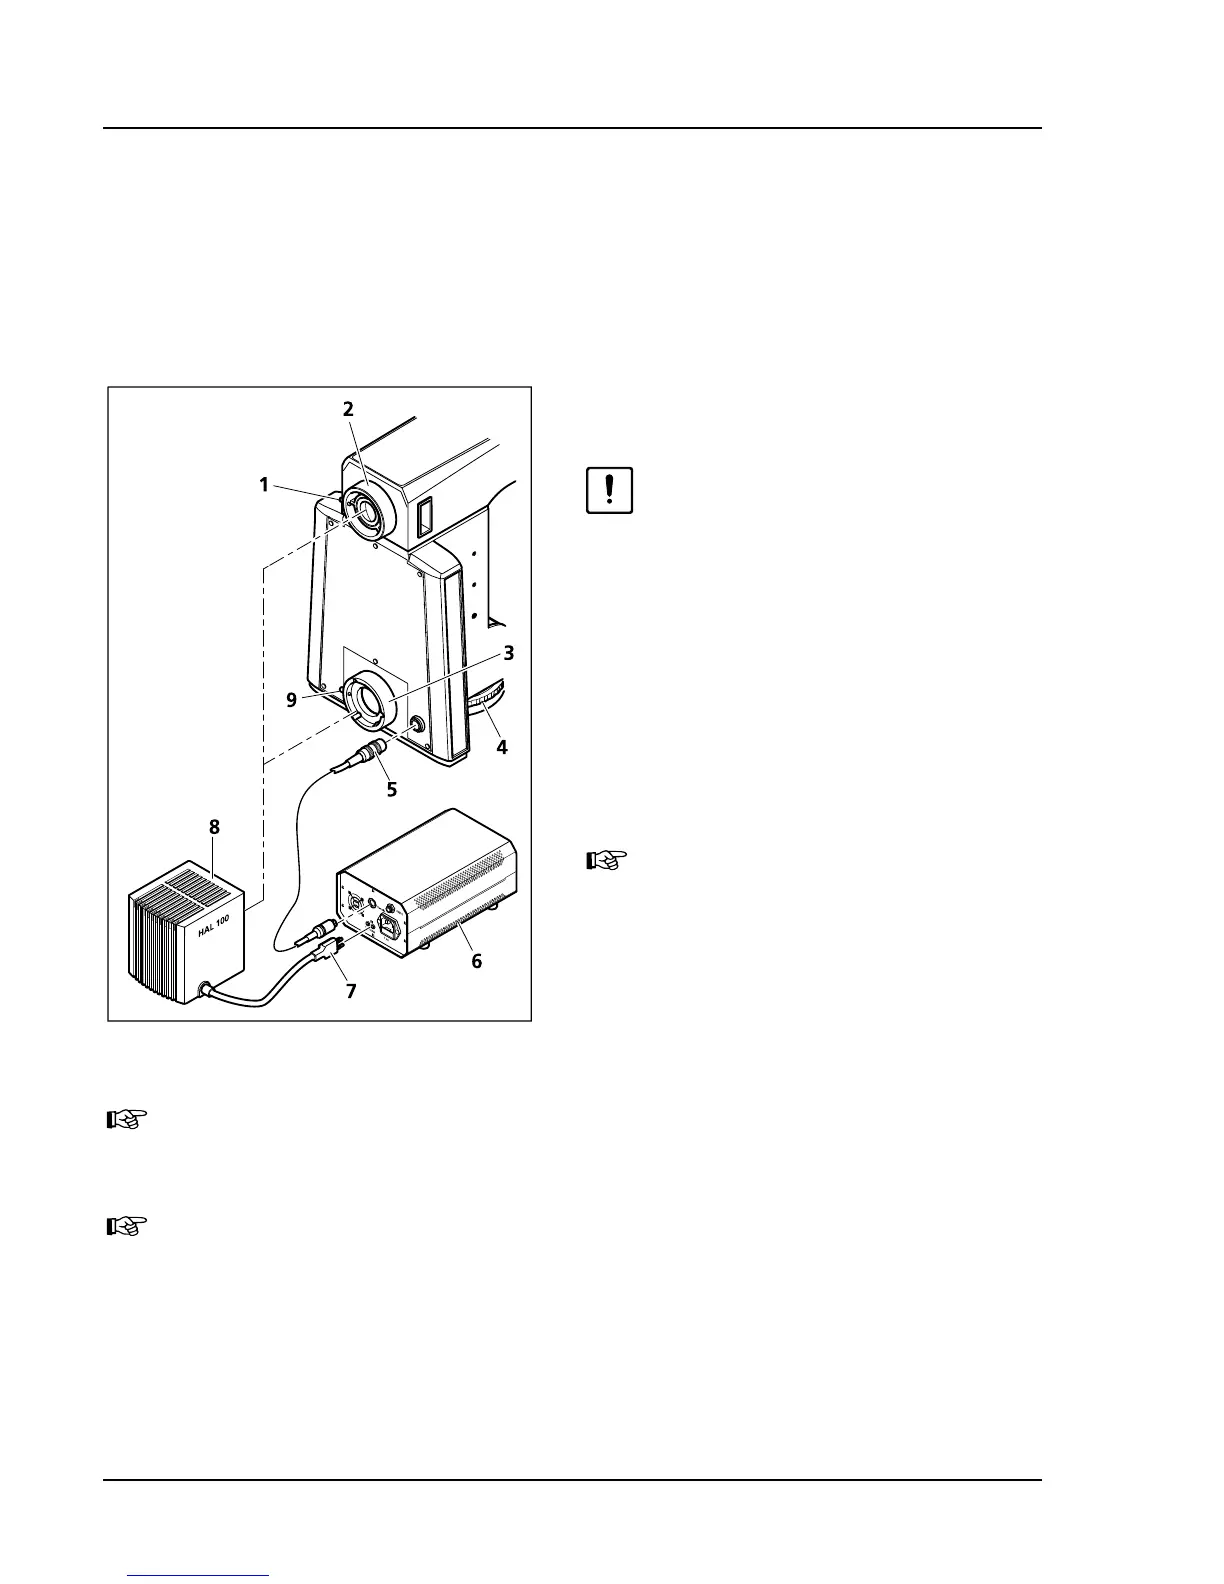
• Remove the cap from the reflected light or
transmitted light connector.
• Insert the lamp case (
418H418HFig. 3-23/8) with the
dovetail ring into the connector (
419H419HFig. 3-23/2 and
420H420HFig. 3-23/3). Now fixate it by tightening the
clamping screw (
421H421HFig. 3-23/1 or 422H422HFig. 3-23/9) with
the ball head screwdriver SW 3.
Due to the lack of ground clearance it
is important to avoid canting the lamp
when inserting it into the lower stand
part. Check for straight and correct fit.
• Insert the 3-pin lamp plug (
423H423HFig. 3-23/7) into the
back of the external power supply (
424H424HFig. 3-23/6).
When mounting HAL 100 to the lower stand part for HAL 100 illumination, it is necessary to
use an additional control cord (
425H425HFig. 3-23/5) for the light intensity (see chapter 426H426H3.2.2). The light
intensity of HAL 100 can then be adjusted with the control wheel (
427H427HFig. 3-23/4).
The light intensity of HAL 100 can also be adjusted with the external power supply unit. In this
case, the control cord needs to be removed.
Fig. 3-23 Mounting the halogen lamp
HAL 100