EasyManuals Logo

Ateis IDA8 Series User Manual

Ateis IDA8 Series
535 pages
To Next Page IconTo Next Page
To Previous Page IconTo Previous Page
Page #310 background imageLoading...
Page #310 background image
IDA8 Global-Net User Manual310
© 2020, ATEÏS. All rights reserved.
hone
Status
512
58588
1
Log
Year
R
x
x
x
x
Year(thousand) of the log
x
x
x
x
Year(hundred) of the log
x
x
x
x
Year(tens) of the log
x
x
x
x
Year(unit) of the log
58589
1
Log
Date
x
x
x
x
Month (tens) of the log
x
x
x
x
Month (unit) of the log
x
x
x
x
Day (tens) of the log
x
x
x
x
Dat (unit) of the log
58590
1
Log
Time
Hour/
Minute
x
x
x
x
Hour (tens) of the log
x
x
x
x
Hour (uint) of the log
x
x
x
x
Minutes (tens) of the log
x
x
x
x
Minutes (uint) of the log
58591
1
Log
Time
Second
x
x
x
x
Second (tens) of the log
x
x
x
x
Second (uint) of the log
58592
100
Log
Text 1
x
x
x
x
x
x
x
x
Log text (100 ASCII
characters)
...
59091
Log
Text 100
x
x
x
x
x
x
x
x
5.5.2.2 Table of Modbus Key
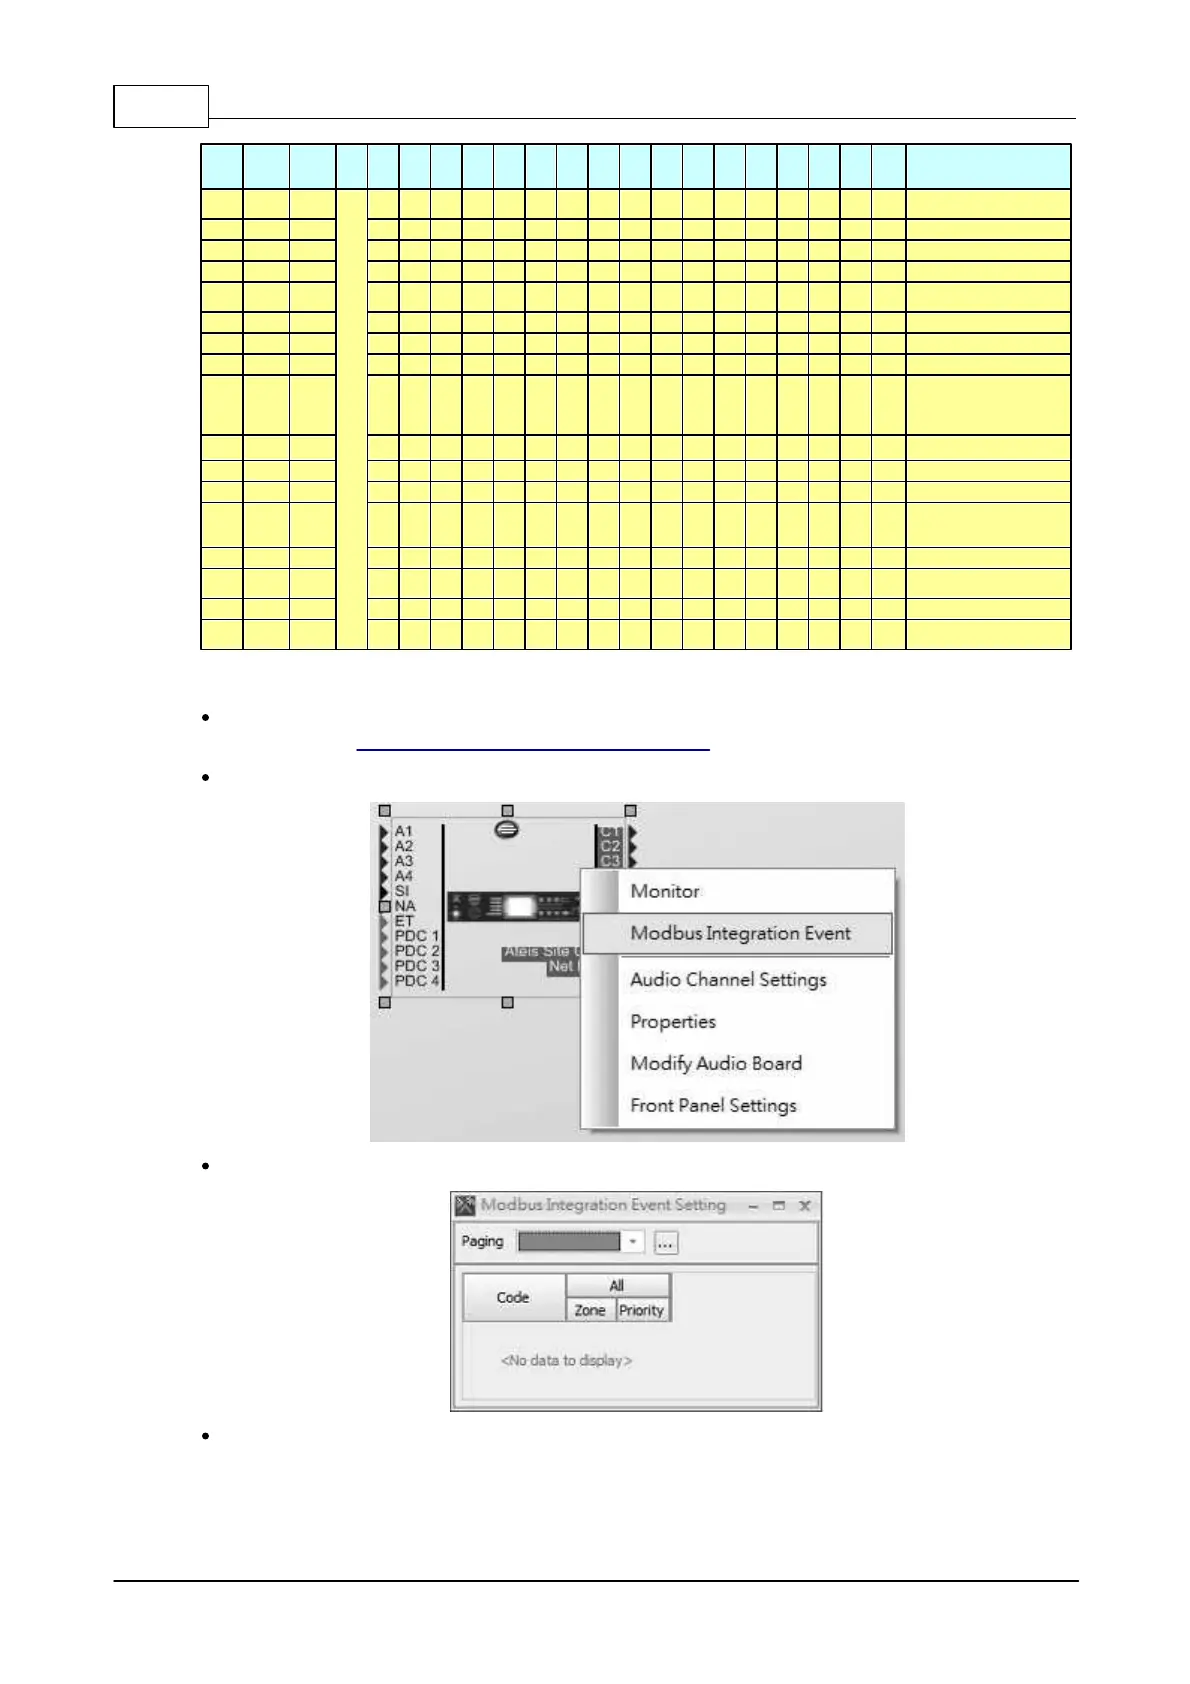
Step 1: Create an [Integration Event] on Network Paging component, the event code can be set
from 1~64, see Network Paging component > Integration for details.
Step 2: Right click on IDA8 processor icon, then click [Modbus Integration Event].
Step 3: Choose the integration event from [Paging] drop-down box.
Step 4: After completed the Modbus Key setting, the Modbus address will be applied at the range
of 40100~40103.

Table of Contents

Questions and Answers:

Question and Answer IconNeed help?

Do you have a question about the Ateis IDA8 Series and is the answer not in the manual?

Ateis IDA8 Series Specifications

General IconGeneral
BrandAteis
ModelIDA8 Series
CategorySecurity System
LanguageEnglish

Related product manuals