160
V2.6 | 8/30/2022 | 1120758
7.14 Category:ImageProcessingControl(≥Release3only)
Category that contains the Baumer image processing features.
General Information - Shading Correction
Uneven lighting can result in some areas of the image being darker than others. Shading
Correction provides the option to compensate for brightness irregularities in the image.
How to set up Shading Correction with Baumer Camera Explorer
1. Start the Camera Explorer. Connect to the camera. Select the prole GenICam
Guru if necessary..
2. Open the category Image Processing Control.
3. Congure the lighting situation as it will be for the planned application.
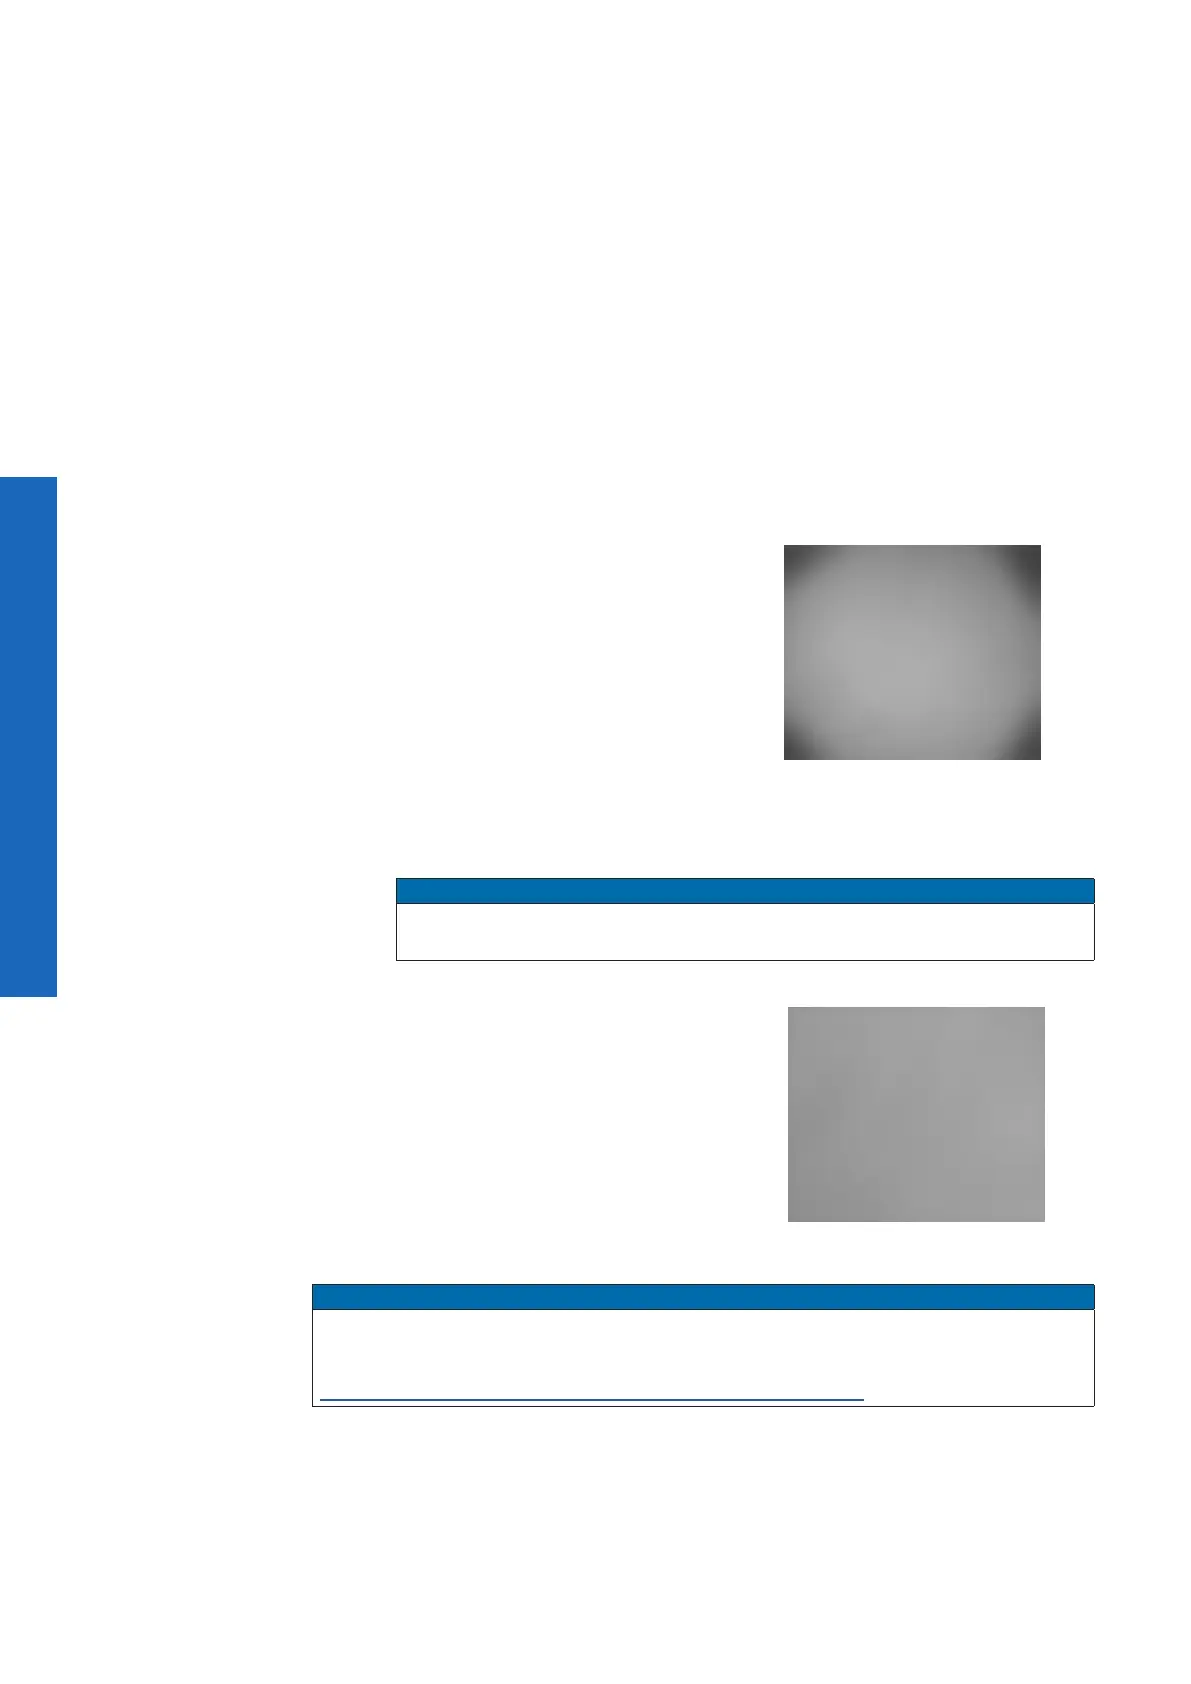
4. Place an homogeneous white or grey
template in the camera´s eld of view.
Clear shadings can be seen in the
corners.
5. Activate the Shading Correction by checking the ShadingEnable box.
6. Start the Shading Correction by executing the command ShadingCalibration-
Start.
Notice
The execution of the shading correction can take 5 - 15 s depending on the
sensor size!
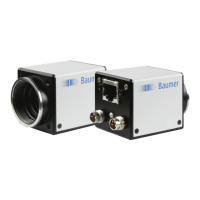
7. Now you will see a corrected image
without shadings in the corners.
If necessary, change the lighting situ-
ation and run the ShadingCalibration-
Start command again if not all shading
should be corrected.
Notice
To completely delete the correction data of a Shading Correction, a DeviceResetToDe-
liveryState must be executed.
see chapter „7.9.15 DeviceResetToDeliveryState“ on page 95